DIY: Transmission Rebuild (89pics!)
 01-14-2008, 04:03 PM
#1
:3
Thread Starter
Join Date: Aug 2005
Location: BFE
Posts: 7,713
Likes: 0
Received 0 Likes
on
0 Posts
This is for an S20 transmission for a D16Z6. Your specs may vary so check your manual. Some inspections were left out to keep it shorter. This is not intended to be a replacement for a manual. This is intended to show you how I did it and to give you an idea what you're in for. You are solely responsible for any damages or injuries as a result of any repairs you attempt.
Tape the splines of the input shaft to protect it. Then place the transmission shaft down on some blocks so the input shaft does not touch the floor

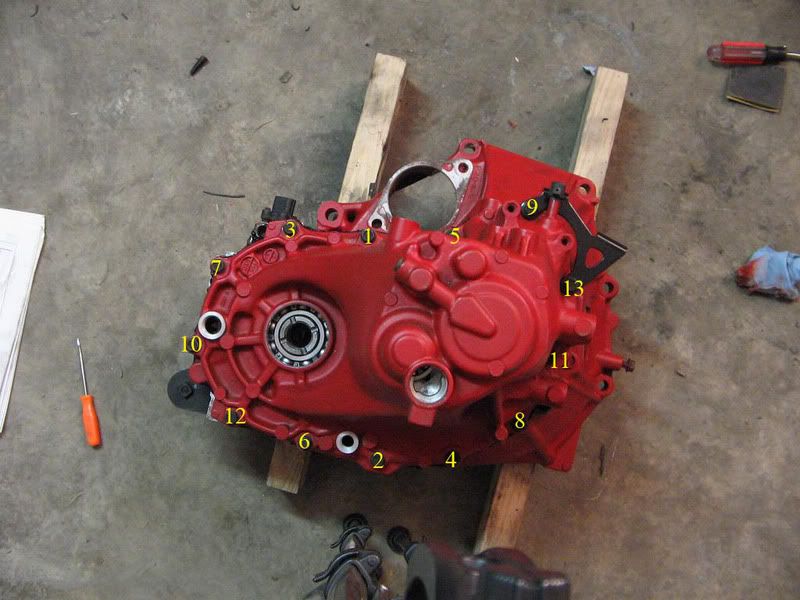
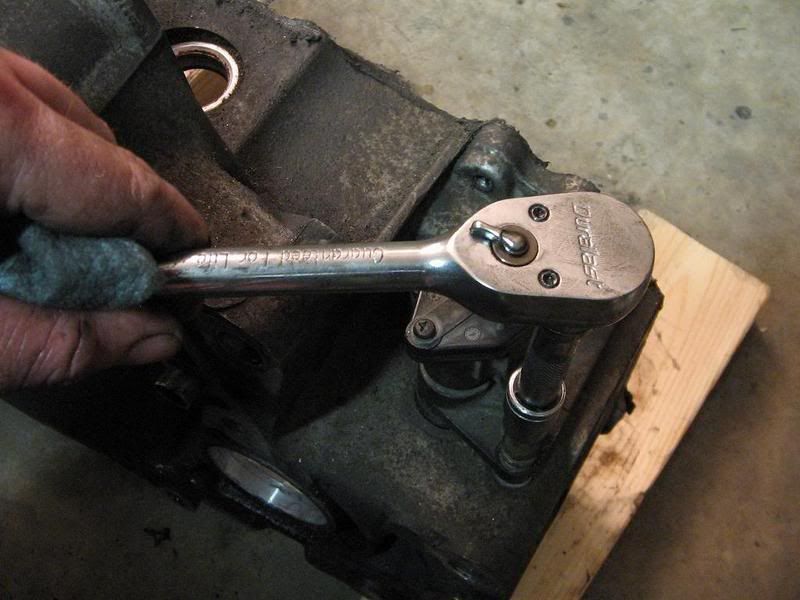
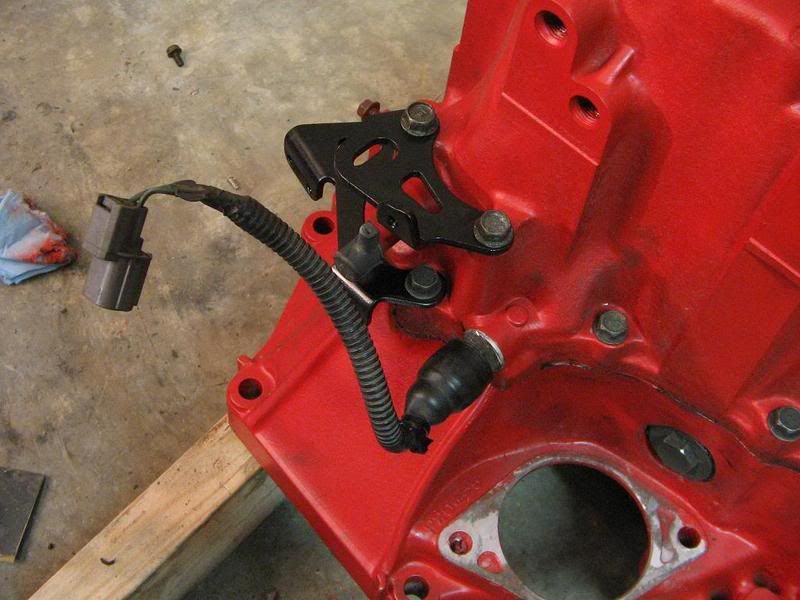
Using an 18mm wrench remove the backup light switch
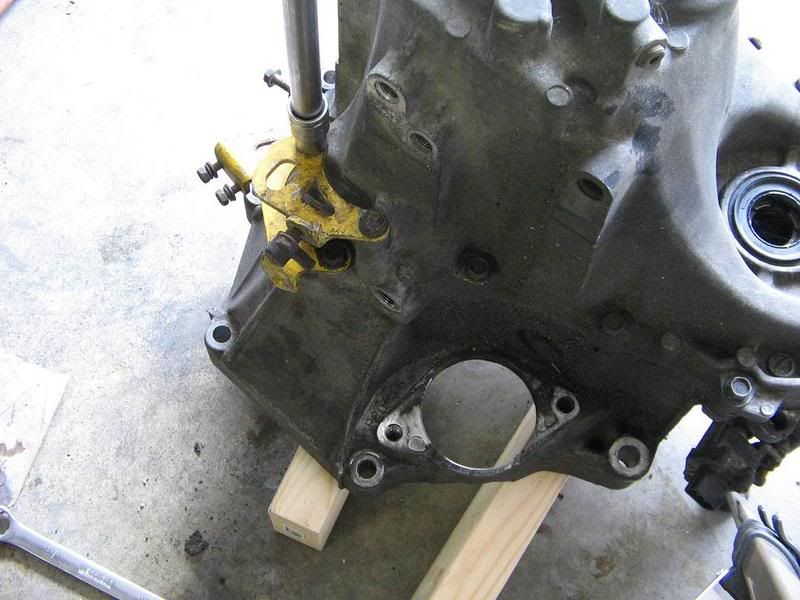
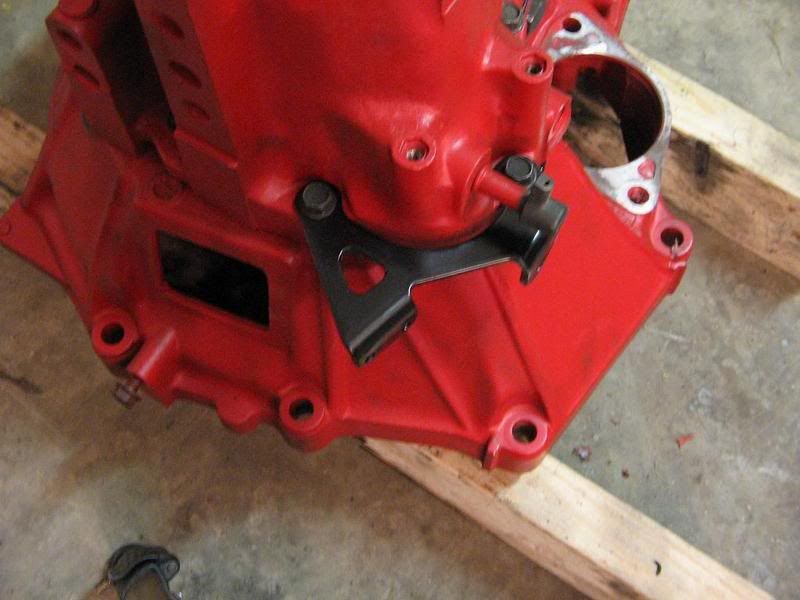
Use a 12mm socket to remove the transmission hanger
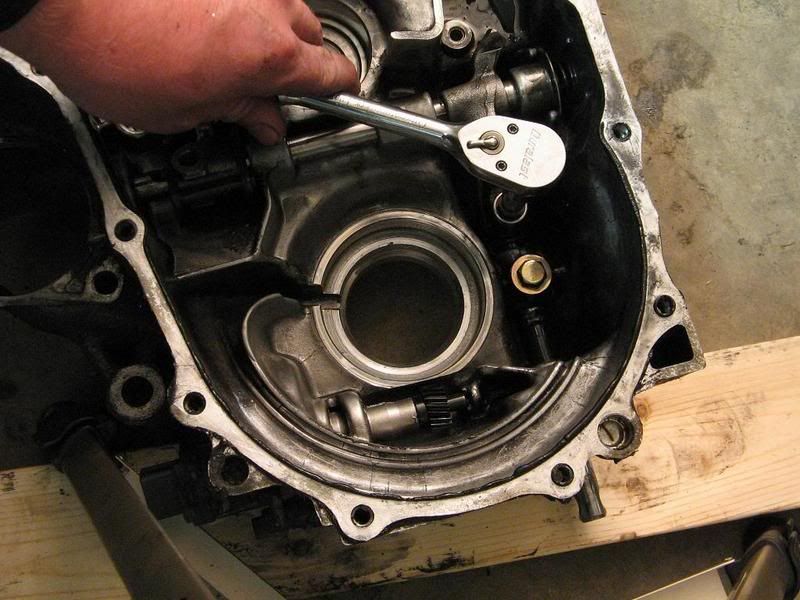
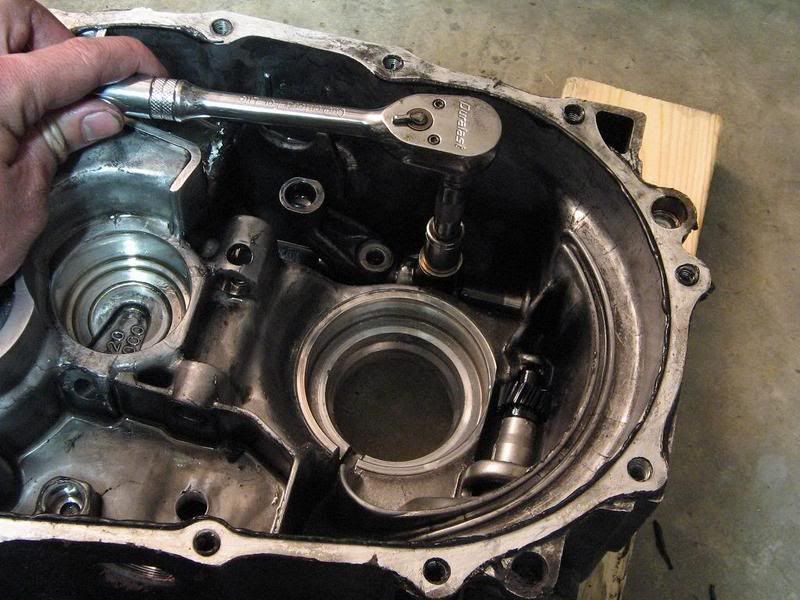
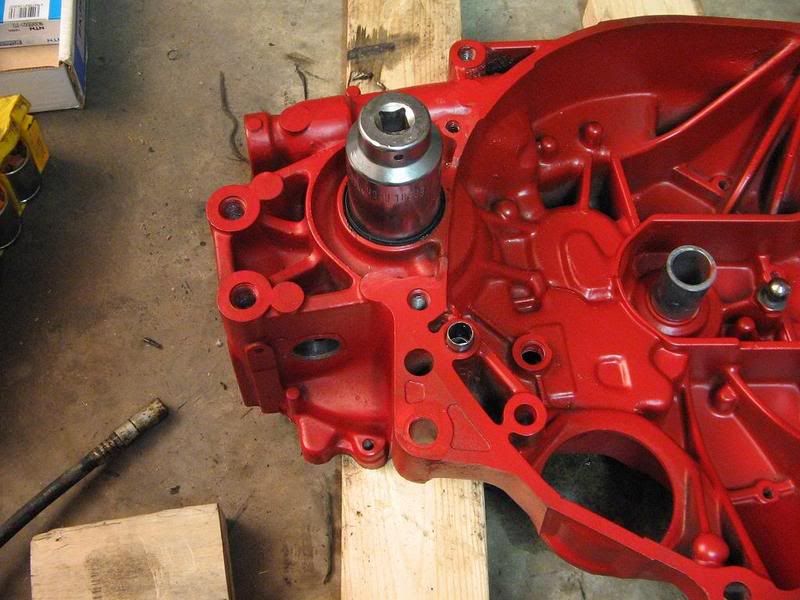
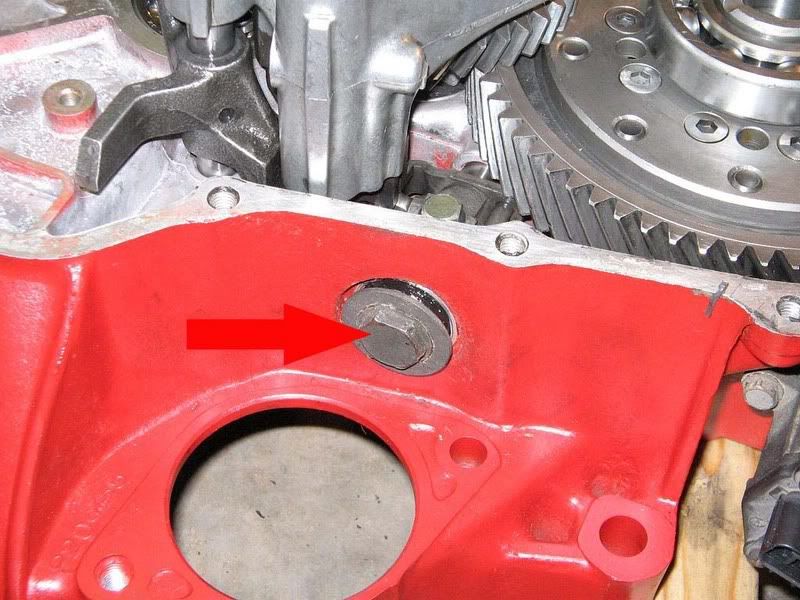
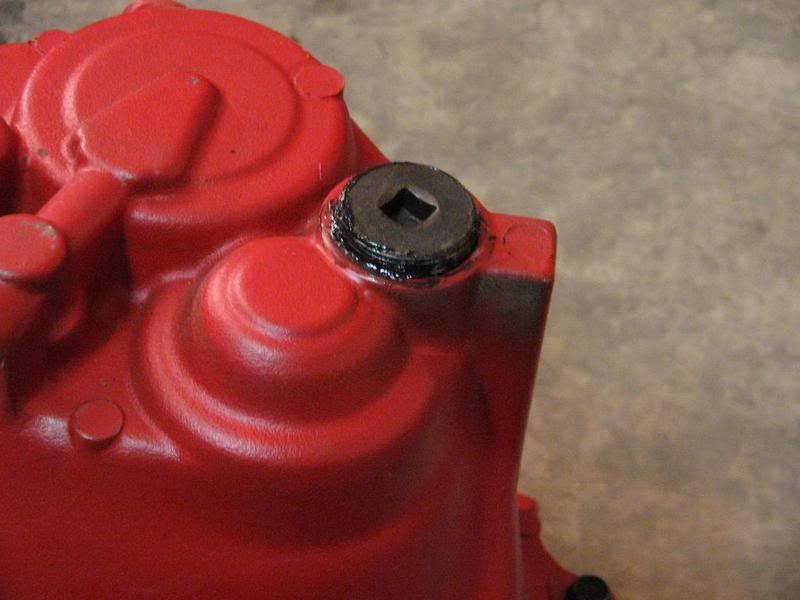
Use a 3/8 drive socket wrench to remove the sealing bolt.
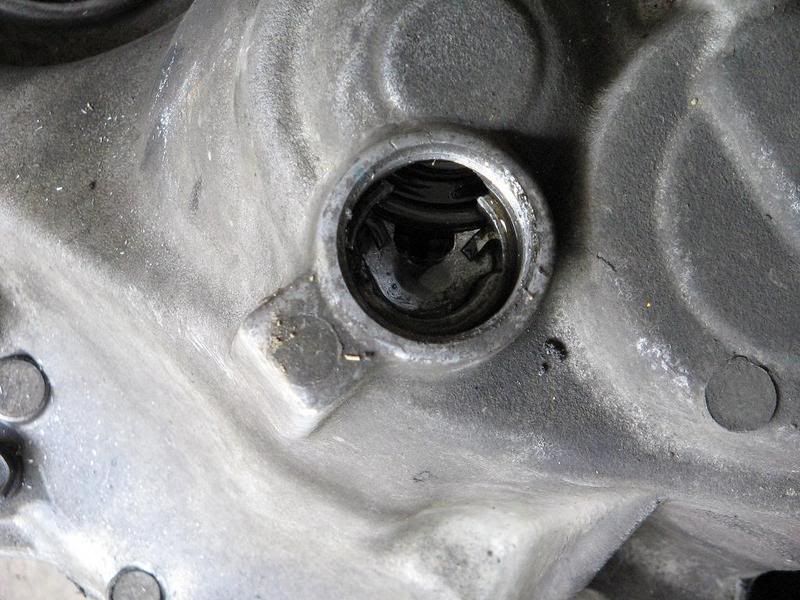
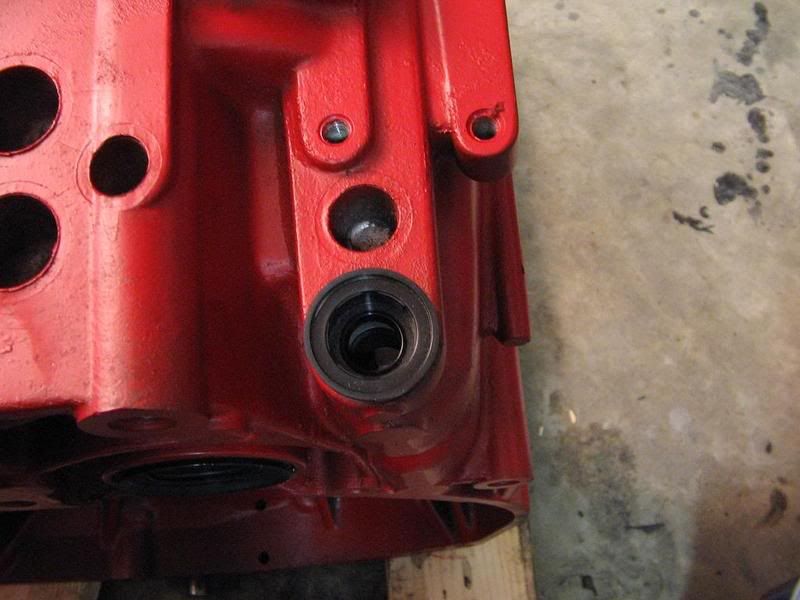
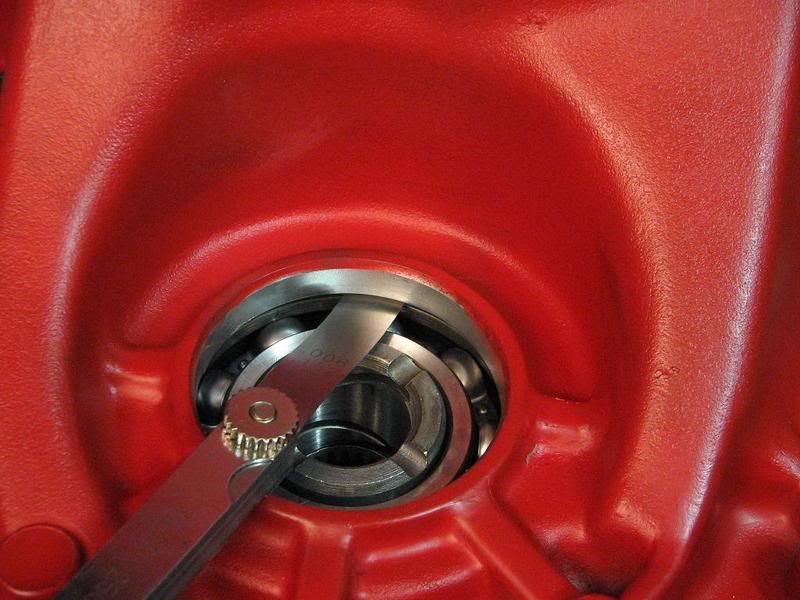
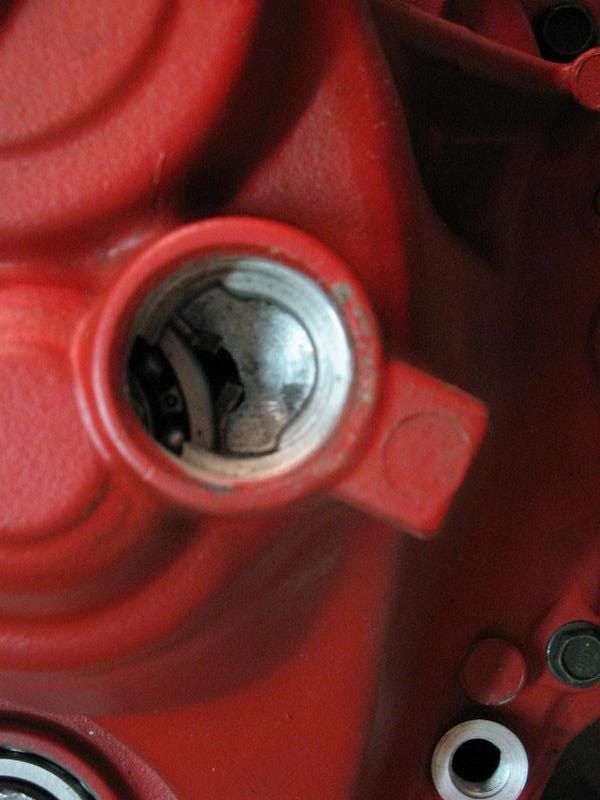
Seperate the snap ring so that it is out of the groove.
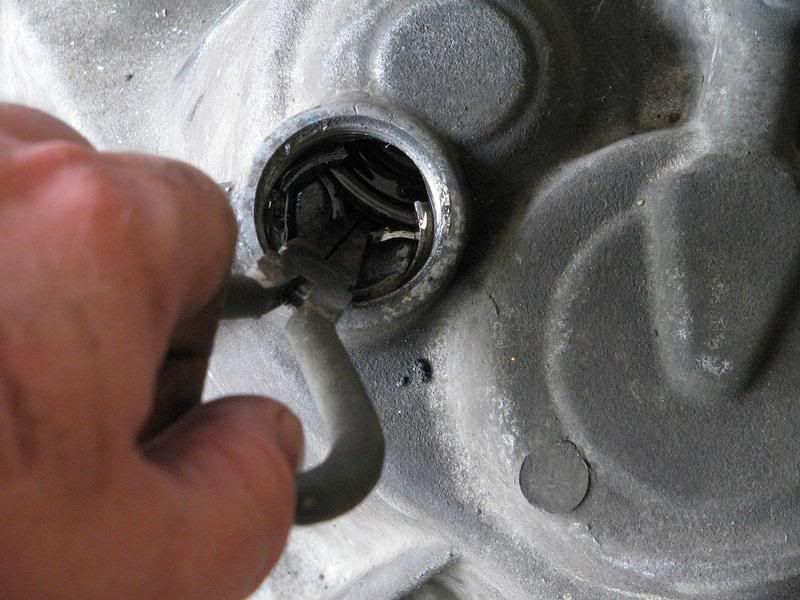
What it looks like seperated and out of the groove.
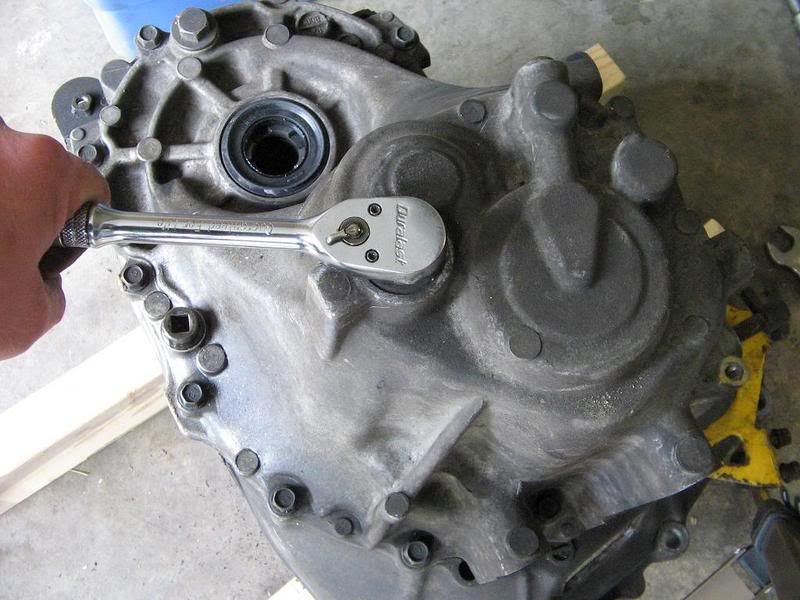
Remove all the transmission housing bolts with a 12mm socket.
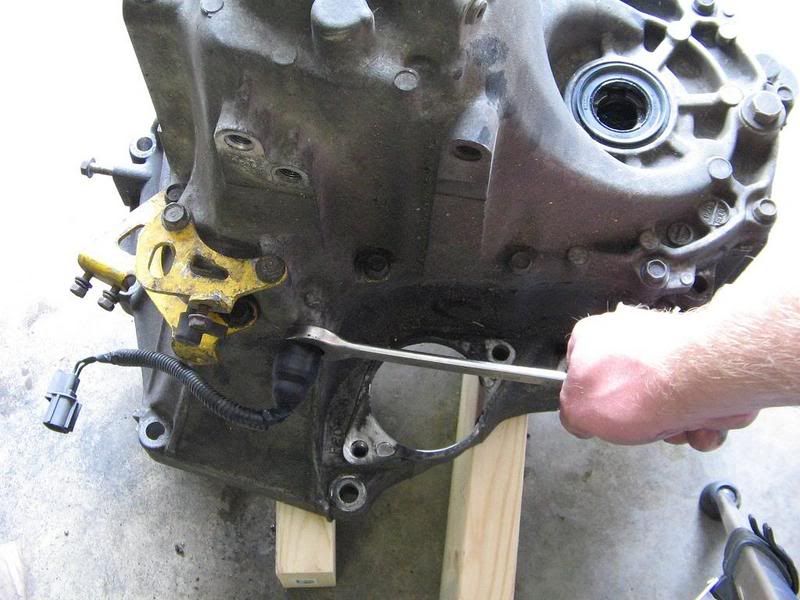
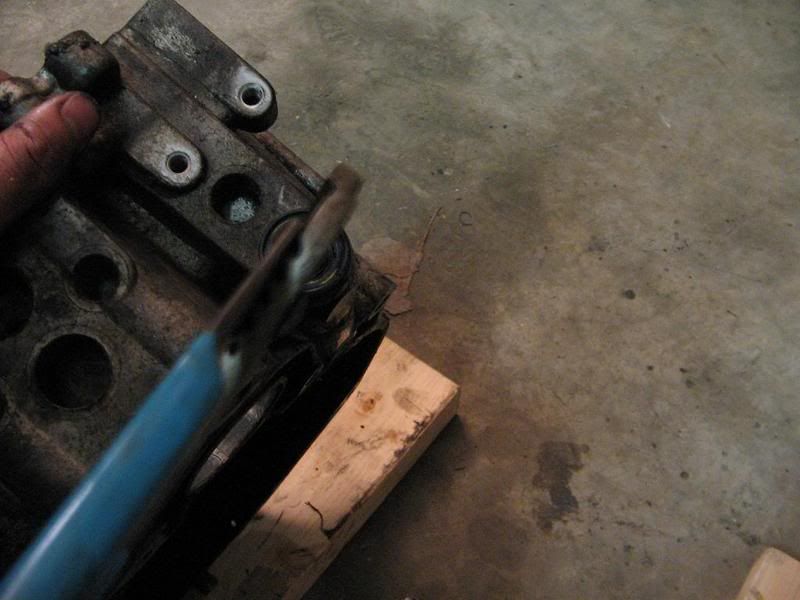
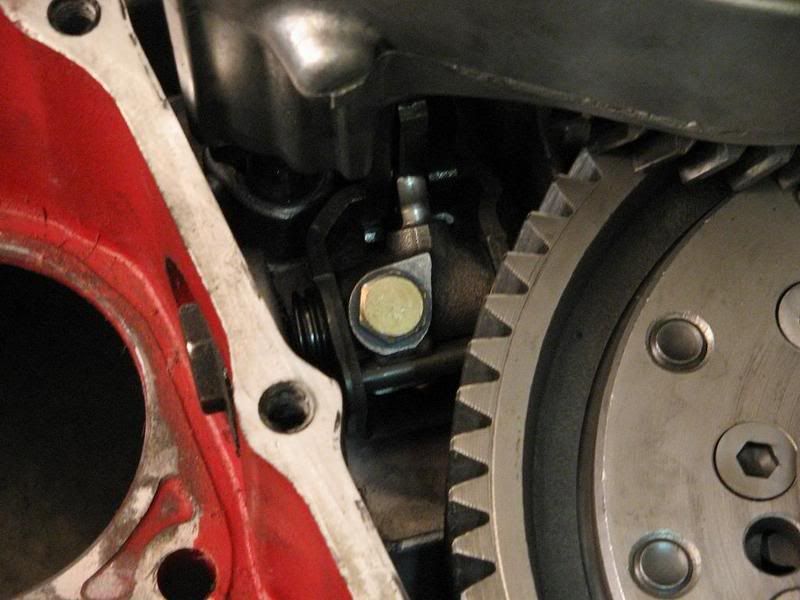
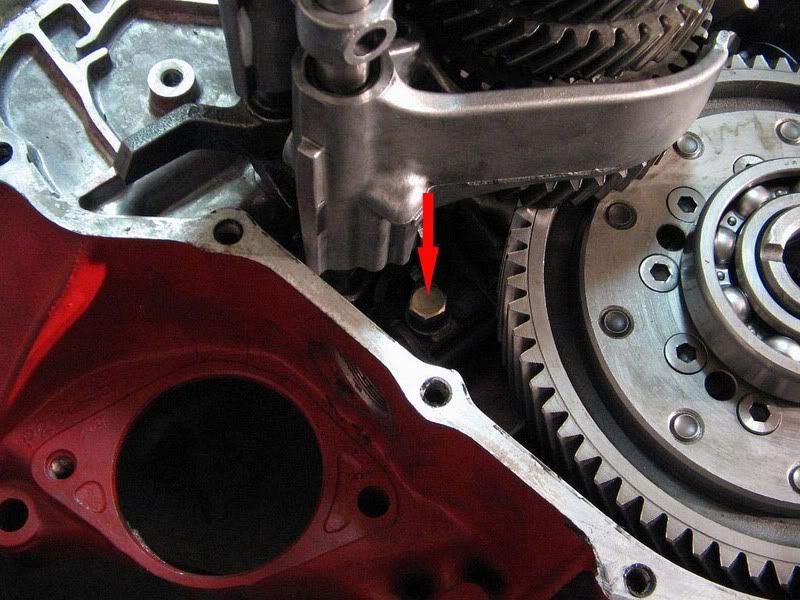
There are two places you can safely pry at to help seperate the housing. You only need to do this to break the seal. Don't try to pry it all the way apart and be careful not to damage the mating surfaces.
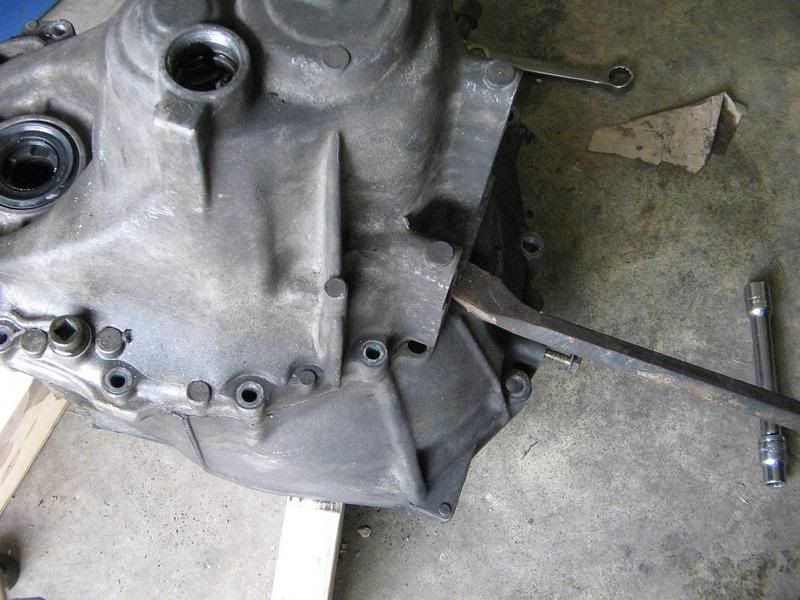
And here.
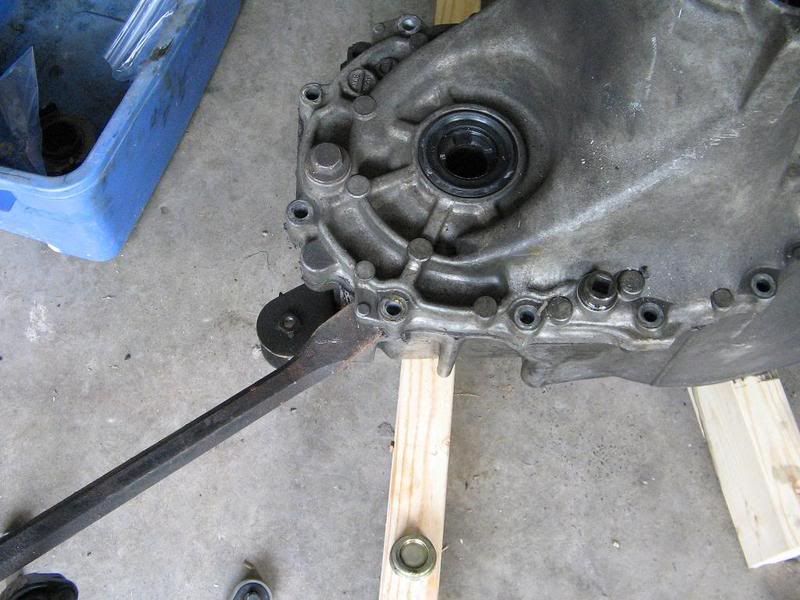
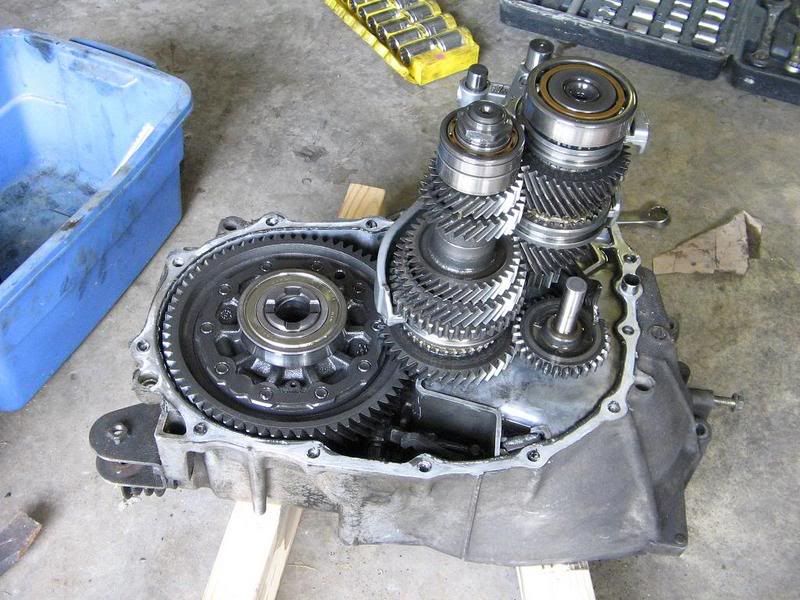
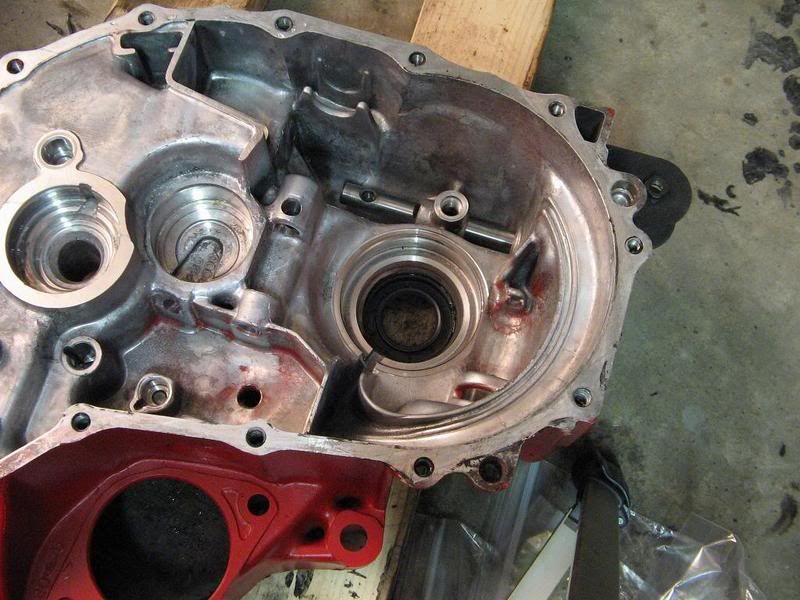
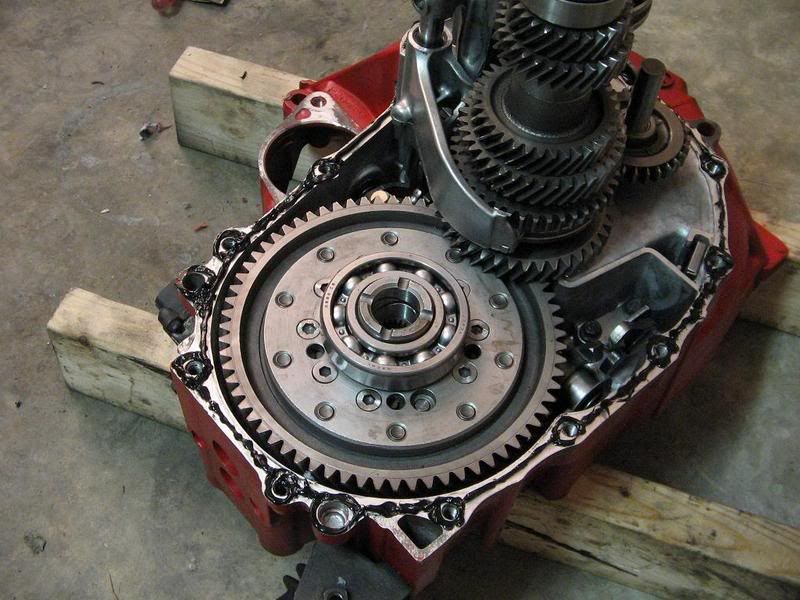
Now you can easily seperate the housing. If it feels like it's stuck check the snap ring to make sure it didn't slip back into it's groove.
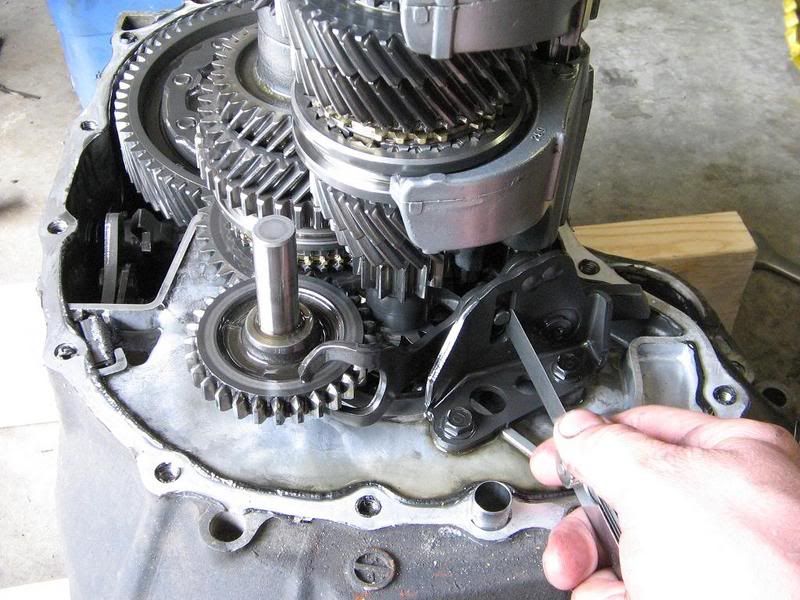
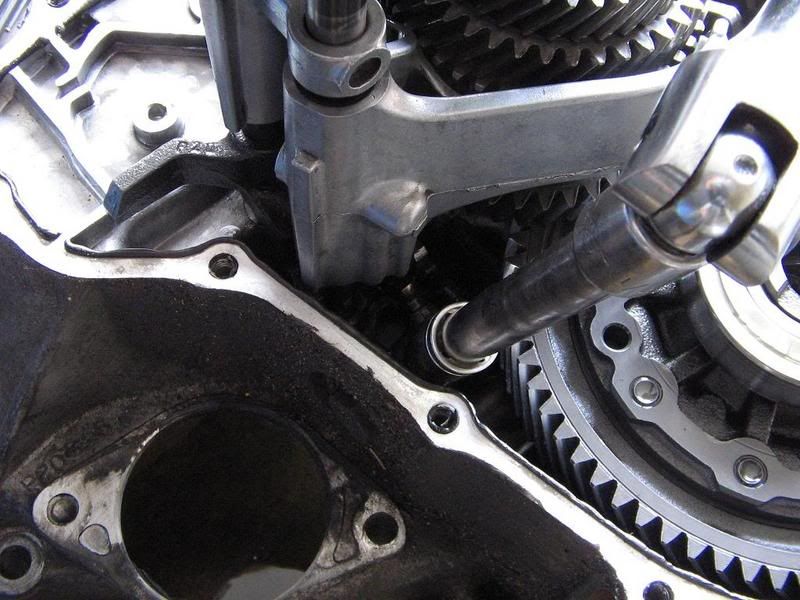
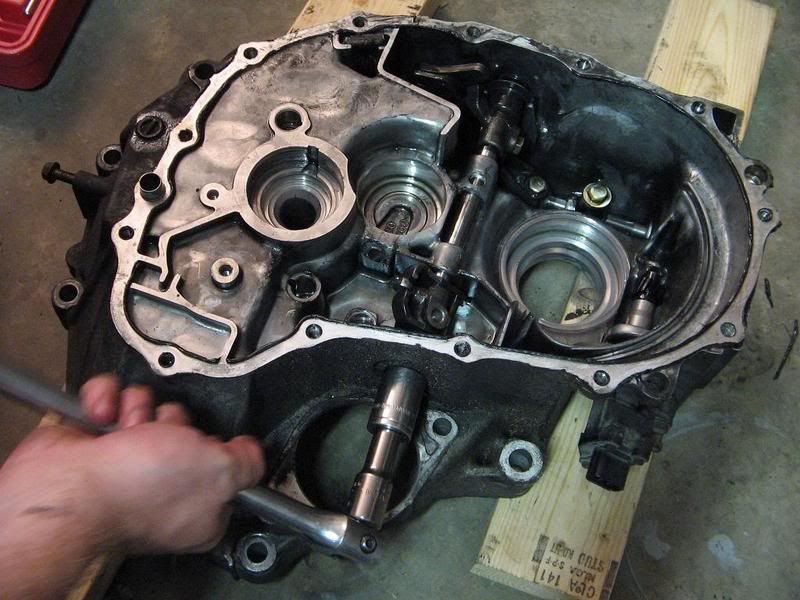
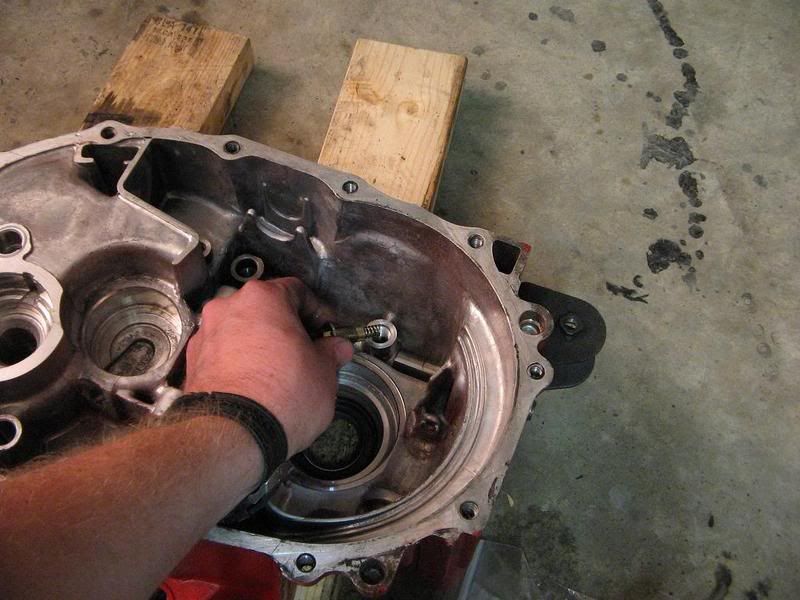
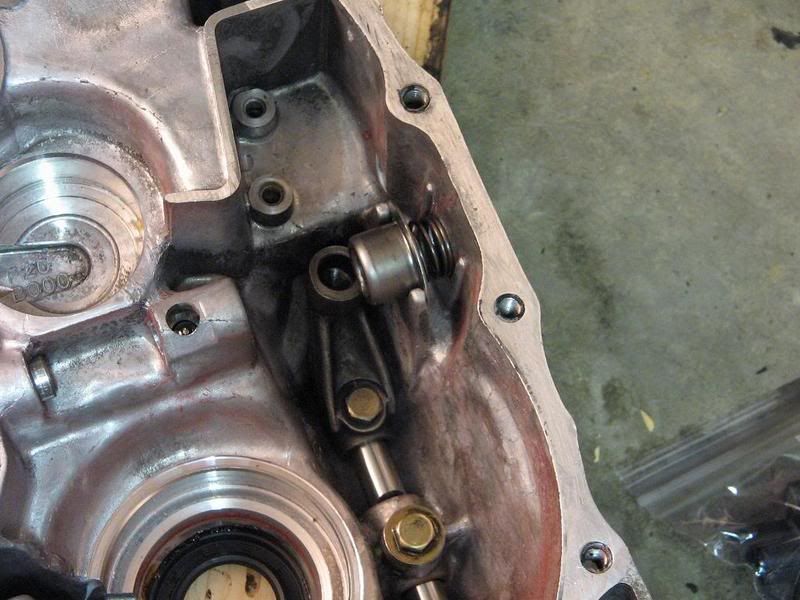
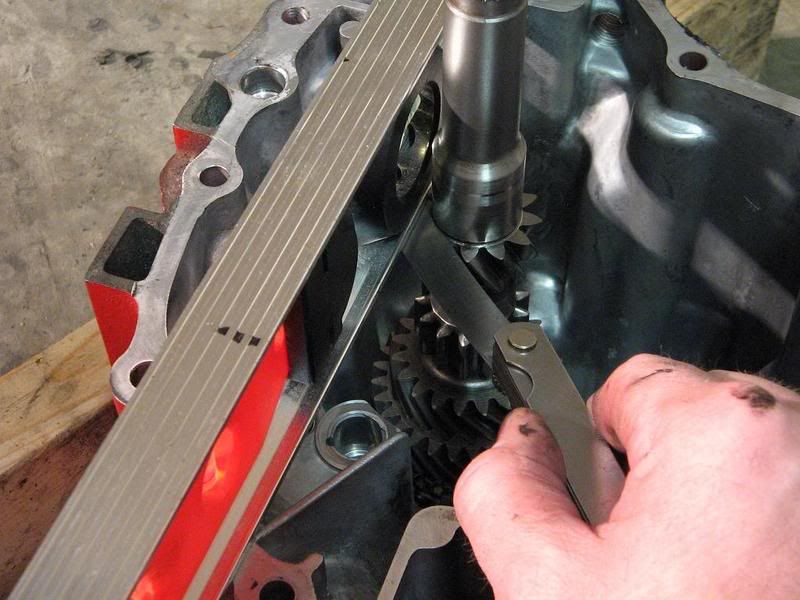
With feeler gauges check the reverse shift piece pin clearance (.002-.014 in) service limit (.020)
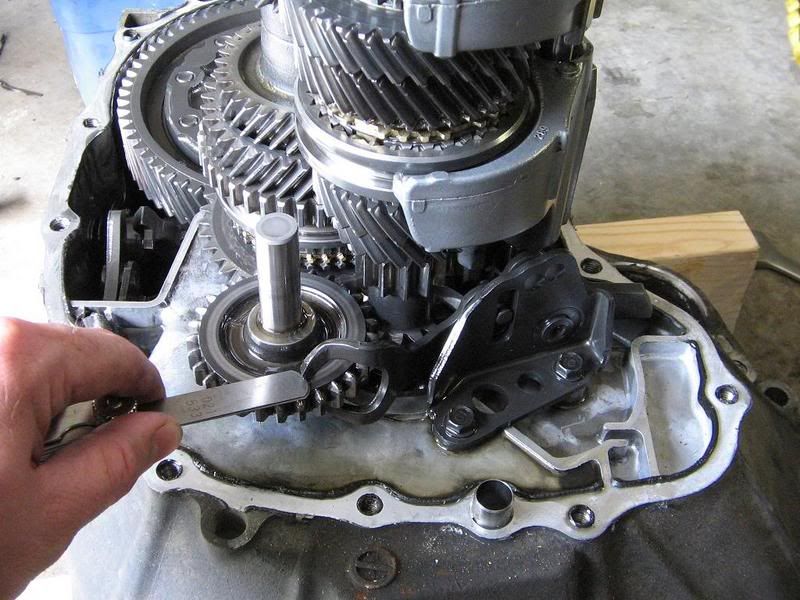
And the reverse shift fork. (.020-.043) SL(.071)
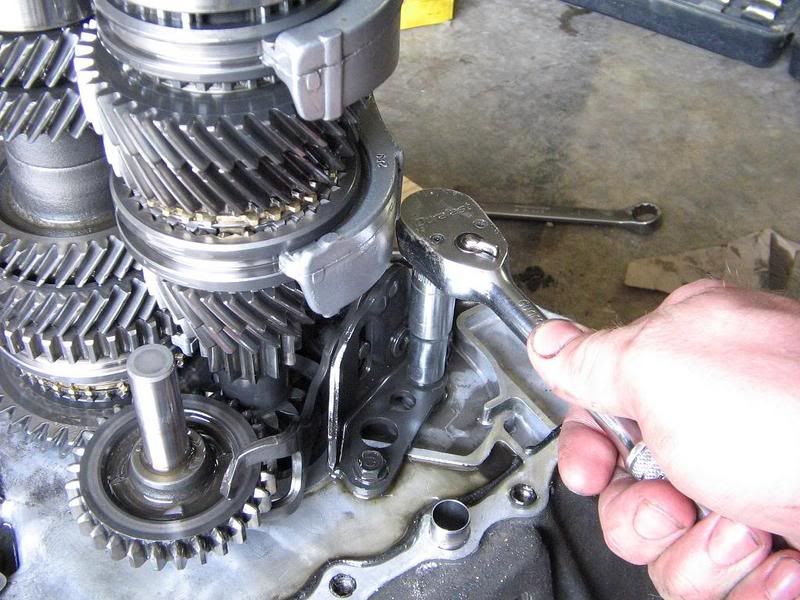
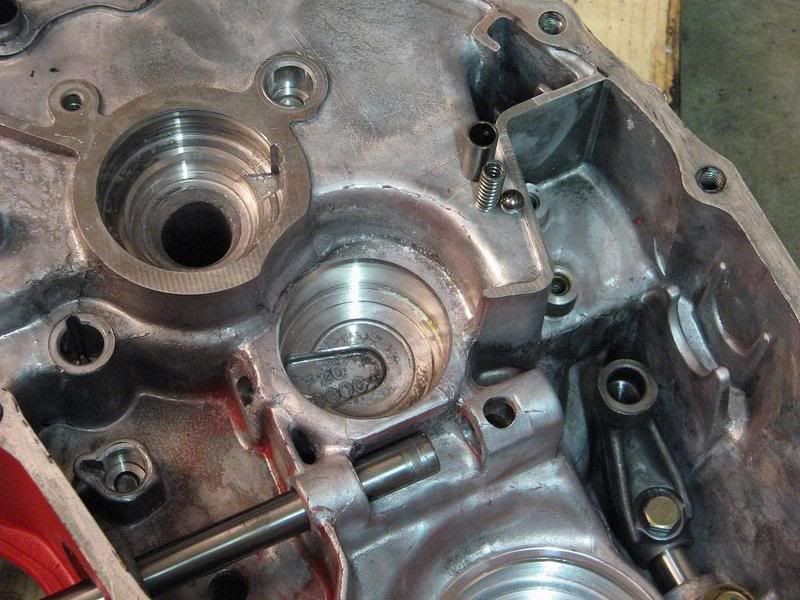
Using a 10mm socket remove the reverse shift fork.
You can now slide the pin and reverse gear out.
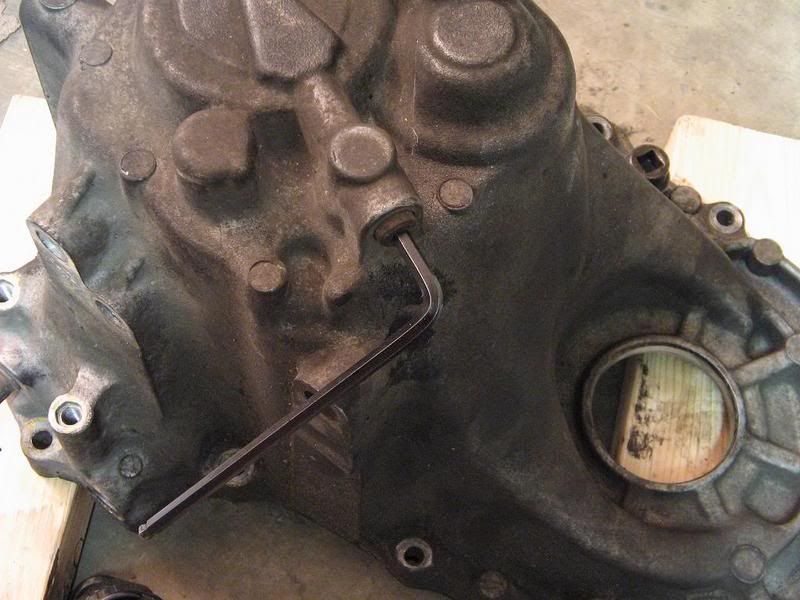
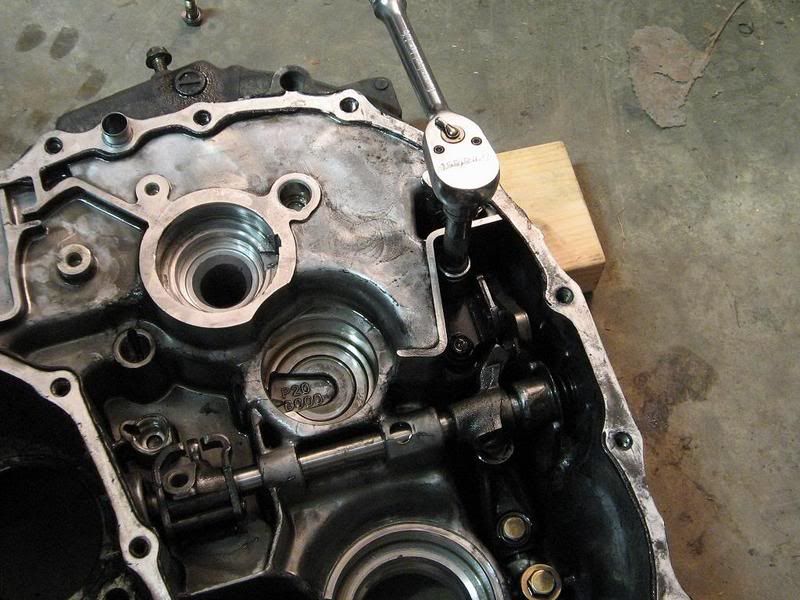
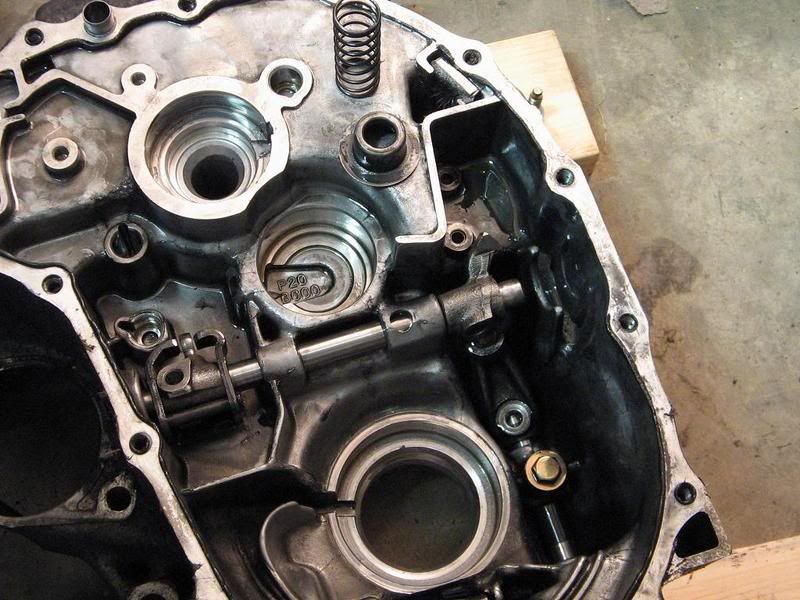
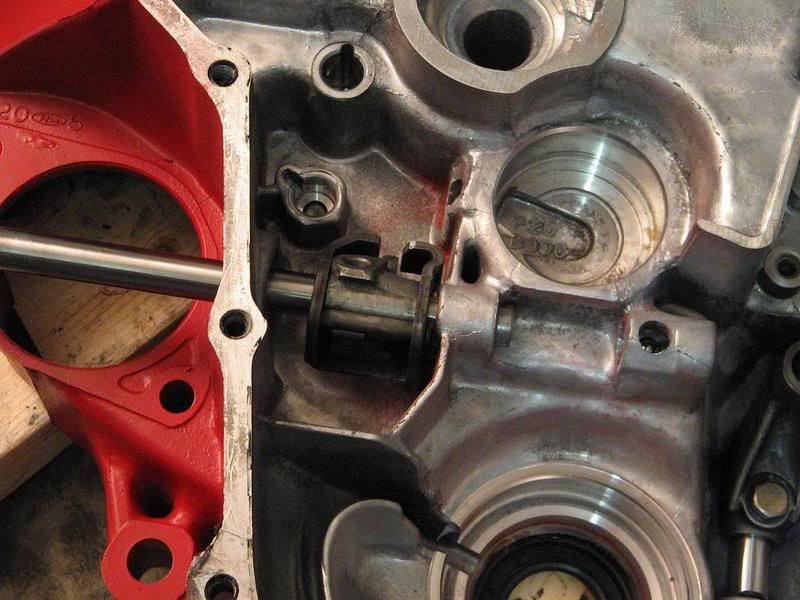
Now use a 6mm hex wrench to remove the interlock guide bolt.

After that remove the shift arm attaching bolt with a 12mm socket.
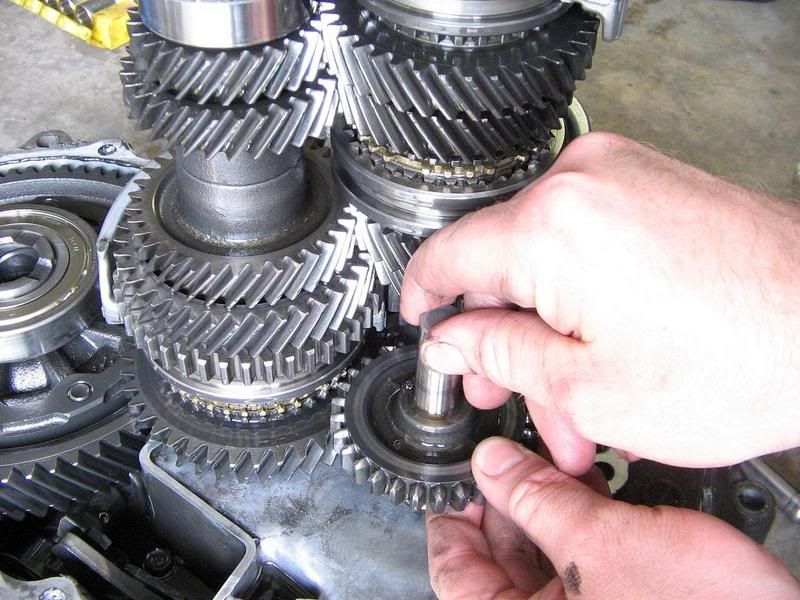
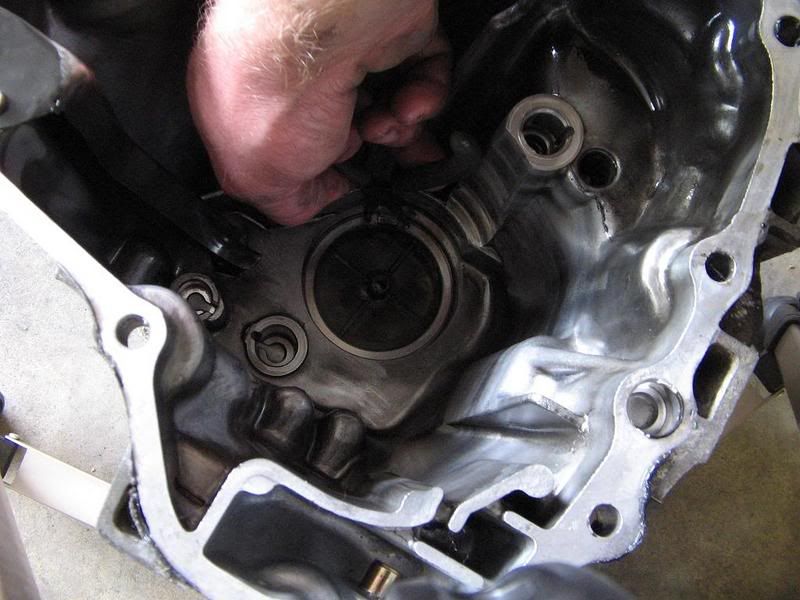
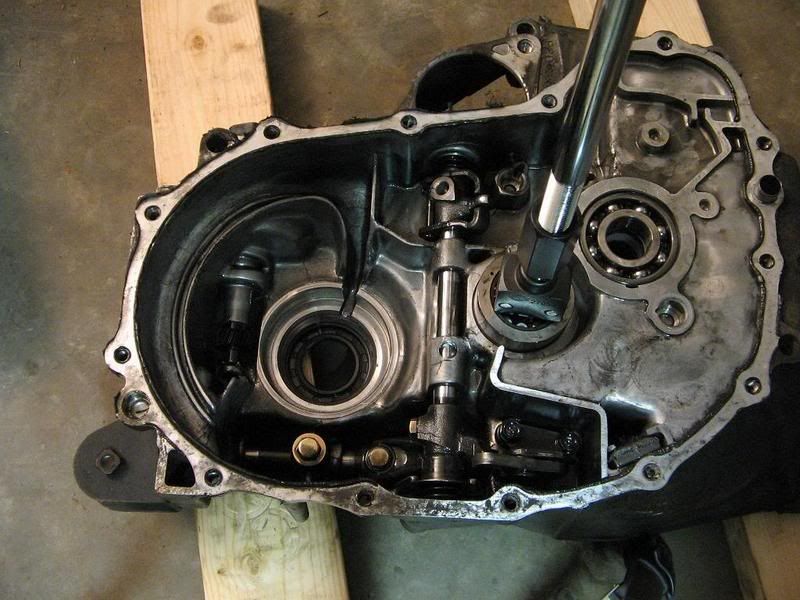
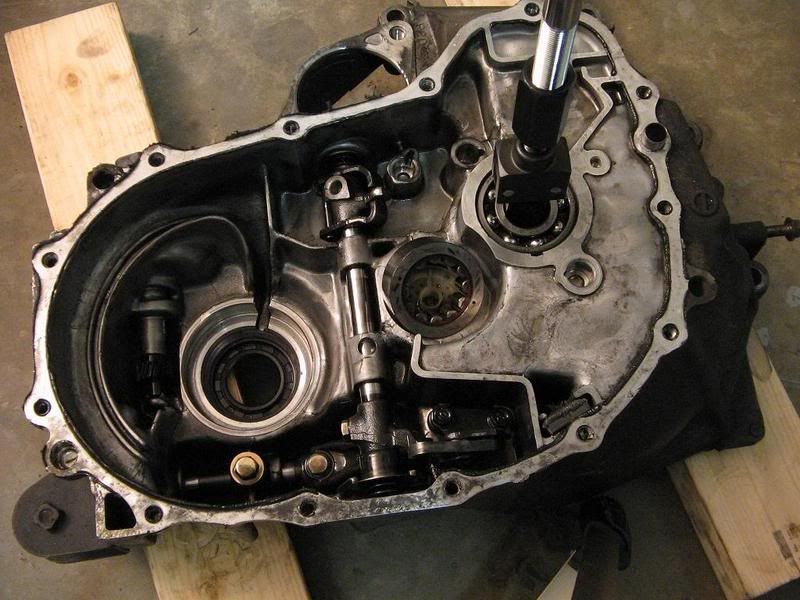
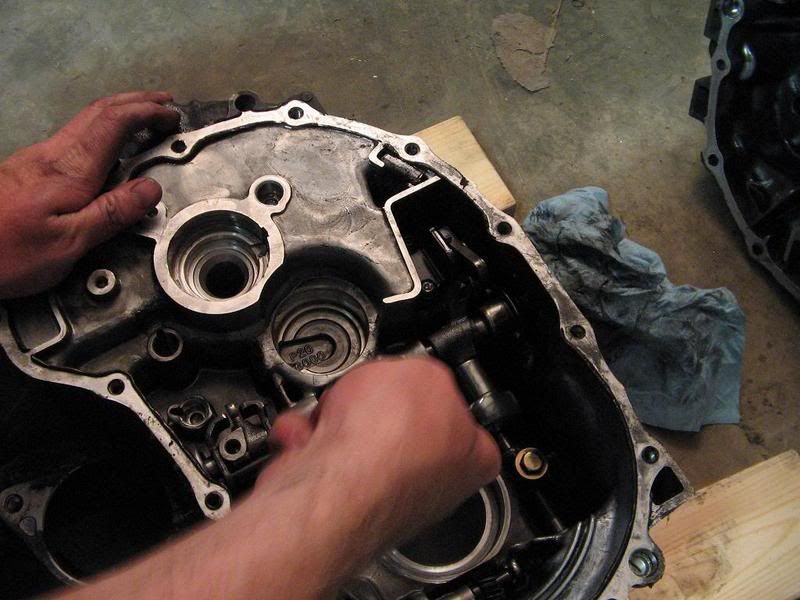
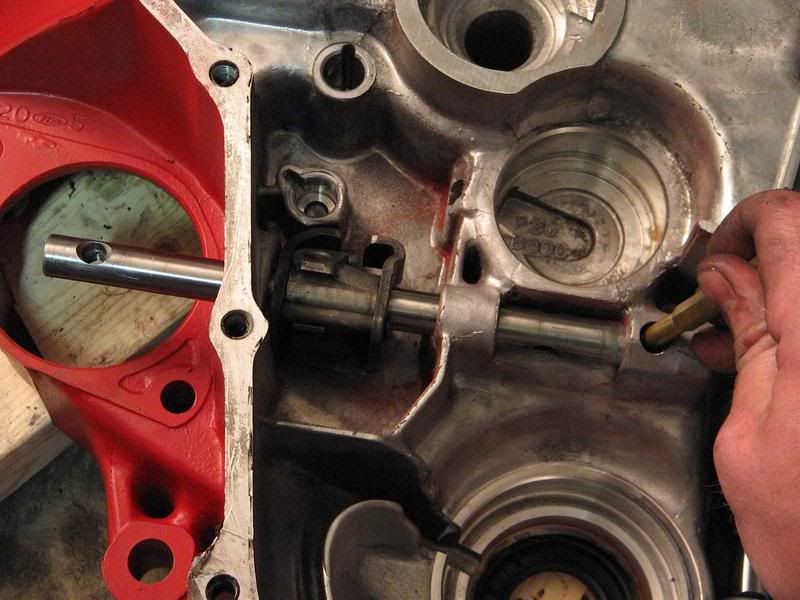
Using both hands remove the input and counter shafts from the housing. It will probably require some jiggling to get them free.
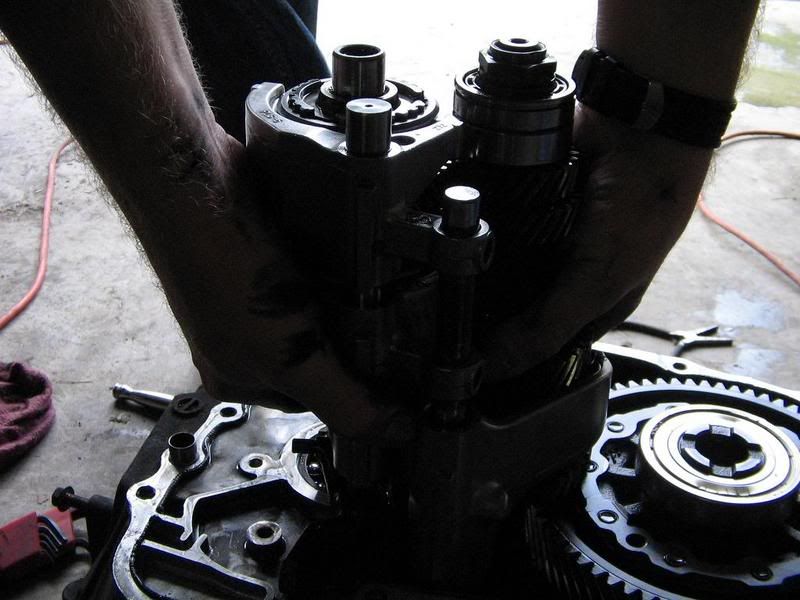
You will have a washer and spring washer on the input shaft. These should be discarded and replace with dealership part numbers You can now easily remove the differental.
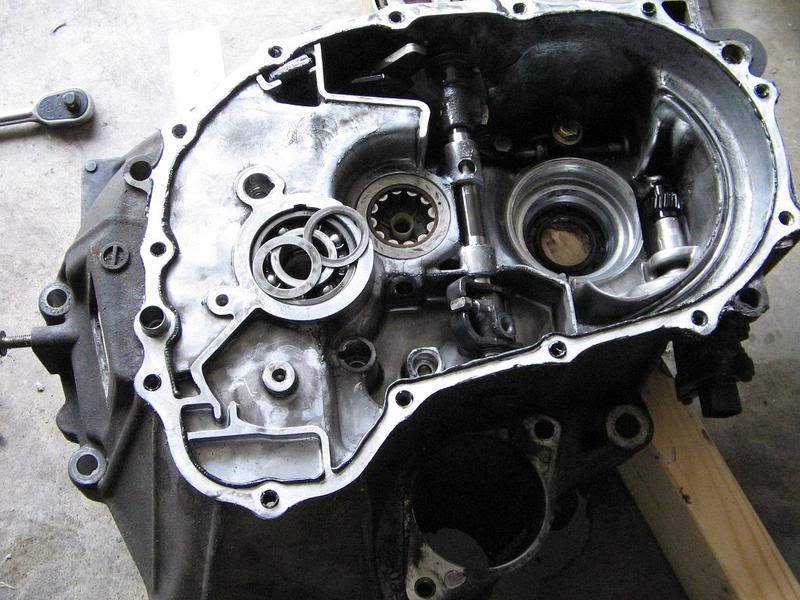
Use a 5mm hex wrench to remove the sealing bolt from the diff. side of the housing. This will allow you to remove the metal oil guide plate on the inside.
You also need to remove the thrust shims for the input shaft and differential. There is a plastic oil guide plate under the shim for the main shaft, remove and clean it.
Now use the bearing puller and slide hammer to remove the counter shaft bearing.
And the input shaft bearing. After which you can remove the counter shaft oil guide plate and clean it. Remove the input shaft and axle shaft seals and discard them.
Use a 17mm socket to remove the shift arm plug bolt. There is a spring under it, be sure not to lose it.
With a 10mm socket remove the reverse lock cam bolts.
Now remove the shift arm bolt with a 12mm socket.
Remove the reverse select retainer and spring. You can now slide the shift arm shaft out. Be careful not to damage it. there is also a steel ball and small spring in there, be sure not to lose them.
You can now use that 12mm socket to remove the shift rod bolts.
Be careful there is another ball and spring under this one.
You can now remove the rubber boot and slide the shift rod out. Then remove and discard the shift rod seal.
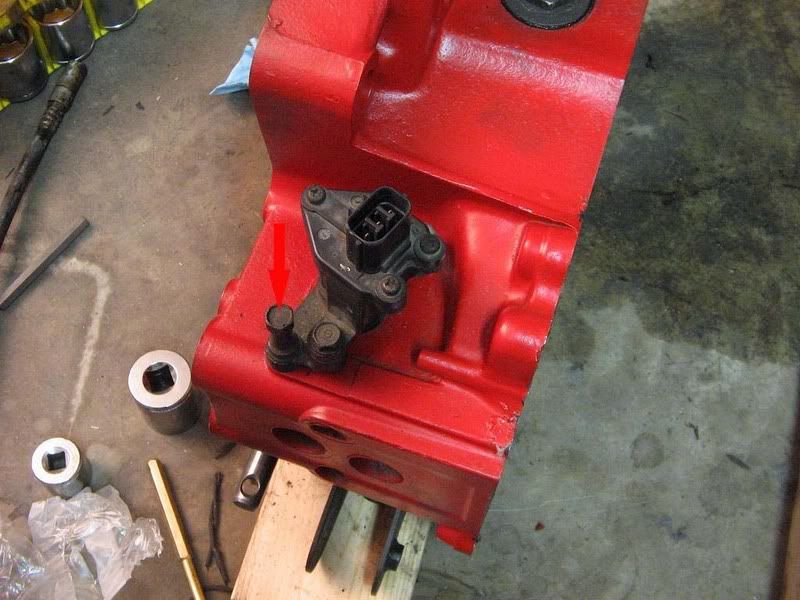
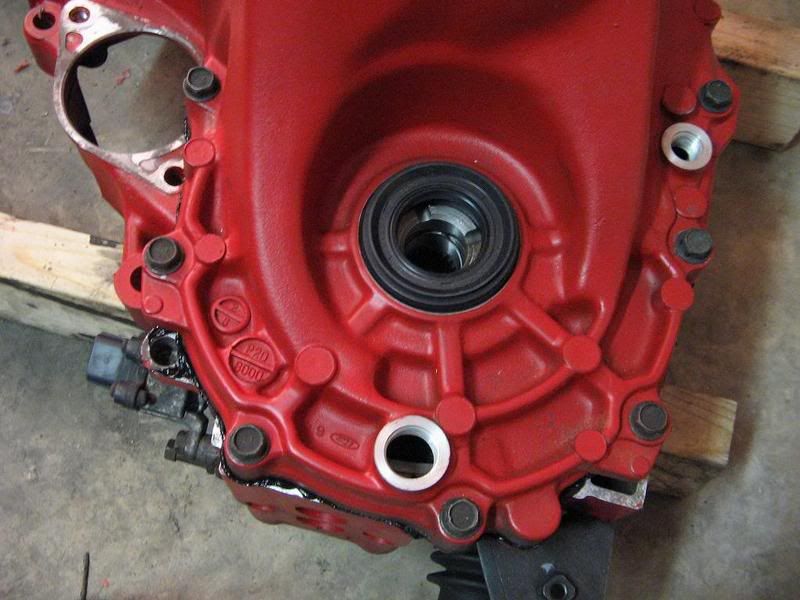
You can optionally remove the single bolt holding the speed sensor in with a 10mm socket. It seals with an o-ring so just give it a little twist and it will pop out.
You can now clean your transmission housing with brake cleaner. Don't forget to clean the magnet.
Tape the splines of the input shaft to protect it. Then place the transmission shaft down on some blocks so the input shaft does not touch the floor
Using an 18mm wrench remove the backup light switch
Use a 12mm socket to remove the transmission hanger
Use a 3/8 drive socket wrench to remove the sealing bolt.
Seperate the snap ring so that it is out of the groove.
What it looks like seperated and out of the groove.
Remove all the transmission housing bolts with a 12mm socket.
There are two places you can safely pry at to help seperate the housing. You only need to do this to break the seal. Don't try to pry it all the way apart and be careful not to damage the mating surfaces.
And here.
Now you can easily seperate the housing. If it feels like it's stuck check the snap ring to make sure it didn't slip back into it's groove.
With feeler gauges check the reverse shift piece pin clearance (.002-.014 in) service limit (.020)
And the reverse shift fork. (.020-.043) SL(.071)
Using a 10mm socket remove the reverse shift fork.
You can now slide the pin and reverse gear out.
Now use a 6mm hex wrench to remove the interlock guide bolt.
After that remove the shift arm attaching bolt with a 12mm socket.
Using both hands remove the input and counter shafts from the housing. It will probably require some jiggling to get them free.
You will have a washer and spring washer on the input shaft. These should be discarded and replace with dealership part numbers You can now easily remove the differental.
Use a 5mm hex wrench to remove the sealing bolt from the diff. side of the housing. This will allow you to remove the metal oil guide plate on the inside.
You also need to remove the thrust shims for the input shaft and differential. There is a plastic oil guide plate under the shim for the main shaft, remove and clean it.
Now use the bearing puller and slide hammer to remove the counter shaft bearing.
And the input shaft bearing. After which you can remove the counter shaft oil guide plate and clean it. Remove the input shaft and axle shaft seals and discard them.
Use a 17mm socket to remove the shift arm plug bolt. There is a spring under it, be sure not to lose it.
With a 10mm socket remove the reverse lock cam bolts.
Now remove the shift arm bolt with a 12mm socket.
Remove the reverse select retainer and spring. You can now slide the shift arm shaft out. Be careful not to damage it. there is also a steel ball and small spring in there, be sure not to lose them.
You can now use that 12mm socket to remove the shift rod bolts.
Be careful there is another ball and spring under this one.
You can now remove the rubber boot and slide the shift rod out. Then remove and discard the shift rod seal.
You can optionally remove the single bolt holding the speed sensor in with a 10mm socket. It seals with an o-ring so just give it a little twist and it will pop out.
You can now clean your transmission housing with brake cleaner. Don't forget to clean the magnet.
 01-22-2008, 02:42 PM
#2
:3
Thread Starter
Join Date: Aug 2005
Location: BFE
Posts: 7,713
Likes: 0
Received 0 Likes
on
0 Posts
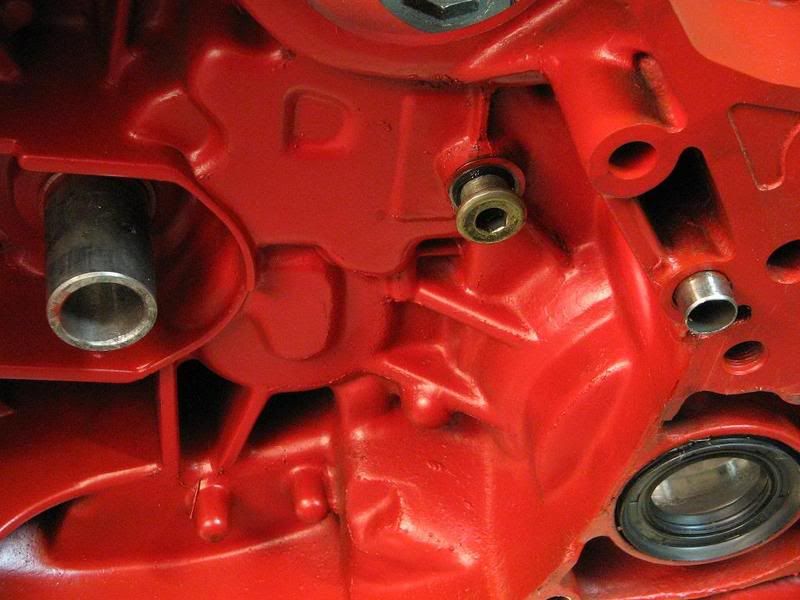
After you've cleaned everything you can start the reassymbly by replacing the drivers side axle seal.
Next replace the shift rod seal
Then drop the shift arm back in before sliding the shift rod into place.
Drop in the ball then spring and replace the bolt. The shift arm bolt gets 23lb-ft and the shift rod bolt gets 16lb-ft of torque.
Put the spring and retainer back in.
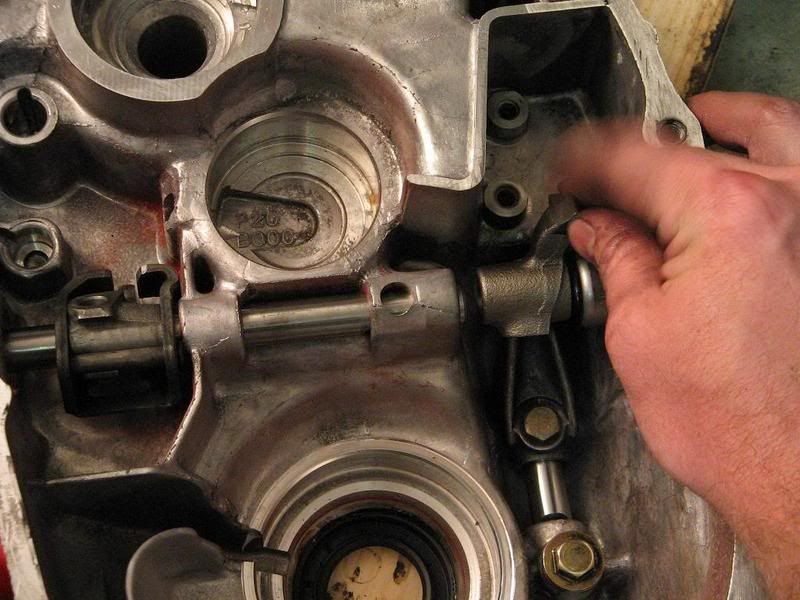
Then start sliding the shift arm shaft back in through the interlock.
Drop the sleave, spring and ball back in that order.
Use something to hold the ball down until you can slide the rod over it.
Hold the last shift arm in place until you slide the rod all the way in.
Torque that bolt to 23lb-ft as well.
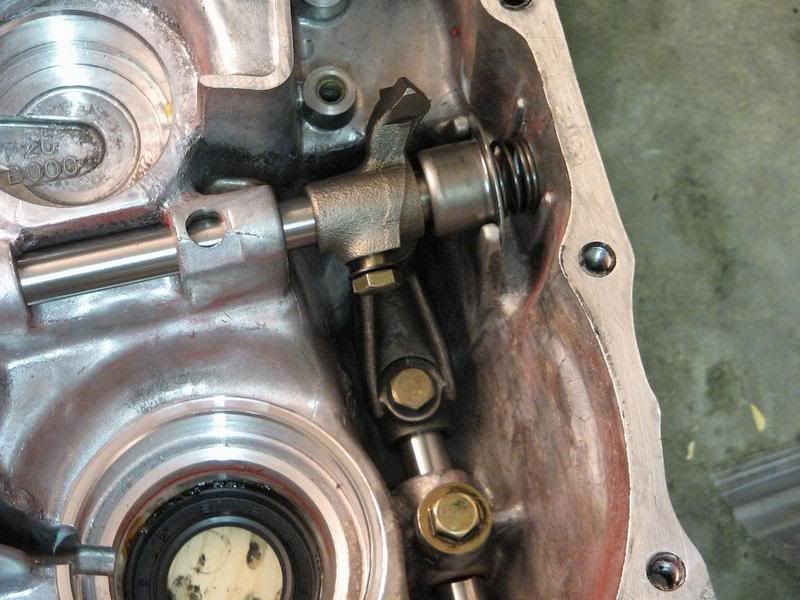
Bolt the reverse lock cam back in with 11lb-ft.

Push the input shaft oil seal back in.
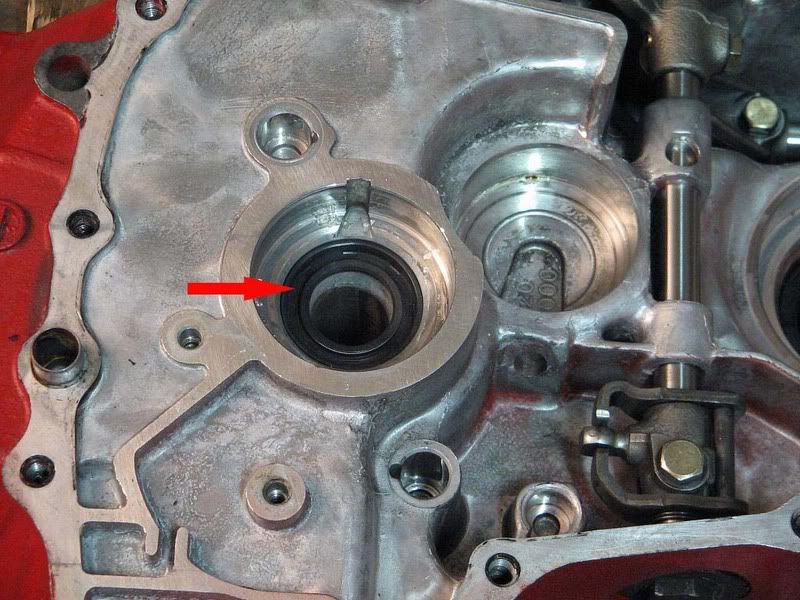
Tap the input shaft bearing in, make sure you use a drift that only contacts the outer race. A large socket can be handy for this. Then place the plastic oil guide for the counter shaft back.
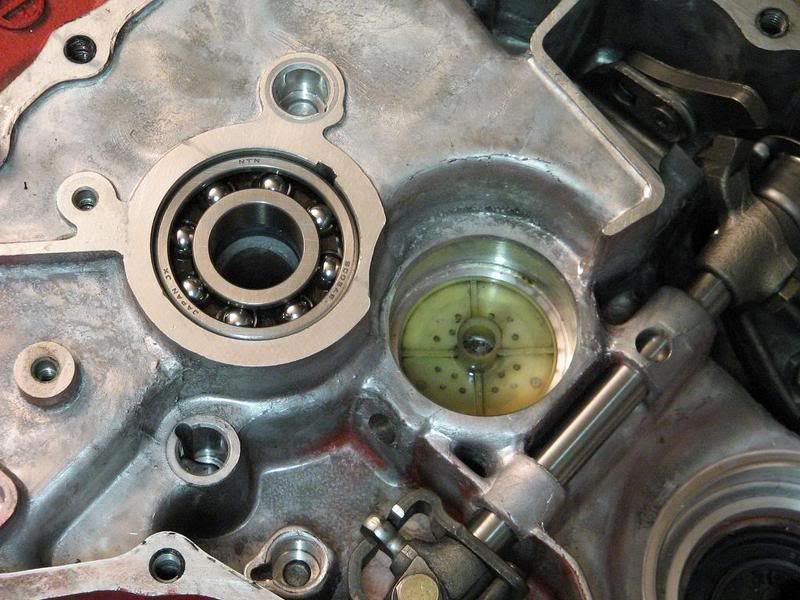
Tap the counter shaft bearing back in.
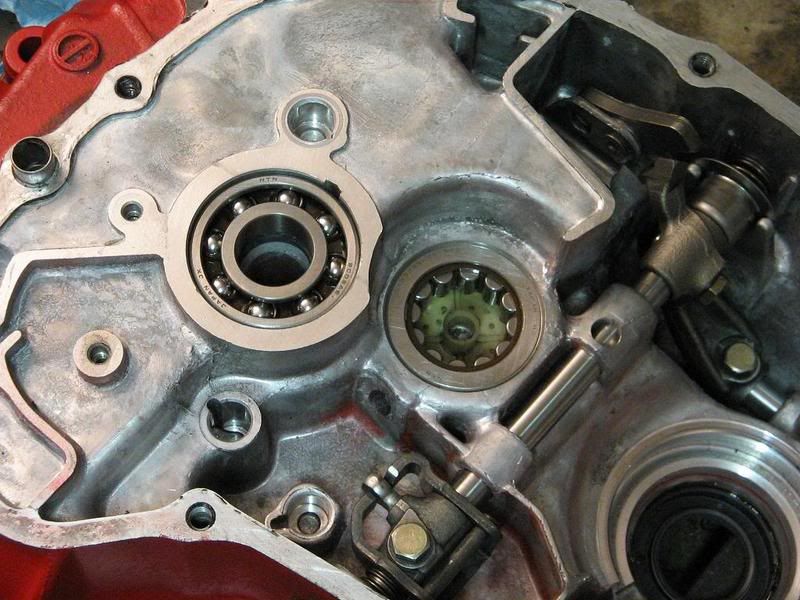
Now you can put the speed sensor back in.
You can also put the oil guide plate back in the other half of the housing.
Don't forget to use some RTV on the retaining bolt.
Next replace the shift rod seal
Then drop the shift arm back in before sliding the shift rod into place.
Drop in the ball then spring and replace the bolt. The shift arm bolt gets 23lb-ft and the shift rod bolt gets 16lb-ft of torque.
Put the spring and retainer back in.
Then start sliding the shift arm shaft back in through the interlock.
Drop the sleave, spring and ball back in that order.
Use something to hold the ball down until you can slide the rod over it.
Hold the last shift arm in place until you slide the rod all the way in.
Torque that bolt to 23lb-ft as well.
Bolt the reverse lock cam back in with 11lb-ft.
Push the input shaft oil seal back in.
Tap the input shaft bearing in, make sure you use a drift that only contacts the outer race. A large socket can be handy for this. Then place the plastic oil guide for the counter shaft back.
Tap the counter shaft bearing back in.
Now you can put the speed sensor back in.
You can also put the oil guide plate back in the other half of the housing.
Don't forget to use some RTV on the retaining bolt.
01-22-2008, 02:43 PM
#3
:3
Thread Starter
Join Date: Aug 2005
Location: BFE
Posts: 7,713
Likes: 0
Received 0 Likes
on
0 Posts
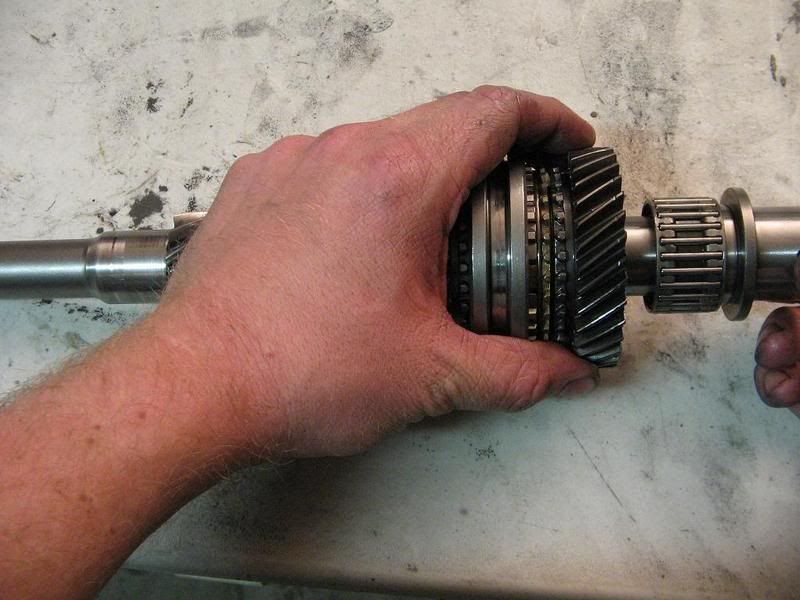
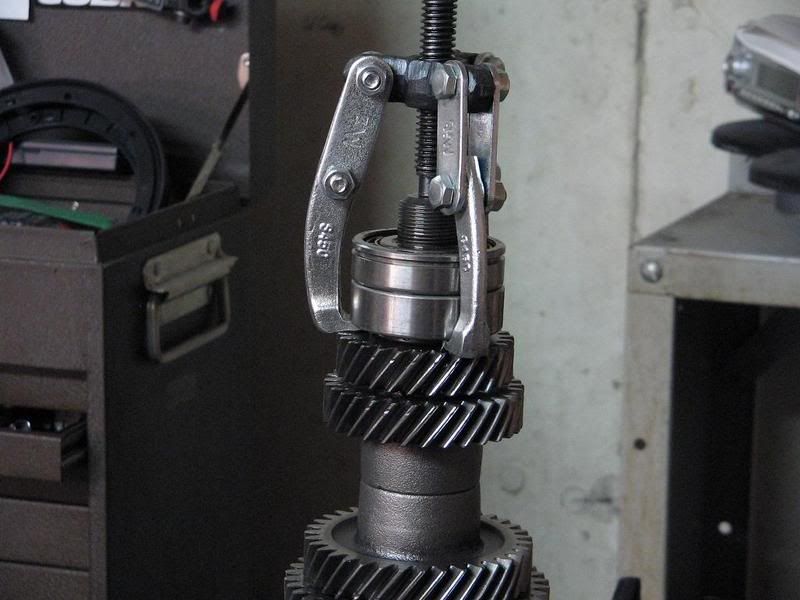
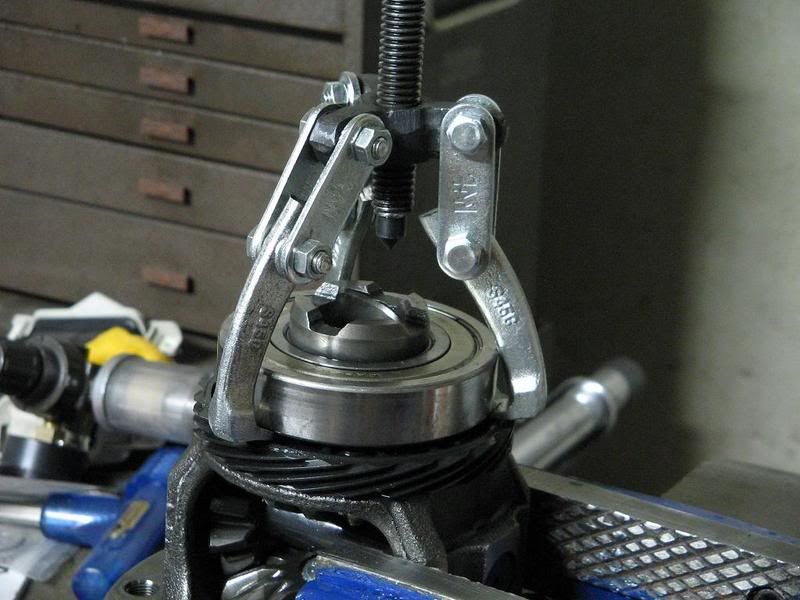
Use a bearing puller similar to the one pictured to remove the main shaft bearing.
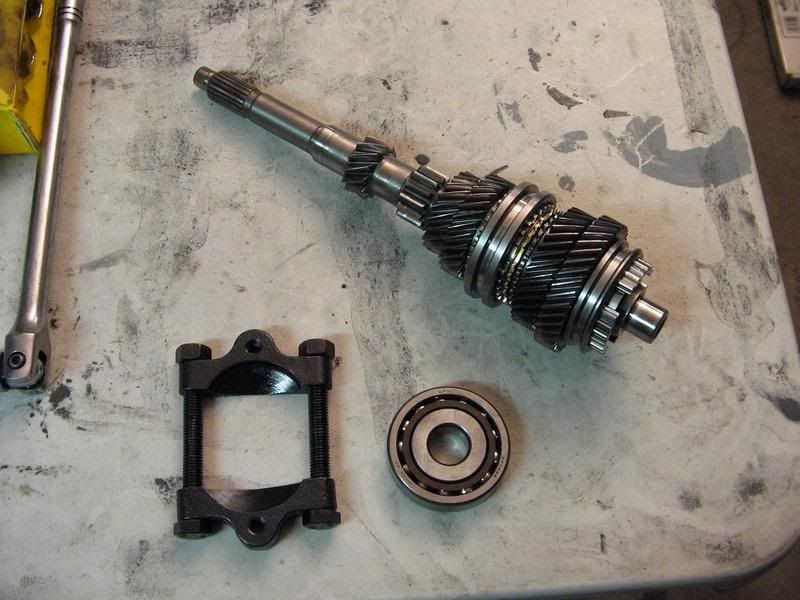
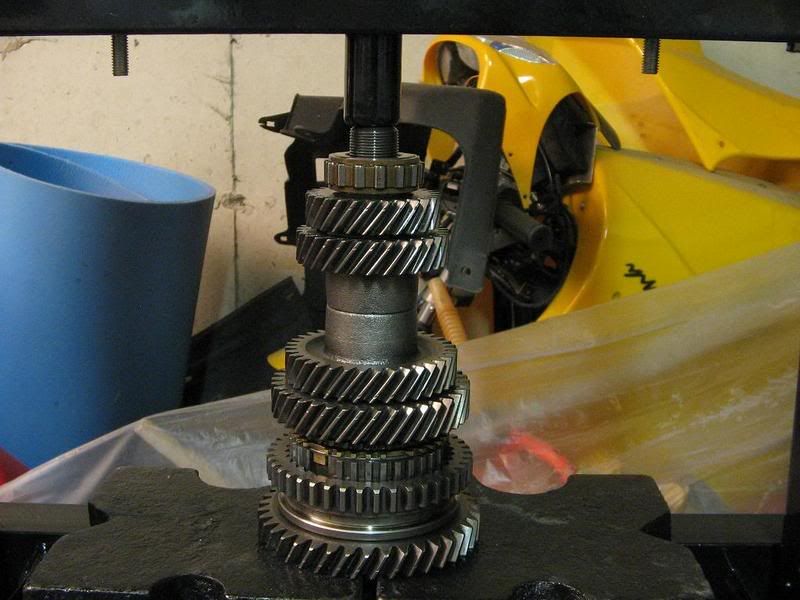
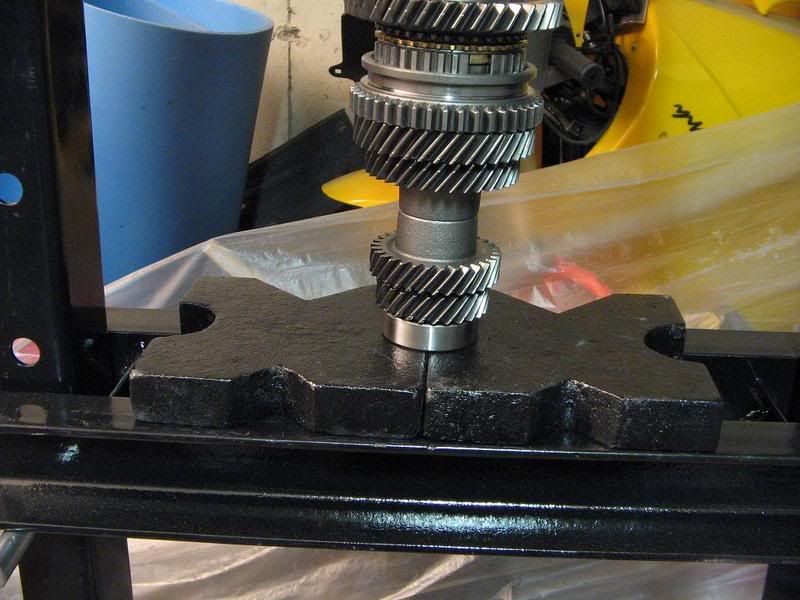
After that press off 4th and 5th gear. It comes off as an assymbly so try not to drop all the parts.
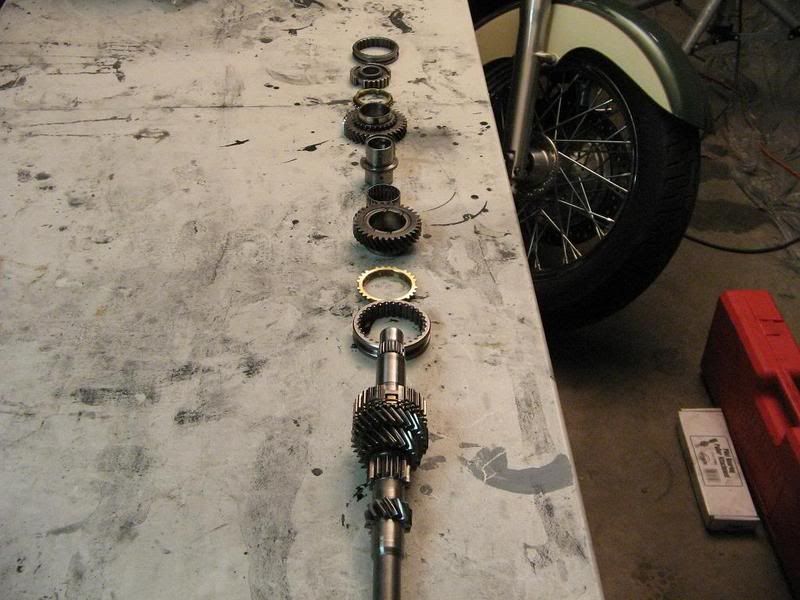
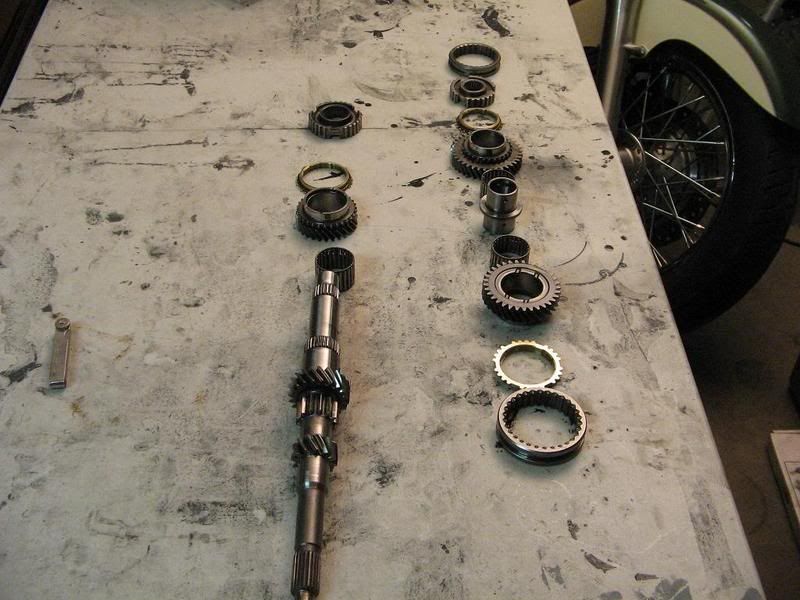
4th/5th assymbly layed out
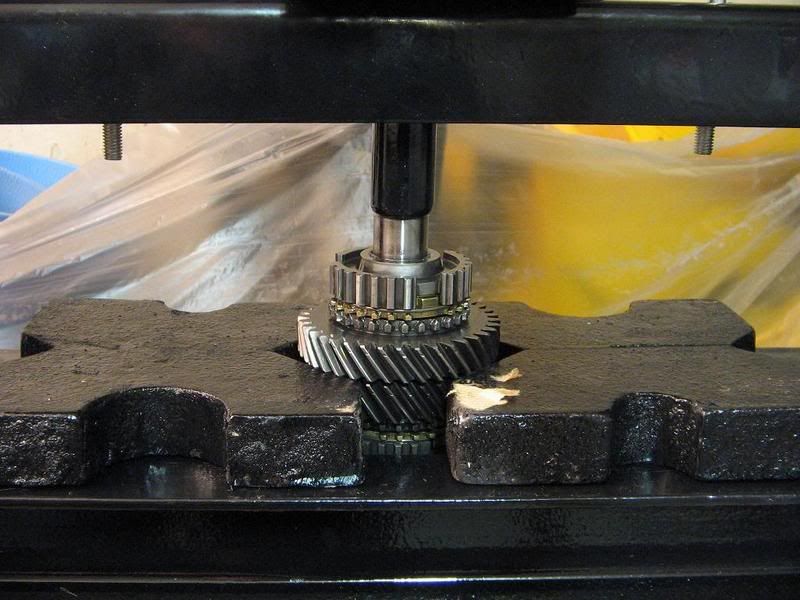
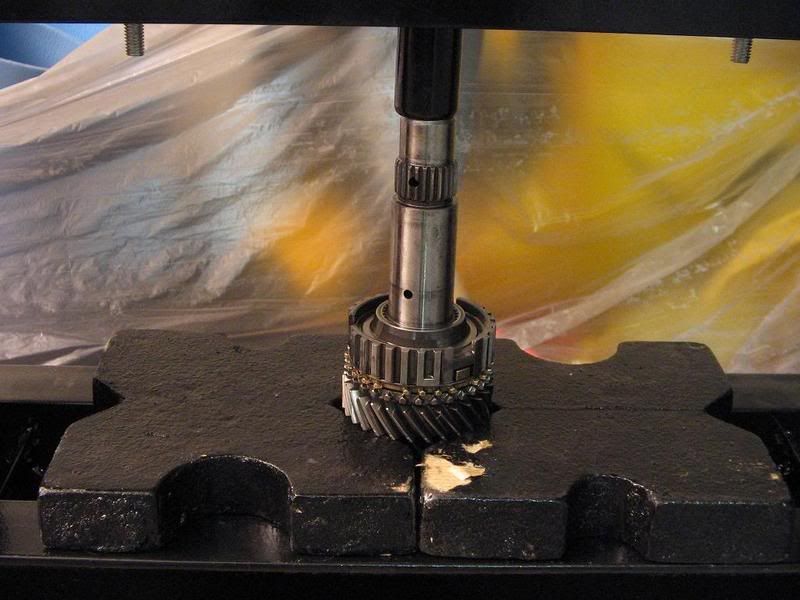
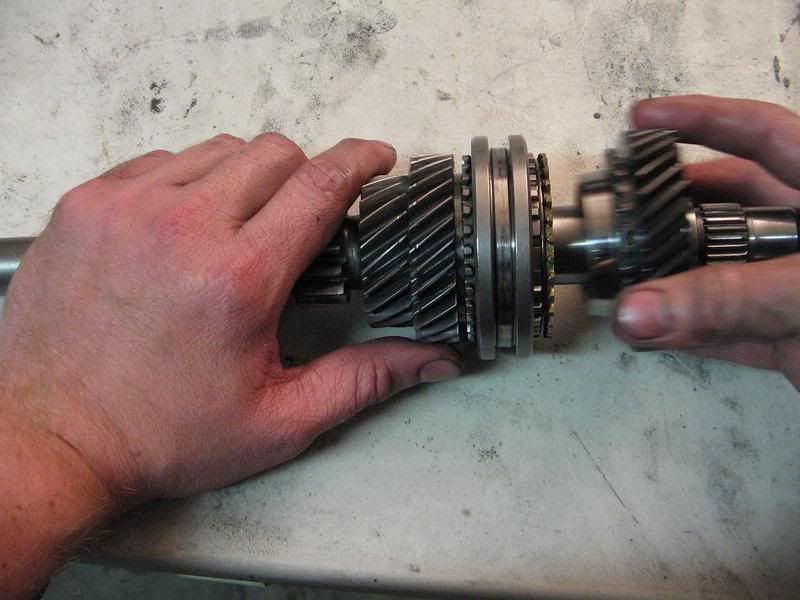
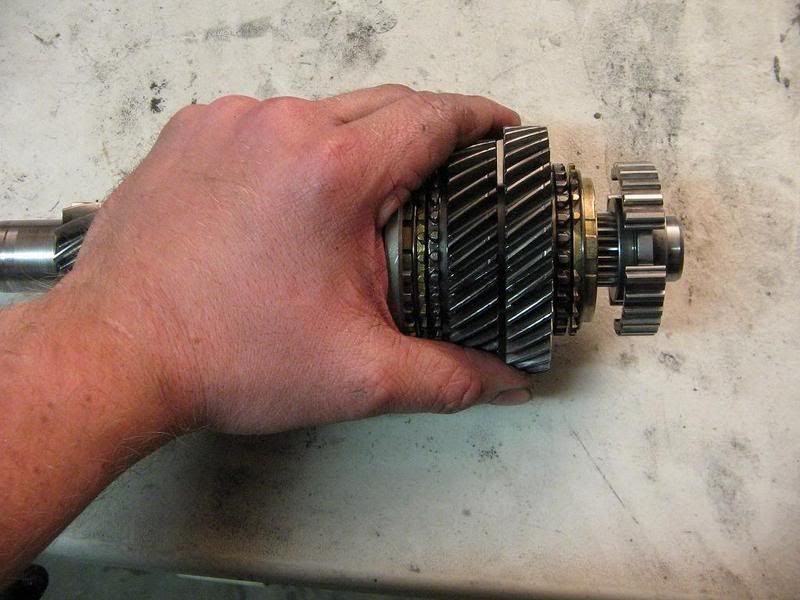
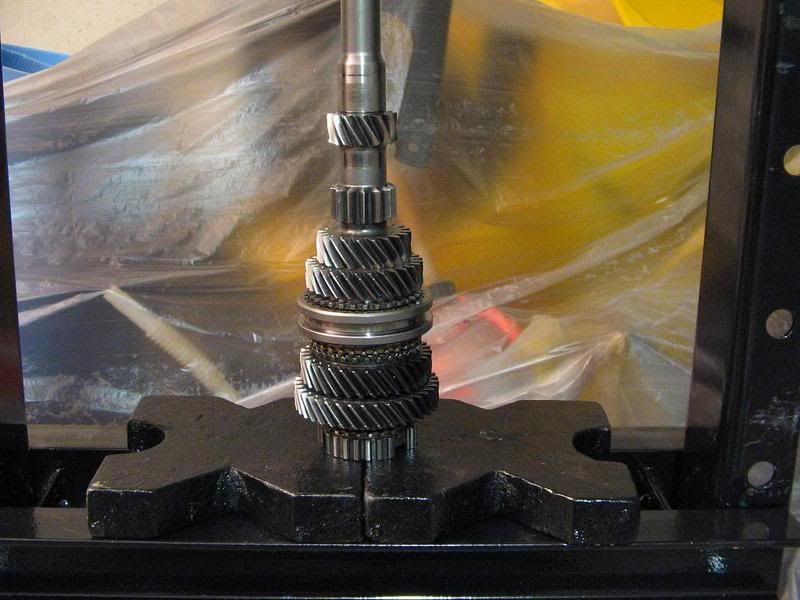
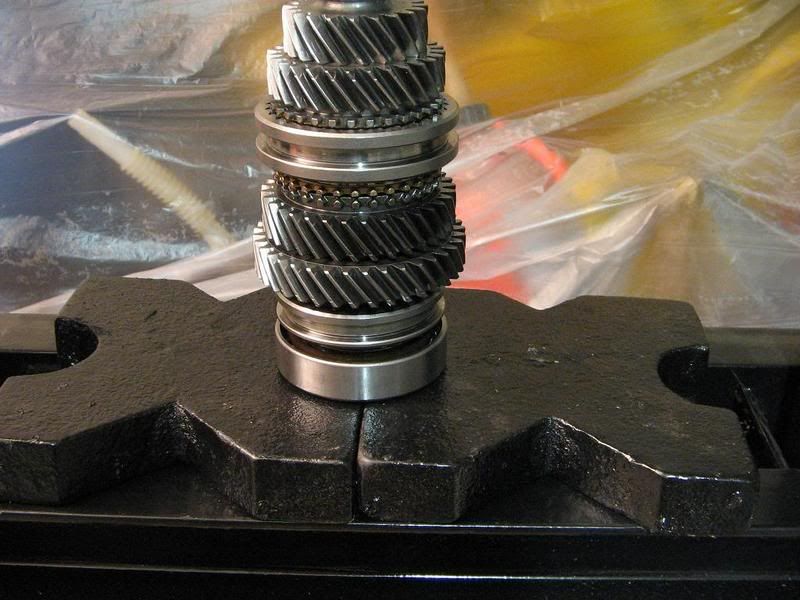
Now press out 3rd.
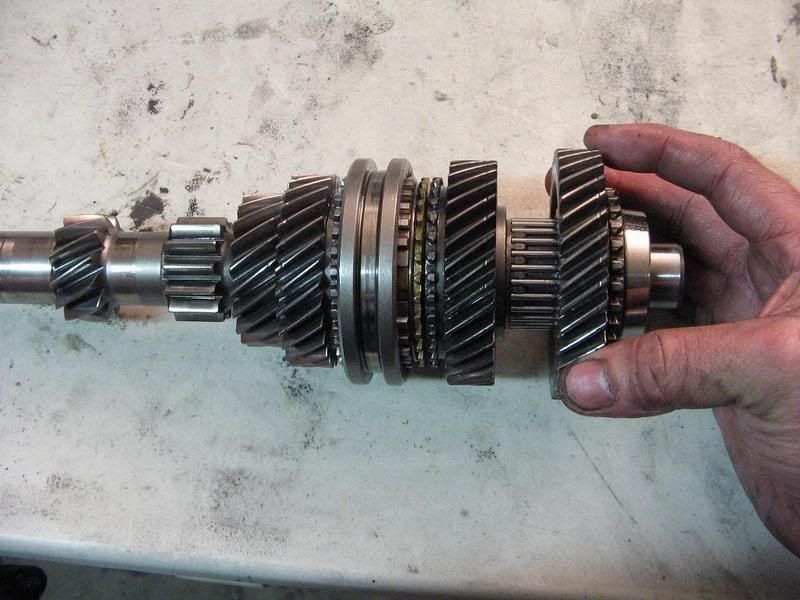
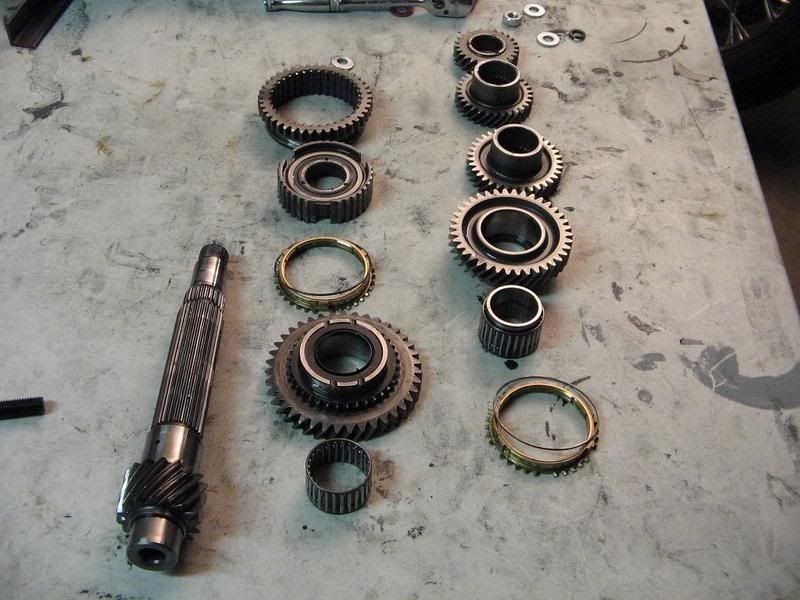
Here you can get an idea of how this all come apart. Make sure you lay things out in the order you removed them to keep track of what you did.
Clean everything out with brake cleaner. Be sure to check the oil holes in the main shaft for obstructions.
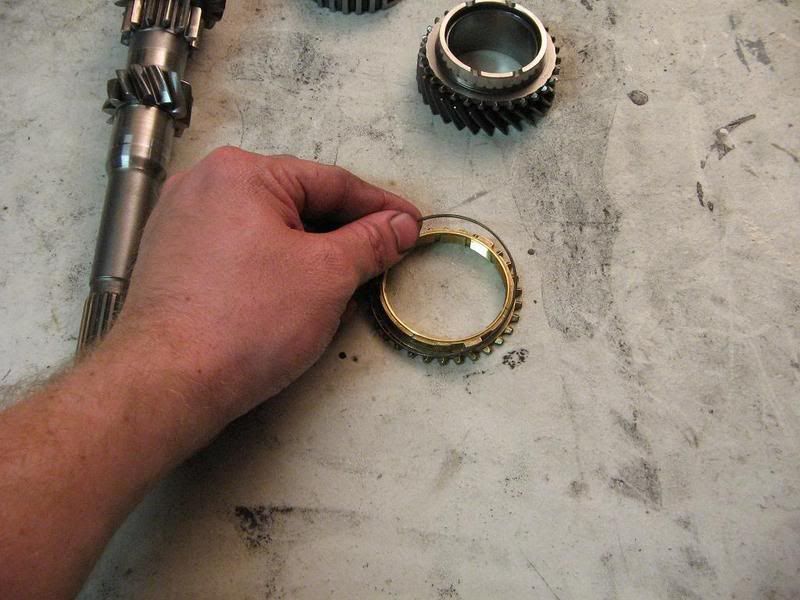
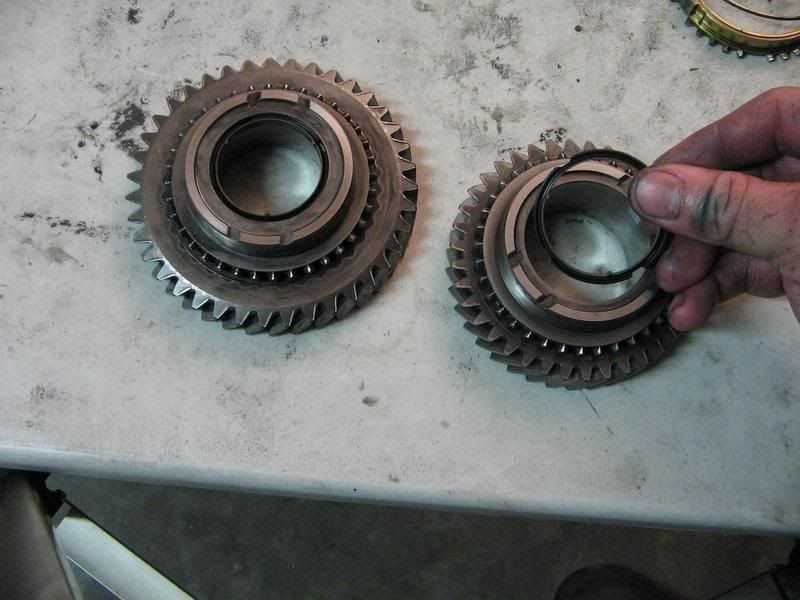
Take the syncro clip off the old one and slide it on the new syncro. Do this on all syncros.
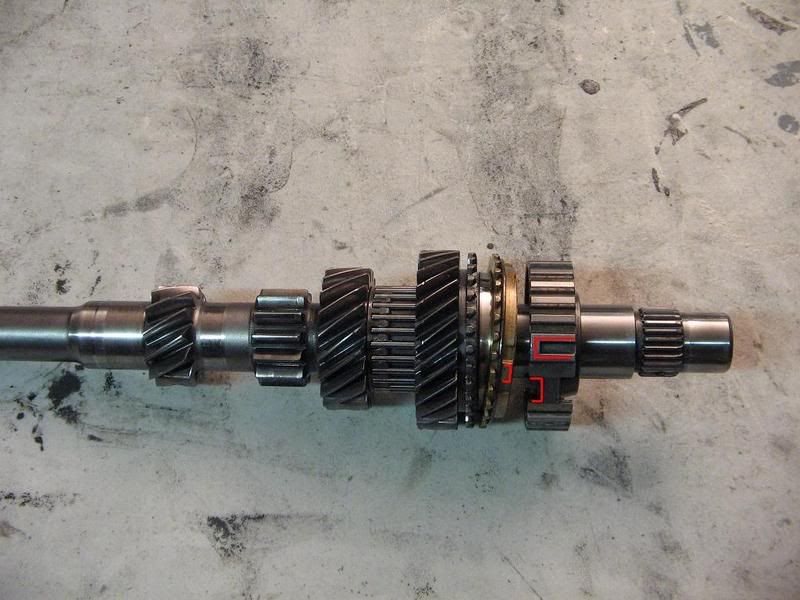
Put 3rd back on. Bearing-3rd gear-syncro-syncro hub. Make sure you line up the notch of the syncro to the hub. Also note the direction the "U" in the hub is facing.
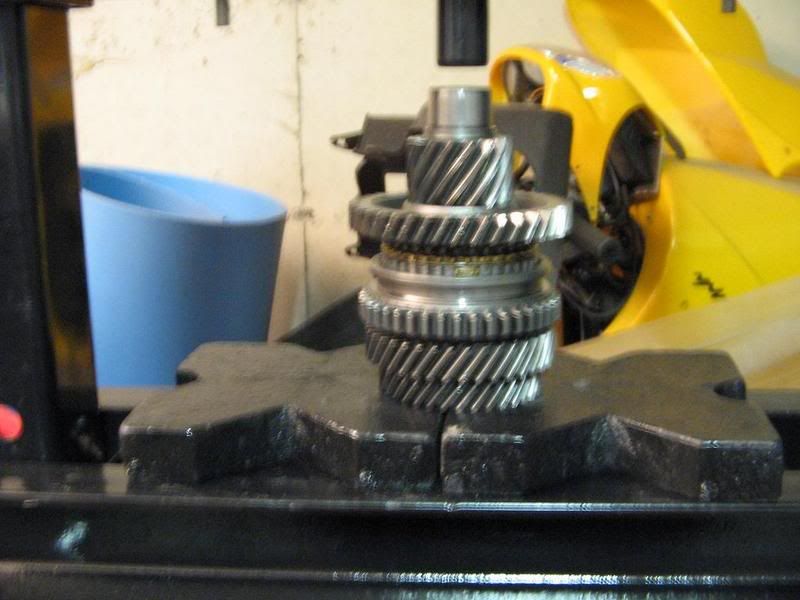
Press it on until you have a .002-.008in gap between 2nd and 3rd.
There is a partially cut tooth in the syncro sleave that must line up to that "U" in the syncro hub. Once that's on slide the other syncro then 4th on.
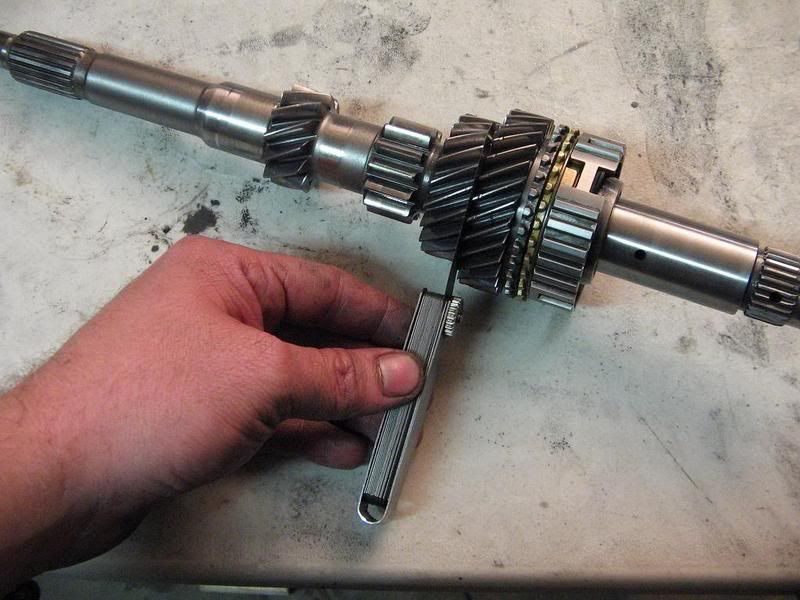
Slide the needle bearing and spacer back on.
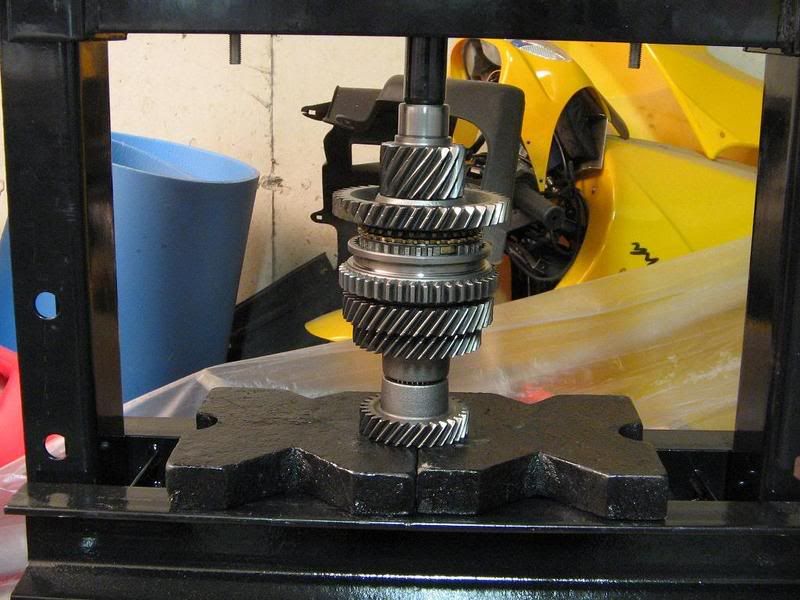
5th gear goes next.
Followed by 5th syncro and syncro hub.
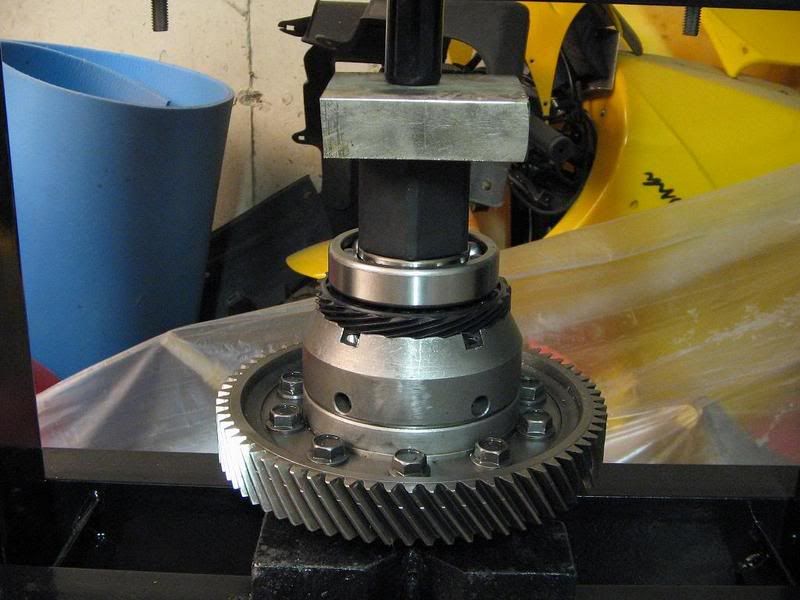
Press the 5th gear syncro hub back on.
Don't forget to put the 5th gear syncro sleave back before pressing on the main shaft bearing.
Remove the lock nut and spring washer, they need to be replaced.
Use a gear puller to pull the counter shaft bearing off.
I didn't have a better way so I pressed everything off at once.
Counter shaft layed out
You should replace these friction dampers while you're here.
I must have been getting tired since I didn't take any detailed pictures here. Basically it all went back on the way it came off.
Checking for an .001-.004in gap.

Stuffing 4th back on.
5th and bearing. After which replace the spring washer and nut (80lb-ft) and stake it.
If you are changing the diff remember these are left handed threads, turn clockwise to loosen.
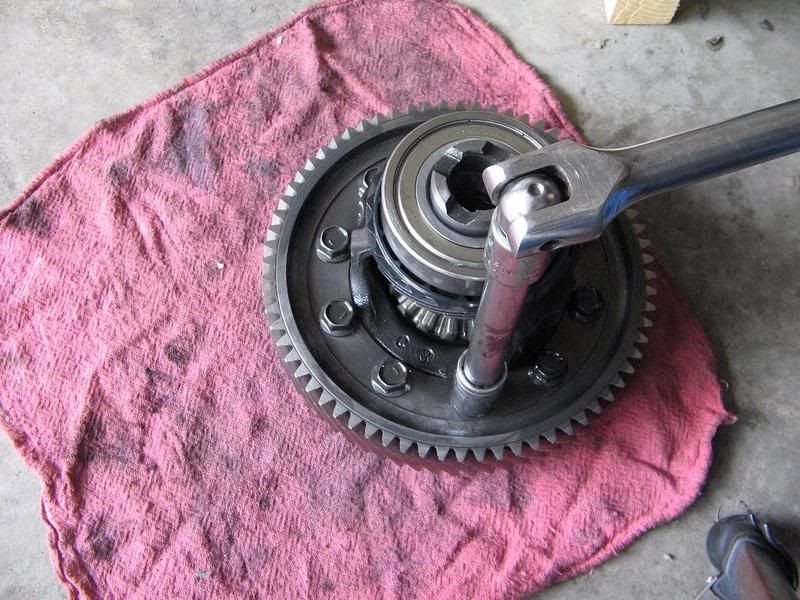
Use a gear puller to remove the diff bearings, it'll look somewhat like this mess. (I had to grind mine down a little to clear the speedo gear)
When you press the new ones on make sure you contact only the inner race.
After that press off 4th and 5th gear. It comes off as an assymbly so try not to drop all the parts.
4th/5th assymbly layed out
Now press out 3rd.
Here you can get an idea of how this all come apart. Make sure you lay things out in the order you removed them to keep track of what you did.
Clean everything out with brake cleaner. Be sure to check the oil holes in the main shaft for obstructions.
Take the syncro clip off the old one and slide it on the new syncro. Do this on all syncros.
Put 3rd back on. Bearing-3rd gear-syncro-syncro hub. Make sure you line up the notch of the syncro to the hub. Also note the direction the "U" in the hub is facing.
Press it on until you have a .002-.008in gap between 2nd and 3rd.
There is a partially cut tooth in the syncro sleave that must line up to that "U" in the syncro hub. Once that's on slide the other syncro then 4th on.
Slide the needle bearing and spacer back on.
5th gear goes next.
Followed by 5th syncro and syncro hub.
Press the 5th gear syncro hub back on.
Don't forget to put the 5th gear syncro sleave back before pressing on the main shaft bearing.
Remove the lock nut and spring washer, they need to be replaced.
Use a gear puller to pull the counter shaft bearing off.
I didn't have a better way so I pressed everything off at once.
Counter shaft layed out
You should replace these friction dampers while you're here.
I must have been getting tired since I didn't take any detailed pictures here. Basically it all went back on the way it came off.
Checking for an .001-.004in gap.
Stuffing 4th back on.
5th and bearing. After which replace the spring washer and nut (80lb-ft) and stake it.
If you are changing the diff remember these are left handed threads, turn clockwise to loosen.
Use a gear puller to remove the diff bearings, it'll look somewhat like this mess. (I had to grind mine down a little to clear the speedo gear)
When you press the new ones on make sure you contact only the inner race.
01-22-2008, 02:44 PM
#4
:3
Thread Starter
Join Date: Aug 2005
Location: BFE
Posts: 7,713
Likes: 0
Received 0 Likes
on
0 Posts
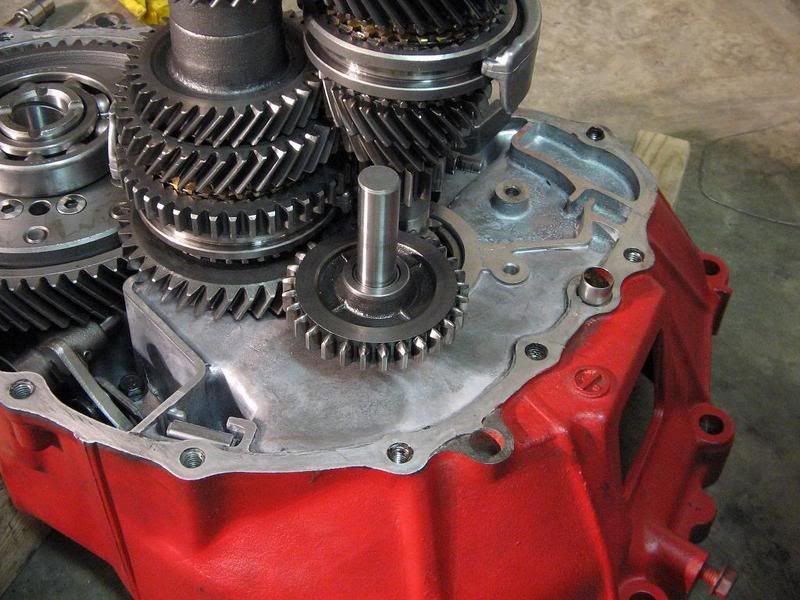
With the shim in place drop the diff in and put the two halves of the housing back together. Tighten the bolts and use a feeler gauge to check the diff play.
The max clearance is .10mm (.004in)
Use a feeler gauge and straight edge to measure the gap at the input bearing.

Put the input shaft in the housing and measure it as well.
Add those two numbers and subtract .95mm to get your shim thickness. (A+B -.95=shim)
My old shim was the right size. You can now put the oil guide and main shaft shim in.
Put the diff back in and the washer and spring washer in place for the main shaft.
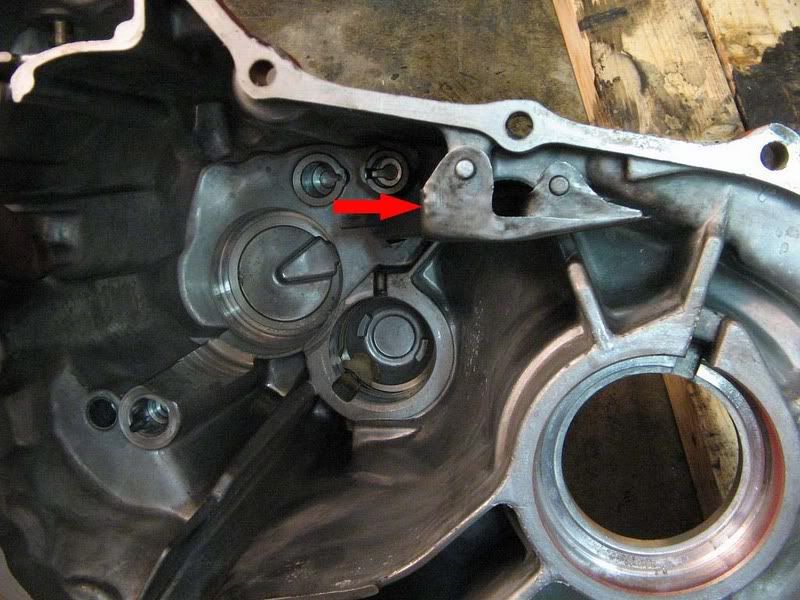
Put the shafts back on the shift forks and drop them all back in as one unit.
It's hard to see but you need to line up the shift forks with the interlock.
Tighten the shift arm bolt to 23lb-ft
Put some RTV on the plug bolt and put the spring in then the bolt. 40lb-ft
More RTV for the interlock bolt. There is a slot in the interlock that must line up for it to go in. 29lb-ft
Put the reverse idler gear in place and then slide it's shaft in.
The reverse fork is next. 11lb-ft
Smear RTV all around where the housing halves will contact.
Expand the snap ring when you put the two halves together.
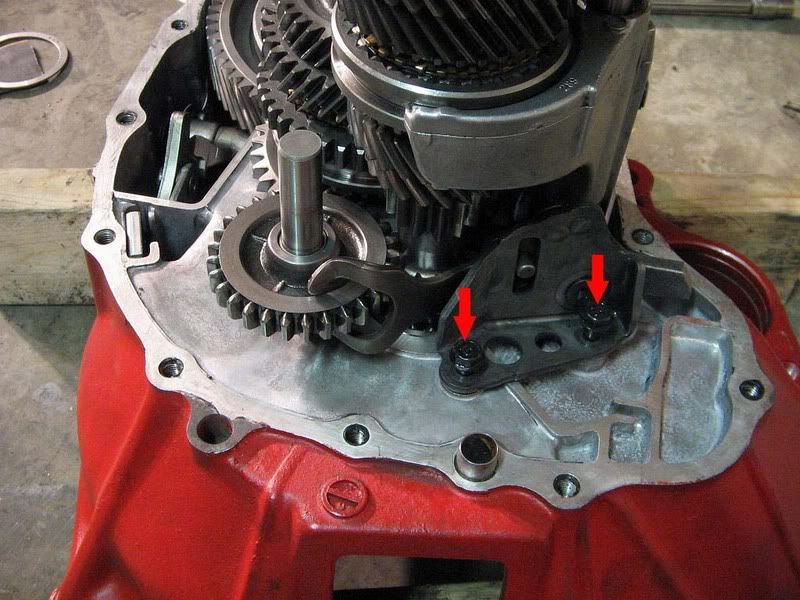
Put this bracket back on but don't tighten the bolts.
Torque to 20lb-ft in this order.
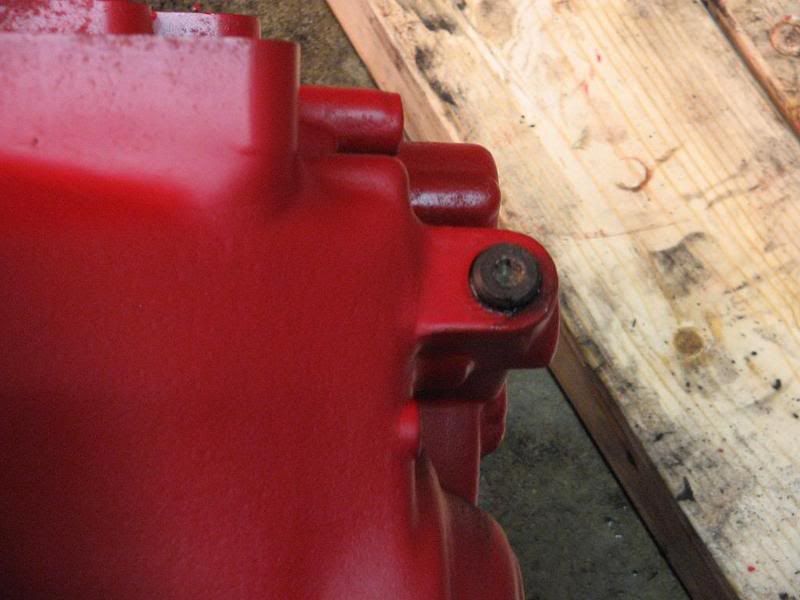
RTV the sealing bolt and torque to 18lb-ft.
Install the passengers side axle oil seal.
Reverse sensor.

Finally the remaining bracket.
The max clearance is .10mm (.004in)
Use a feeler gauge and straight edge to measure the gap at the input bearing.
Put the input shaft in the housing and measure it as well.
Add those two numbers and subtract .95mm to get your shim thickness. (A+B -.95=shim)
My old shim was the right size. You can now put the oil guide and main shaft shim in.
Put the diff back in and the washer and spring washer in place for the main shaft.
Put the shafts back on the shift forks and drop them all back in as one unit.
It's hard to see but you need to line up the shift forks with the interlock.
Tighten the shift arm bolt to 23lb-ft
Put some RTV on the plug bolt and put the spring in then the bolt. 40lb-ft
More RTV for the interlock bolt. There is a slot in the interlock that must line up for it to go in. 29lb-ft
Put the reverse idler gear in place and then slide it's shaft in.
The reverse fork is next. 11lb-ft
Smear RTV all around where the housing halves will contact.
Expand the snap ring when you put the two halves together.
Put this bracket back on but don't tighten the bolts.
Torque to 20lb-ft in this order.
RTV the sealing bolt and torque to 18lb-ft.
Install the passengers side axle oil seal.
Reverse sensor.
Finally the remaining bracket.
01-22-2008, 02:56 PM
#5
:3
Thread Starter
Join Date: Aug 2005
Location: BFE
Posts: 7,713
Likes: 0
Received 0 Likes
on
0 Posts
I will reread and try to update anything I've missed. There maybe comments or tips that will also warrant updates. I wrote this DIY to help people better understand the process not as a replacement for a shop manual.
01-23-2008, 06:19 PM
#6
Driving a Turbo 2L Terror
Join Date: May 2002
Location: Stafford, VA
Posts: 4,212
Likes: 0
Received 0 Likes
on
0 Posts
Very good write up, I have done a couple of Trans rebuilds, and this hits each step. the only thing i would say instead of RTV i would use honda bond, It cleans up alot easier when you have to rebuild it down the road, and i personaly think it seals better. I have seen RTV transmisions leak. 2 :thumbup: :thumbup: up
01-23-2008, 07:43 PM
#7
college kid
Join Date: Mar 2003
Location: New York
Posts: 2,000
Likes: 0
Received 0 Likes
on
0 Posts
GOD DAMN DUDE!!!
thats the shit right there. very nicely detailed and documented. the same identical procedure is outlined in helms. i'm actually rebuilding two y8 trannies at the moment. ( i need to buy a press :-P ) procedure is identical btw. but hey its nice to have some bigger pictures too. job well done man
-Luke
01-24-2008, 11:54 AM
#8
:3
Thread Starter
Join Date: Aug 2005
Location: BFE
Posts: 7,713
Likes: 0
Received 0 Likes
on
0 Posts
I followed a helms so yeah it's pretty much exactly the same. Hopefully seeing actual pictures can help clear things up for people and make it less intimidating. I bought my 12 ton press from homier for 80$ I picked it up local. http://www.homier.com/detail.asp?Ses...cat=&sku=03945
01-25-2008, 09:58 AM
#9
college kid
Join Date: Mar 2003
Location: New York
Posts: 2,000
Likes: 0
Received 0 Likes
on
0 Posts
damn thats cheap. too bad its not local. HF has their 12 ton for 110.
I'm wondering if i should just build my own. would you mind taking a close picture of the rack that the bottle jack sits on?
btw, rough idea on how much all the new seals and bearings ran?
-Luke
I'm wondering if i should just build my own. would you mind taking a close picture of the rack that the bottle jack sits on?
btw, rough idea on how much all the new seals and bearings ran?
-Luke
