Well, here it is ladys and germs. At long last, the difinitive DIY for replacing your 5th or 6th gen Civic's clutch and flywheel. I will walk you through a slew of mini-DIYs here too including axle replacement, transmission fluid replacement, primary O2 sensor replacement, and bleeding your clutch. Please realize that this DIY was done on a 1999 EX (D16Y8) and that the process is slightly different for the 5th gens and the Bseries motors.
Let me begin by first saying that this is how
I have always done this install. There may be a better way out there, but I have gotten this method down to about 4 hours working at a slow and methodical pace. I am a perfectionist and I prefer all of my tools to be put back and bolts to be reinserted into their perspective places when a part is removed so you may see signs of that in the images below. Don't be alarmed, I'm just nutty that way. :loco:
Ok... fasten your seatbelts:
TOOLS LIST
- Impact Gun (optional, but EXTREMELY handy)
- Breaker Bar (I used 1/2)
- Air Ratchet (also optional, but EXTREMELY handy)
- Ratchet (I used a 3/8 and 1/2)
- Needle Nose Pliars
- Standard Screwdrivers
- Pickle Fork (also known as a balljoint fork - you can use this method or some other)
- Crow Bar
- Clutch alignment tool (should have come with your kit)
- BAH - a.k.a. Big Ass Hammer
- Punch: 5/16" x 5 1/2" (I used a roll punch)
- 10mm, 12mm, 14mm wrenchs
- 10mm, 12mm, 14mm, 17mm, 19mm, 32mm sockets
- 10mm, 17mm
12 point sockets
- 17mm deep-well socket
- Also recommended that you have various ratchet extensions. We had 3: a 3/8 3", 3/8 10", and 1/2 5".
- 22mm wrench or O2 sensor socket (optional)
- Oil drain pan
- A long funnel
- Torque wrench(s) that will range from 19 ft/lbs to 134 ft/lbs
PARTS & SUPPLIES
- 2 replacement cotter pins for your lower balljoint nuts if you do not wish to reuse the ones removed
- 3 quarts of Honda manual transmission fluid (MTF)
- 1 crush washer for the transmission drain plug
- Standard bearing grease
- New parts: cluch, flywheel, pilot bearing, throwout bearing
THE PROCESS
- Begin by jacking up the front of the car and supporting it with jack stands
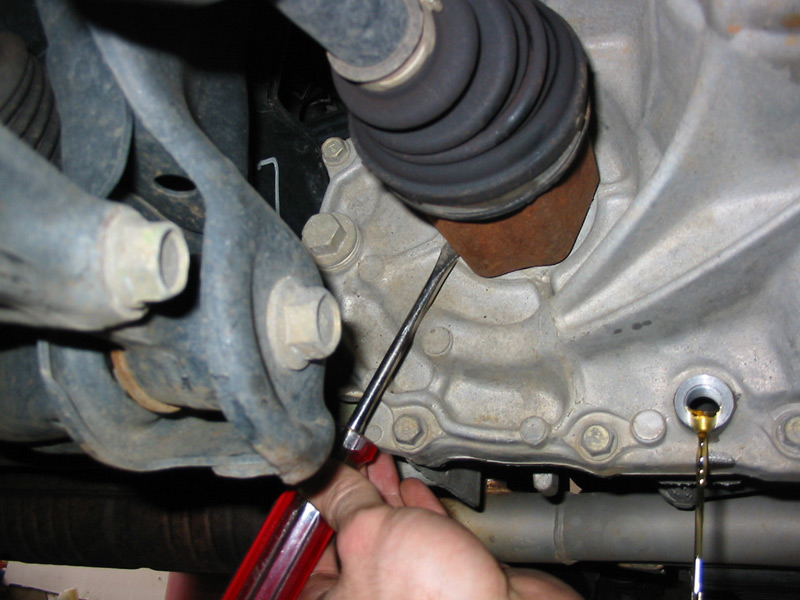
- You may want to begin by draining the tranny fluid since it will need to be done anyway and you can get it out of the way: do this by using a 3/8 ratchet on the bolt shown below


- Just let it run until it's empty and work on something else for now
- Remove the wheels (19mm socket)
- Remove the axle nuts (32mm socket) - this is easily done with an Impact Gun, but you may need a friend to hold the brakes for you while you use a large breaker bar here

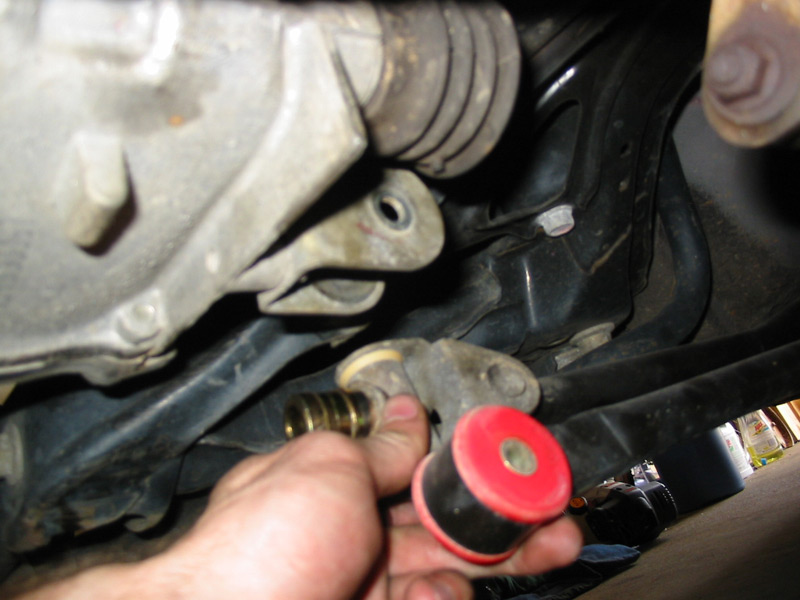
- With both of the axle nuts off, remove the cotter pins from the lower balljoint nuts

- Remove the lower balljoint nuts (17mm)

- Separate the lower balljoints from the lower control arms (LCA). This can be done multiple ways, but I use a pickle fork
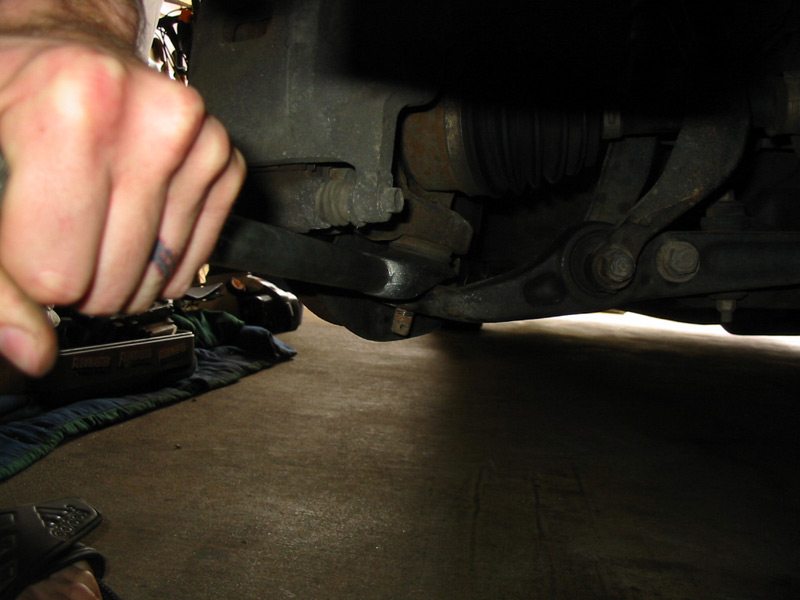
- With the hub now loose from the LCA, pick the whole hub assembly up and away from the LCA

- While doing this, push the tip of the axle through the hub. This may not be easy and you may need to tap the end of the axle with a hammer to break it free. Ours came out easily, lucky for us.
- Check the progress of your tranny oil drain that you started. It should be done by now. Go ahead and replace the crush washer on the bolt and reinstall the drain bolt on your tranny.
- Now, remove the axle from the transmission.
WARNING: Do not just pull on the axle because you will likely pull the CV joint out of it's socket and you will be in a world of hurt. Use a crow bar or a flathead screwdriver with a hammer to slide between the tranny and the face of the CV joint. With a tap of the hammer, you can get the axle to separate from the tranny.
- Pull on the CV joint housing, not on the axle shaft, to remove the axle from the tranny.

- You will not be able to remove the axle completely from the car without removing the strut fork. There is no need to do this unless you are also replacing your axles. If you are replacing your axles you will need to use a 17mm socket and wrench because the strut fork is held on by a bolt and a nut so one side will need to be held while the other is loosened. Once you have the bolt out, pull the LCA down far enough to slide the axle out. We just pulled the axle out as far as possible and left it resting comfortably.

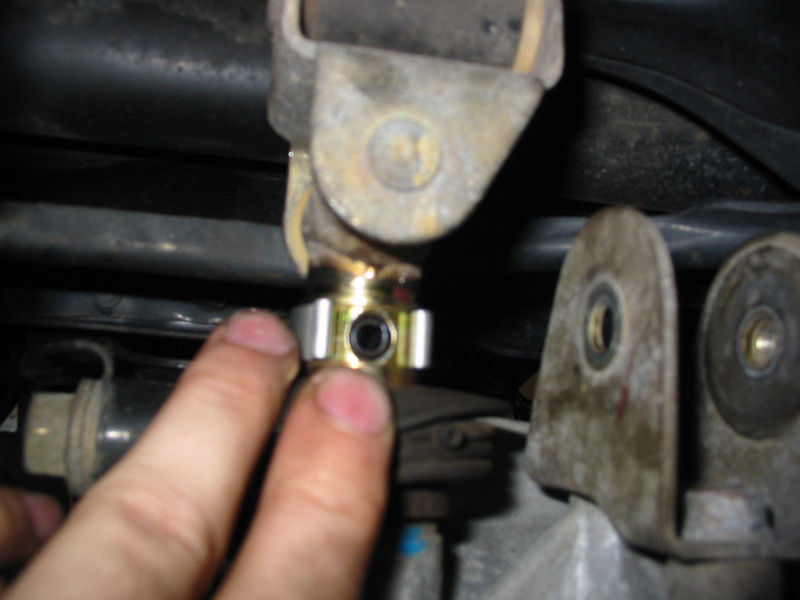
- Next, disconnect the 2 shift linkage rods from the transmission. The first rod is a stabilizer rod held on by a 12mm bolt. Remove the bolt and the rod will drop down away from the tranny.

- This part is despised by all who have tried it - the keeper pin for the shift rod. I'd like to be an extreme ass here and boast that the pin came out with little effort. NA NA NA NA! Begin by removing the small cover from the rod.
- Then pound the crap out of the keeper pin until it comes out. A 5/16" x 5 1/2" roll punch and mini-sledge hammer did the trick.
Note: this is not completely necessary and I have bypassed this step in the past when I can not get the pin to budge. You can leave this rod alone and lower it with the tranny if you disconnect the other end from the base of the shifter. This will require a 12mm socket and wrench as it is a bolt/nut combo.


- Lower both shift rods to the floor and out of the way
- Now, remove the bolts holding the flywheel cover on. There are two 14mm bolts, one 12mm bolt, and one 10mm bolt. You can leave the cover here because it probably won't come out without removing the stiffener arms going from the engine to the tranny. Just remember to put the cover back on before you slide the tranny back into place later in your installation.

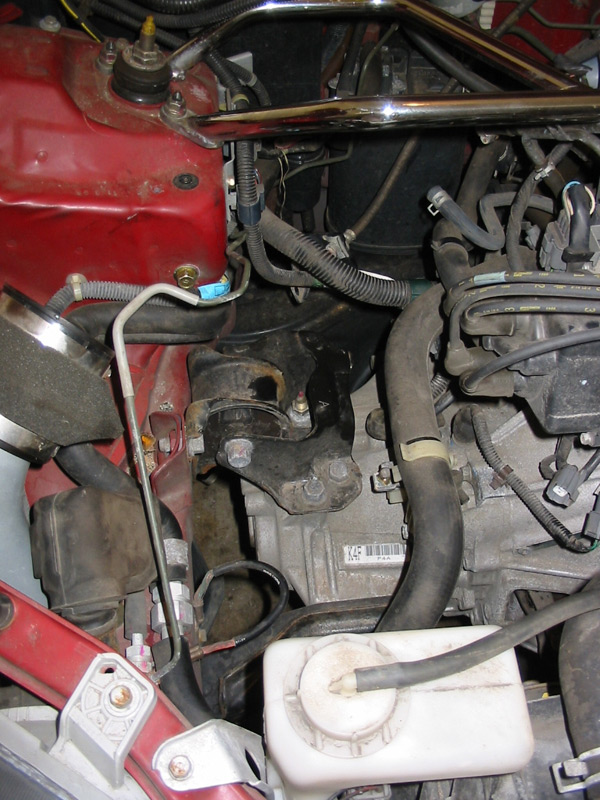
- Since you're under the car, you might as well take care of everything else needed to be done down there so you don't have to keep going back and forth. You can remove the two 19mm bolts connecting the rear tortion mount to the tranny.
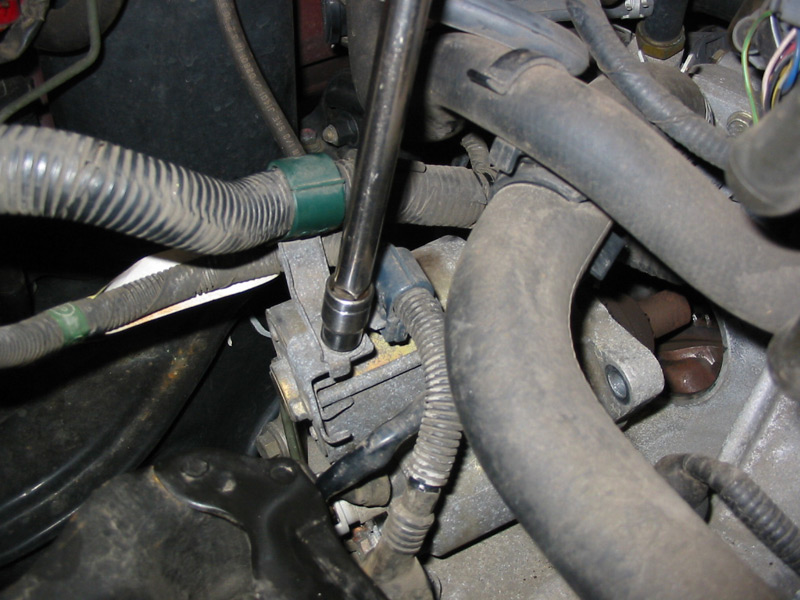
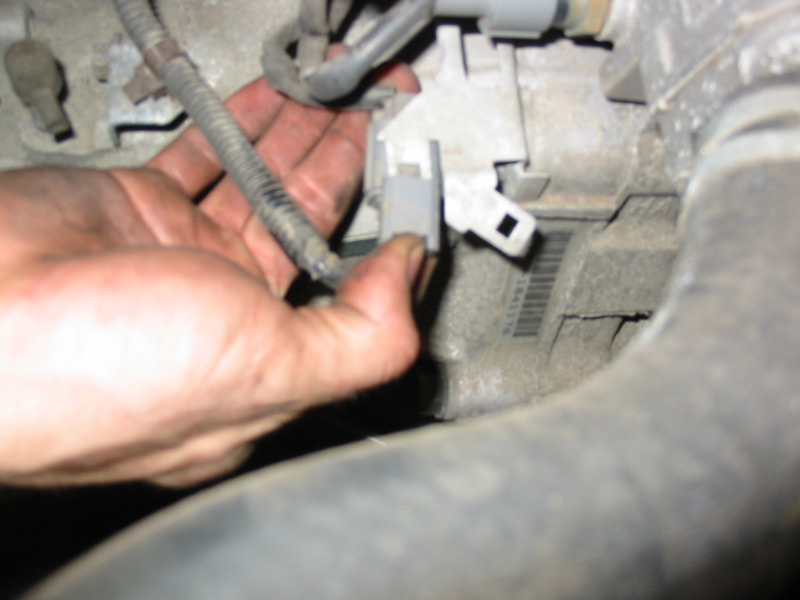
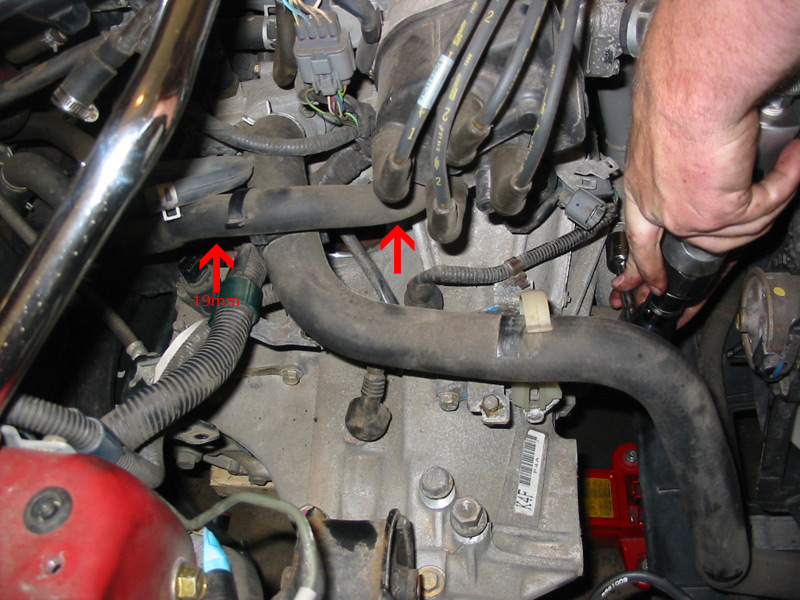
Note: you may need to remove the O2 sensor in order to use a socket on the lower of these two bolts. I did just to make it easier. The O2 sensor is a 22mm and requires the use of either an open-ended wrench or a specialized socket specifically made for O2 sensor removal.
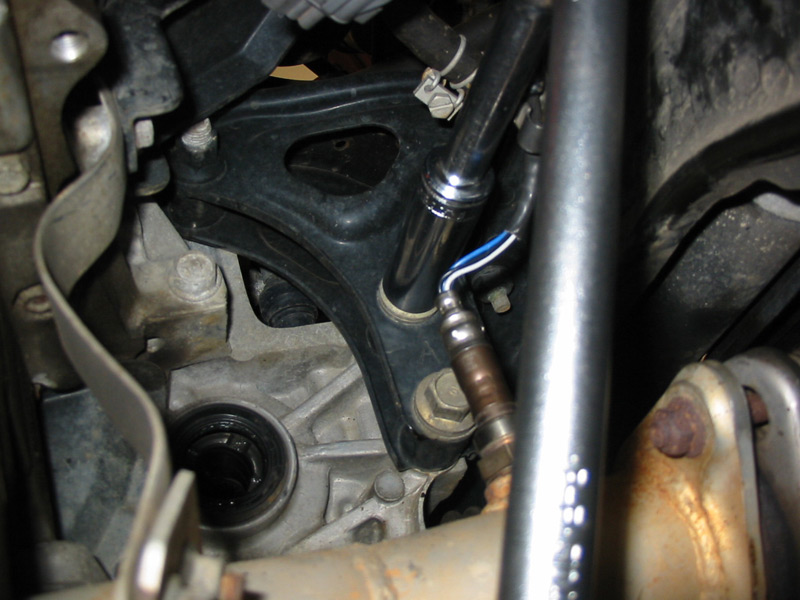
- Also remove the one 17mm bolt that connects the tranny to the engine just above the hole for the axle.
- That should be it for under the car (for now). We decided it would make things easier if we removed the CAI and because he had a bypass valve, we just had to remove the upper portion of the piping which was only two couplers and a couple of hoses

- Now, remove the starter by first disconnecting the negative (-) connection from the battery. Then, pull the rubber cover that looks like a bulb off of the back of the starter.

- Remove the 12mm nut and pull the wire away from the starter. Also remove the female connector just to the right of where this nut was. It is covered by a rubber shielding, but is one single wire so try to get as close to the starter as possible before pulling on it because you may pull the wire out of the connector if you pull too far out from the connector itself.
- Remove the one 10mm bolt that holds the wiring bracket to the starter
- Remove the two 14mm bolts that hold the starter onto the motor. The right/upper one is pretty easy to get to, but the left/lower one is a little more difficult because you can't see it. You will have to get to it by feeling around.
right/upper

- Pull the starter out and place it somewhere out of your way
- You can now remove the wiring connector for your reverse sensor. You have to pull it off of the bracket before you can disconnect the plugs from each other.
- Remove the ground strap from the to of the transmission and fold it back so it is out of the way (10mm)
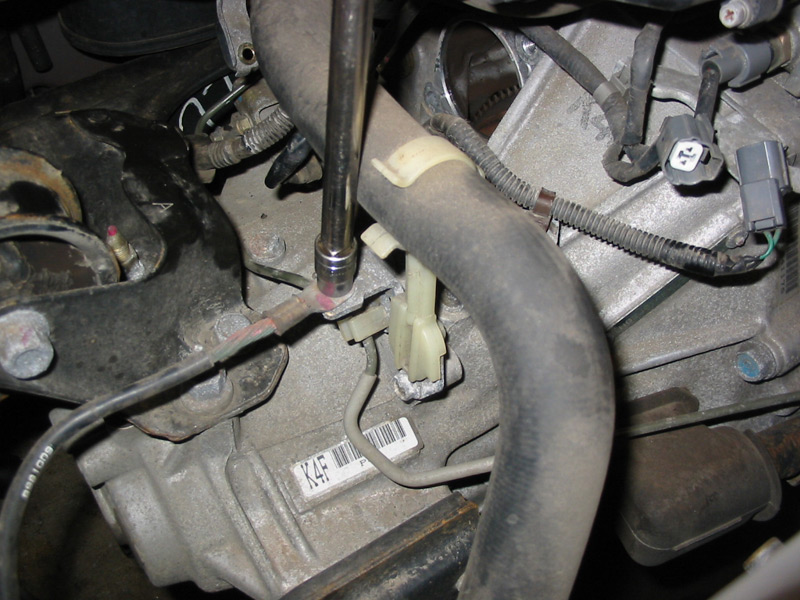
- Remove the bracket for the clutch line from the top of the tranny (two 10mm)
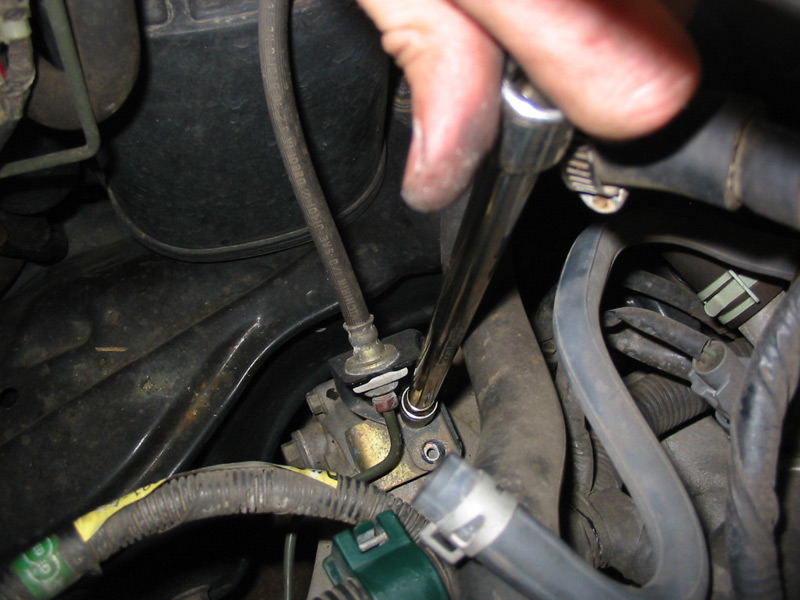
- Remove the slave cylinder from the front of the tranny (two 12mm). DO NOT disconnect the clutch line from the slave cylinder unless you want to rebleed the entire clutch system. It isn't that hard, but there really isn't any reason to disconnect this line.
- Use a small screwdriver to push the plastic keeper back so you can remove the slave cylinder hardline from the bracket on top of the tranny. This will free it so you can move the slave cylinder and hardline out of your way

- With the slave cylinder and line free, tuck it behind the headlight being careful not to bend the hardline
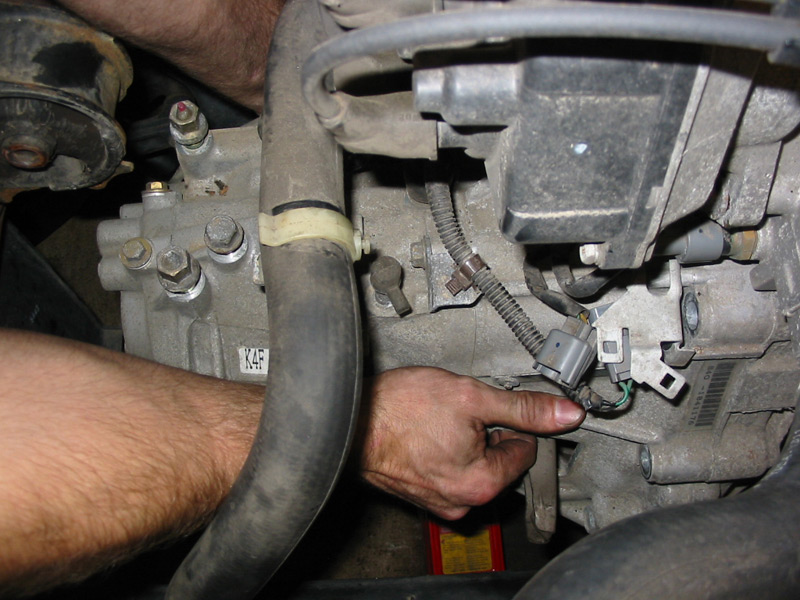
- Disconnect the wire plug from the speed sensor on the top/back of the tranny

- Support the engine/tranny with the jack using a piece of plywood between them so that you do not mar the casings. Jack up the entire engine/tranny just enough so that you can see that it is obviously supported. With this complete, remove the upper tranny mount (four 17mm)


- You can now also remove the front tranny mount. There are three 17mm bolts that hold the mount to the tranny, and two 14mm bolts that hold the rubber portion of the mount to the subframe. Remove all of these and pull the mount out to be placed somewhere that it is not in the way.
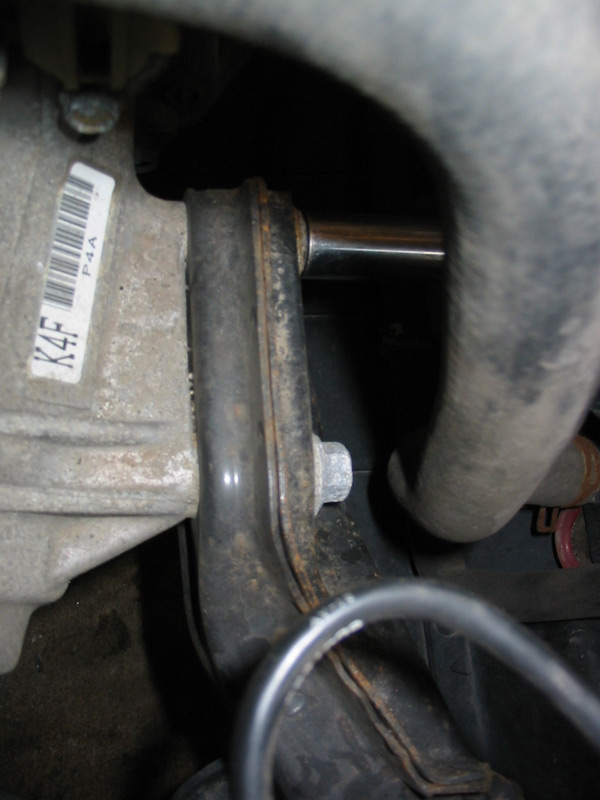

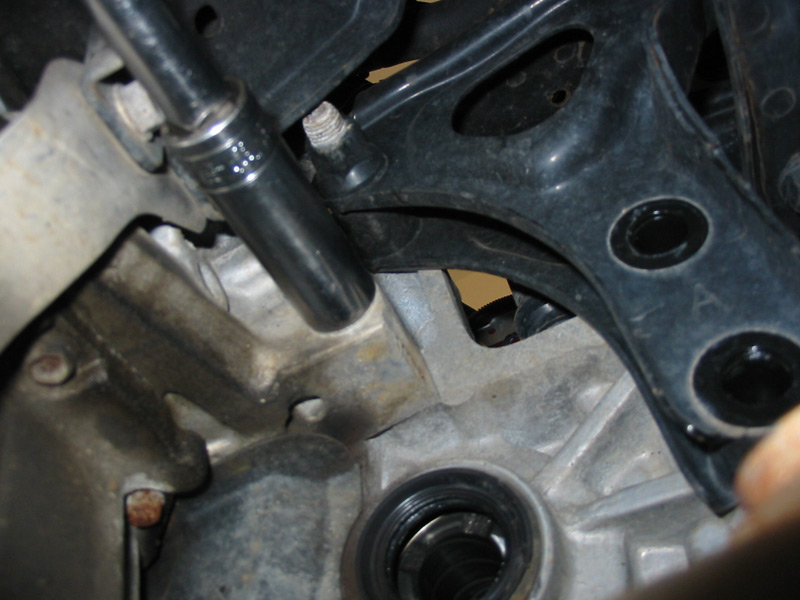
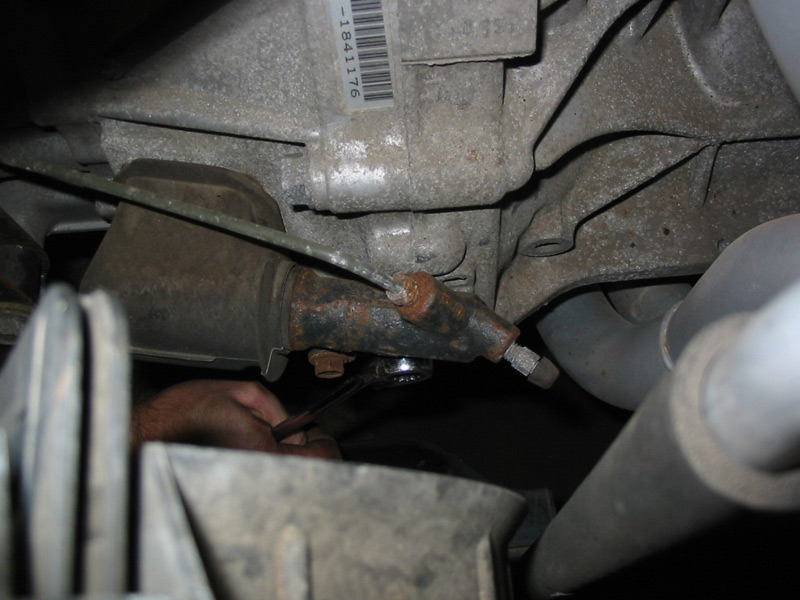
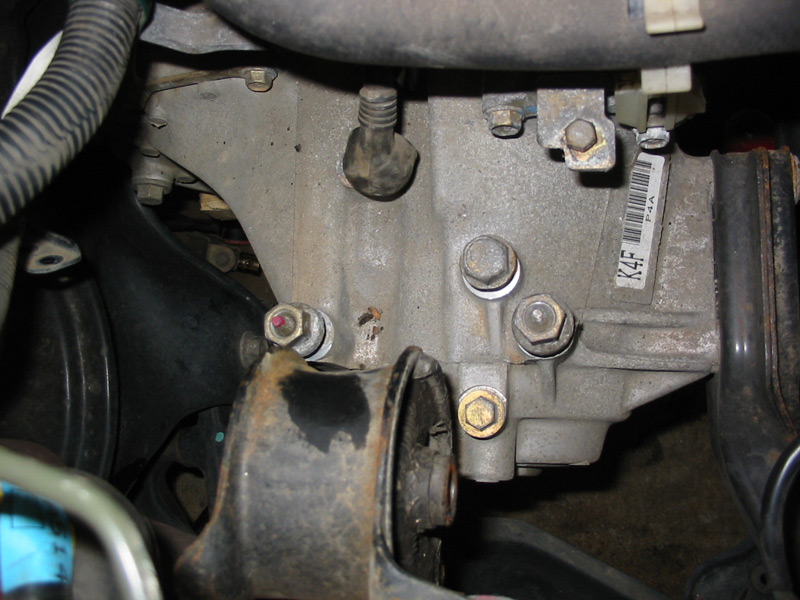
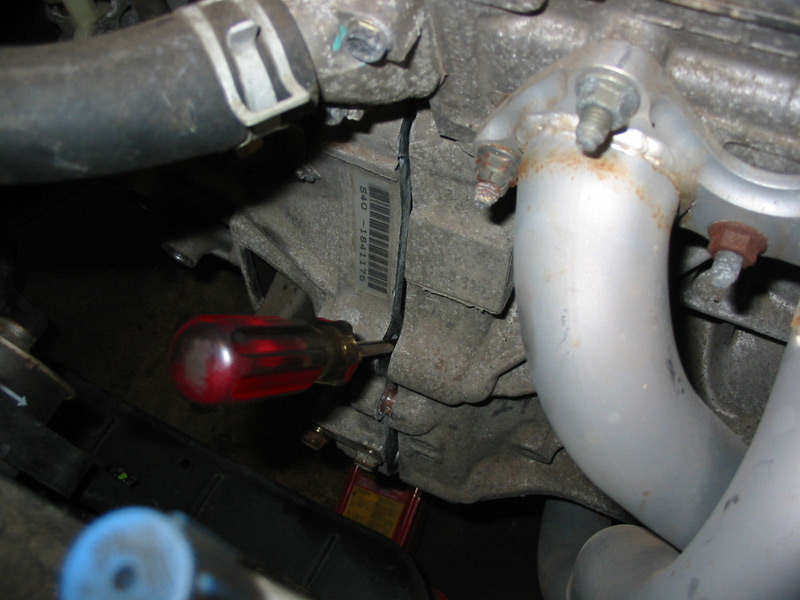
- There is now only a single bolt holding the transmission to a mount and it is near the back of the transmission. There is a single 19mm bolt that goes through the transmission and into the rear tortion mount. It can be seen in the image below:
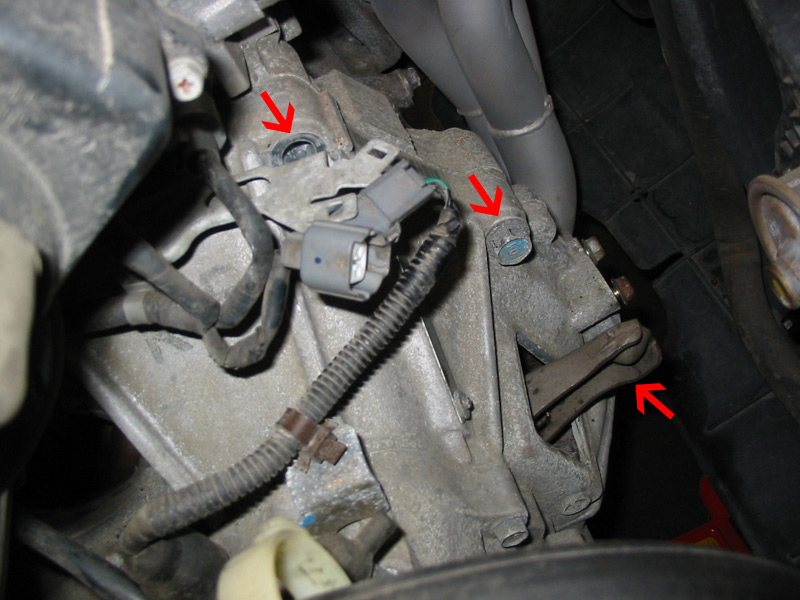
- Now remove the four 17mm bolts remaining that hold the tranny to the engine. I have marked these bolt locations in the image below:
- Pull the lower coolant hose that runs from the bottom of the radiator to the thermostat housing out of the plastic bracket attached to the top of the tranny. It looks like a "C".
- Lower the jack all the way so that it is not supporting the engine/tranny anymore, but keep it under the tranny so that when you separate the tranny from the engine you have something there to set it on
- Shimmy the tranny from side to side standing on the passenger's side of the vehicle. If you can not get it to separate at all, use a flathead screwdriver and a hammer to wedge into the seam between the engine/tranny to get it started.
- Once you've opened up the seam, get back to the passenger's side and shimmy the tranny until it slides out away from the engine.

- The tranny isn't all that heavy, but it is an awkward position so be careful not to drop the tranny on the ground. Set it on the jack and then get a better grip to pick it back up and then pull the jack out so you can set the tranny as far away from the engine as possible so it won't be in the way.
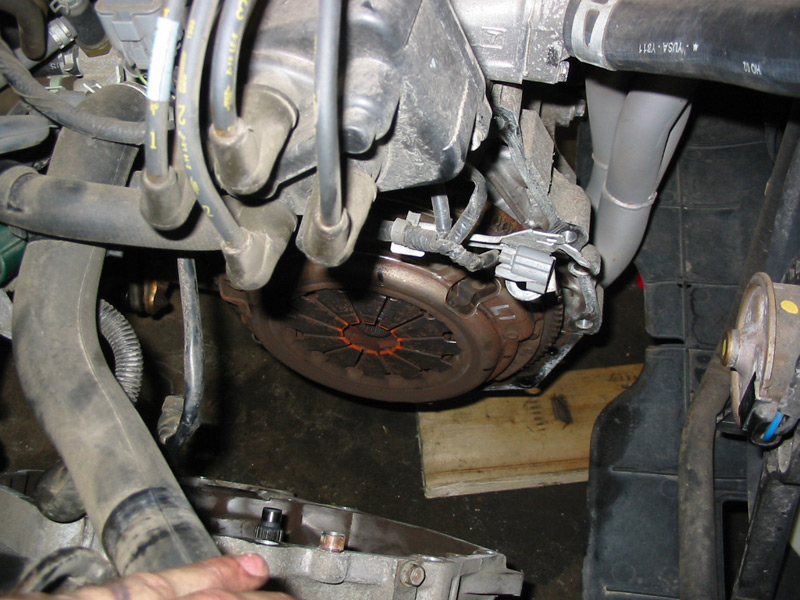
- You can now remove the pressure plate from the flywheel. There are 6 bolts that require a 12 point 10mm socket.
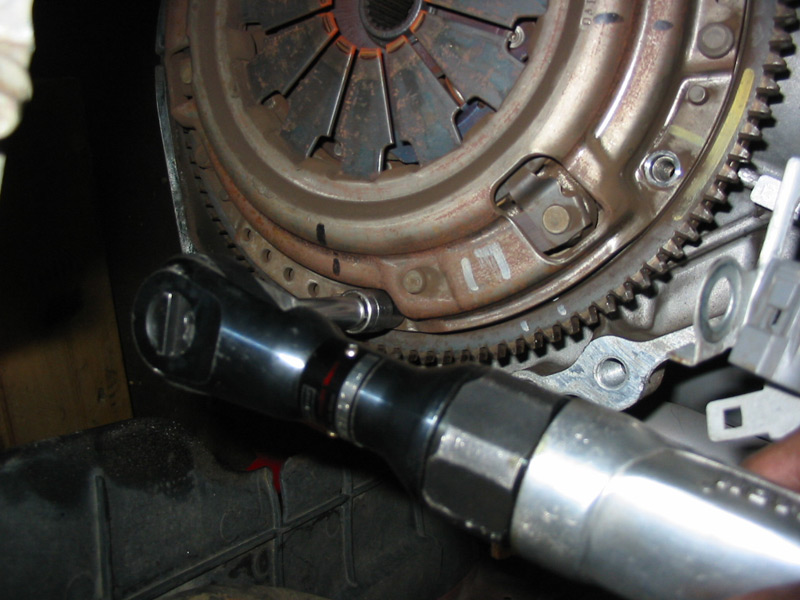
- With the pressure plate and clutch disc off of the flywheel, get a 12 point 17mm socket to remove the 6 flywheel bolts. We used the impact gun here because it is hard to hold the flywheel while loosening these bolts. You may need to wedge something between the teeth of the flywheel and the engine to keep it in place.
- Here's the new flywheel going onto the engine - ACT ProLite:

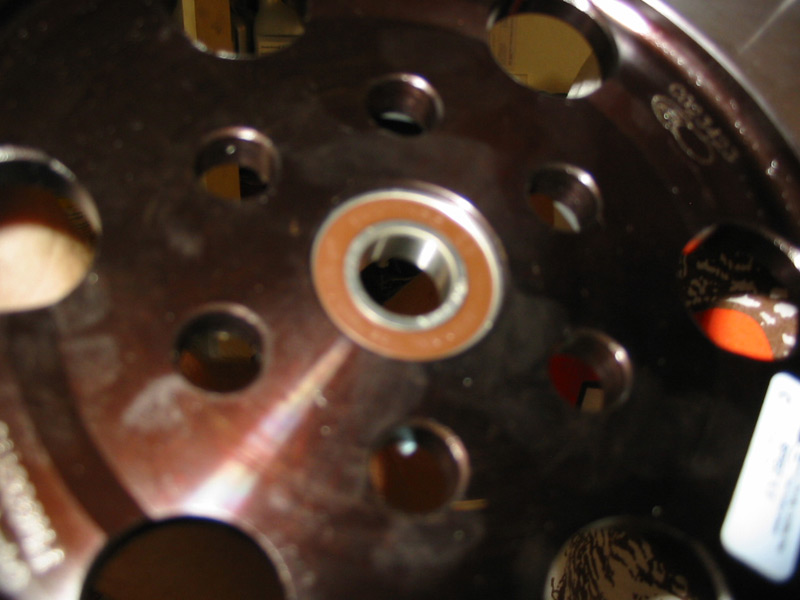
- You can now install the new pilot bearing into the flywheel
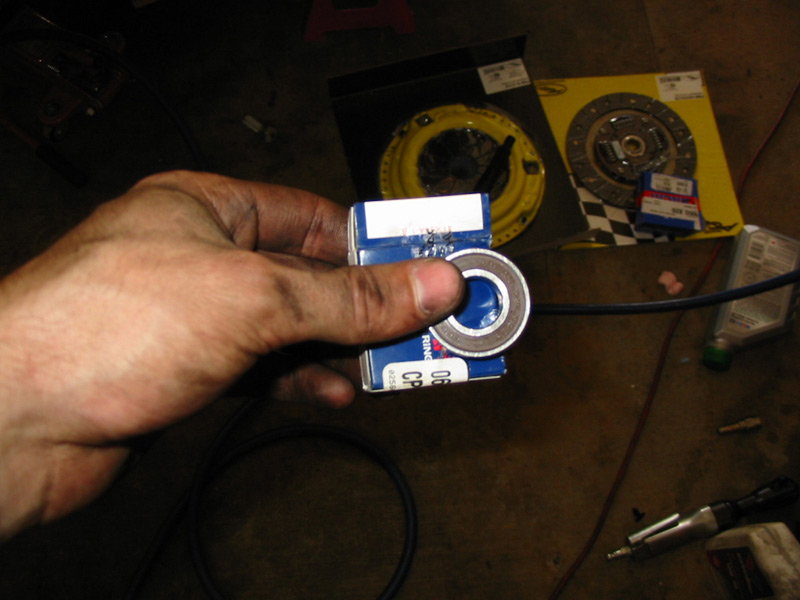
- The bearing can only install from the back of the flywheel because there is a lip for it to anchor to in the front. Use a soft hammer to do this if you can. If not, use a large socket to place over the top of the bearing so that the blow will be distributed evenly over the bearing and not dent it
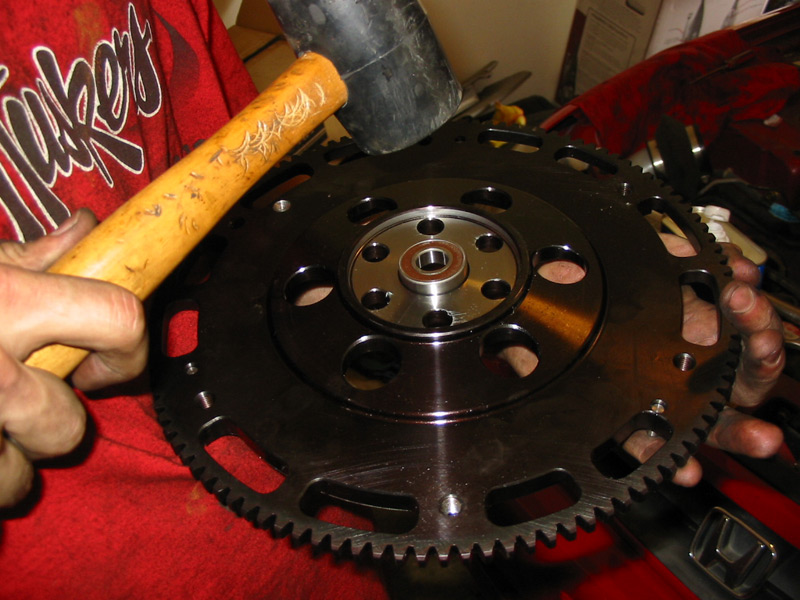
- Here is what the finished product should look like:
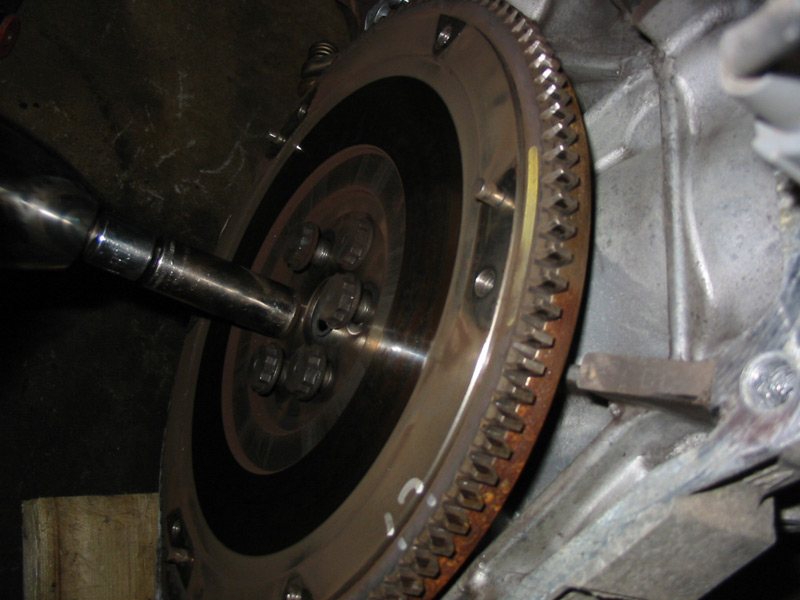
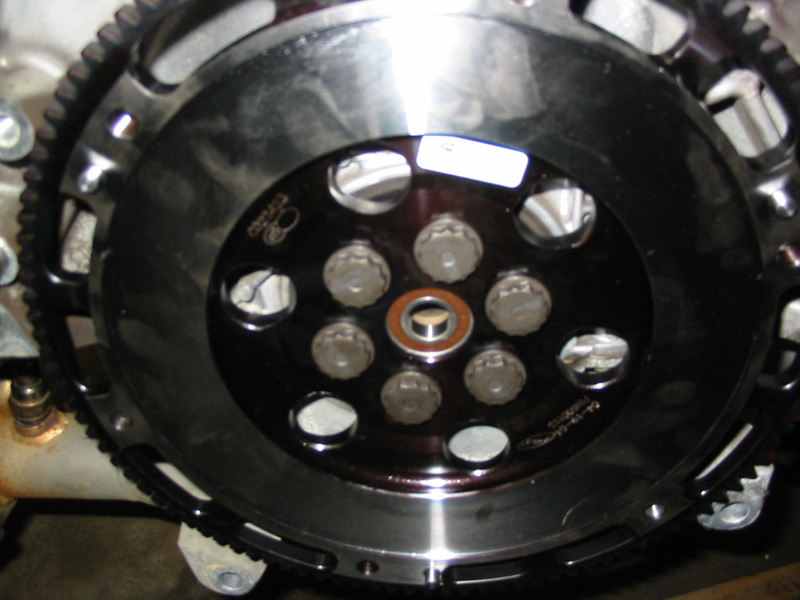
- Reinstall the flywheel onto the engine. Torque the bolts to 87 ft/lbs and remember to tighten them in a criss-cross pattern. Do not go from one to the next. Use something like a crow bar to wedge into the teeth of the flywheel and hold against the engine so that the flywheel will not spin while torquing the bolts.

- Take a shop towel or something with a little amount of lint and put a cleaning agent on there like acetone or alchohol. Clean off the surface of the flywheel where the clutch will be touching.
- The flywheel reinstalled:
- Grab the clutch alignment tool and the clutch disc. Put the alignment tool through the clutch disk so that the smaller end is on the same side as the flat side of the disc. The flat side of the disc will install against the flywheel while the bluged side of the clutch disc will face the tranny.

- Stick the alignment tool into the hole in the pilot bearing and slide the disc forward so that it sits flush against the flywheel.

- Just as you did with the flywheel, clean off the surface of the pressure plate that will touch the clutch disc.
- Press the pressure plate against the flywheel and be aware that there are three studs on the flywheel that the pressure plate mates to. There is only one way that the pressure plate can go onto the flywheel so be sure that you have all of these studs in the right holes. You can't put the pressure plate on wrong with these studs in the wrong holes because there is only one way that it can go on. Once the pressure plate and the flywheel have mated correctly, put all of the bolts back in and tighten the bolts until they are loosly snug. Wiggle the alignment tool until you are absolutely sure that the clutch is correctly centered. When you're sure, tighen the pressure plate bolts to 19 ft/lbs each. Tighten them in a criss-cross pattern and go through them many many times until you are sure that all of them are torqued correctly. Often times with this install you may think you have a pressure plate bolt tight until you tighten 2 or 3 more up and suddenly it's loose again. Be careful and meticulous here.
- When everything is tight, remove the alignment tool.
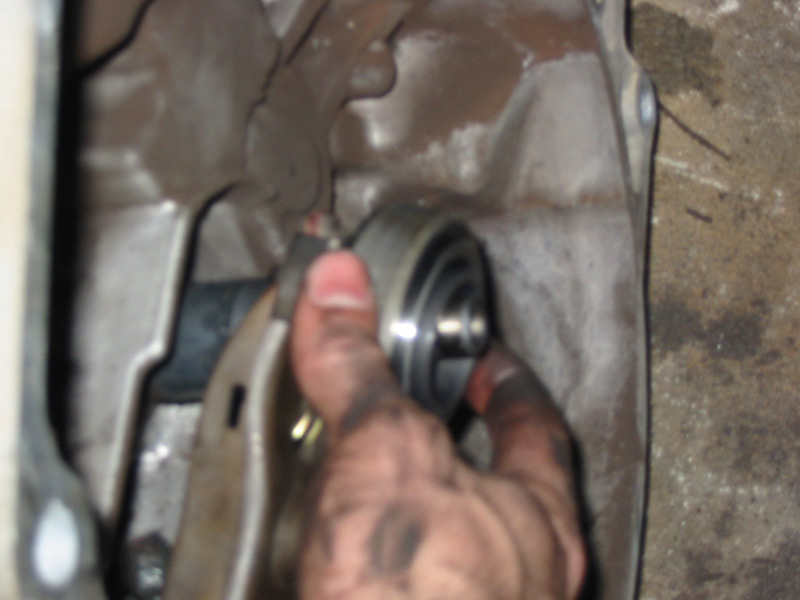
- Now, turn your attention to the open face of the tranny. Remove the old throwout bearing by pulling it away from the tranny. Hopefully the clutch fork will come off too because you will need to remove it to regrease its connections. If it does not pull off with the bearing, you can get it off by pushing the two wires that stick out the sides of the shift fork inside of the fork. This procedure is very difficult to explain, but hopefully it will make sense when you're actually looking at it.
- With the bearing and shift fork off, throw the old bearing away and grab your general purpose grease. Lube up the bulb on the tranny where the shift fork was connected.

- Place the new bearing onto the shift fork and reinstall both of them together. Make sure that the shift fork correctly snaps back into place and if you had to push those wires in, put them back into place before putting it back on the tranny
- Also put a dab of grease onto the splines of the tranny shaft that goes into the motor. This will help keep the shaft from rusing and getting stuck for future removal. Put a bit on the tip as well so that it will help to lube the pilot bearing.
- Now, ahead and pick the tranny up so that you can put the jack back under it.
REMEMBER THAT FLYWHEEL COVER!
First time ever that I've actually hit the 20,000 character limit on a post :shocked:
The rest is in the next post \/