Even-a-caveman Accord axle swap
 07-02-2009, 06:14 PM
#1
Junior Member
Thread Starter

Join Date: Jul 2009
Location: DC Metro
Posts: 3
Likes: 0
Received 0 Likes
on
0 Posts
Backstory:
My cv joints were bad and I needed to pass inspection. I figure I'll save a little time and worry and just replace the whole drive axle assemblies. My first car. I'm on a budget, and save $ where I can.
I'm more mechanically inclined than most, but really, this isn't a hard job if you have the right tools.
Specifically, get air tools. I found a POS air compressor (old sears paint sprayer) in the back of my dad's warehouse and bought an impact wrench, ratchet (3/8) and sockets for $85, and spent a few more on a new hose/connectors off craigslist. Got my jack and jack stands there too. Similar finds on ebay.
If you plan on wrenching on stuff in the future, it's worth it. Or you can just sell the stuff right back on CL. Really though, it pays for itself in one or two jobs.
Whatever, once you get an air ratchet in your hands and hear that sweet sound you'll know what to do.
For educational use only blah blah blah.
_________________________________
Tool & Budget tip
You can get refurbished axles on the cheap. I got mine at NAPA for around $45 each, after I got the core charge back for bringing in the old part.
They have a warranty which makes it an even better deal - this is part of the reason why I replaced the whole axle assembly instead of just fixing the CV boots. Cleaning out those CV joints will take time, effort, and parts that exceed $45 in my mind.
________________________________
Business:
My car is a 1991 Accord lx. Pretty sure these instructions apply to all 90-93's, let me know if I'm wrong. I did both axles, so the side I'm working on in the pic might switch around. Get in there and get dirty, it'll make sense once it's in front of you.
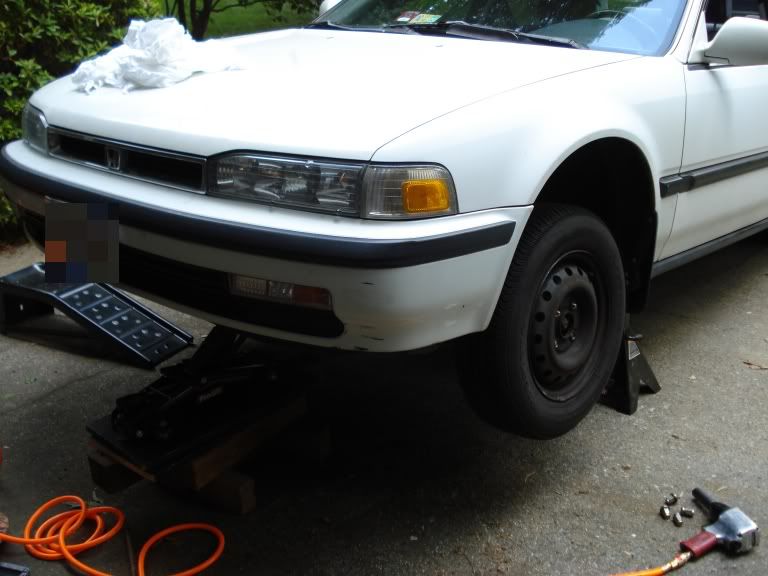
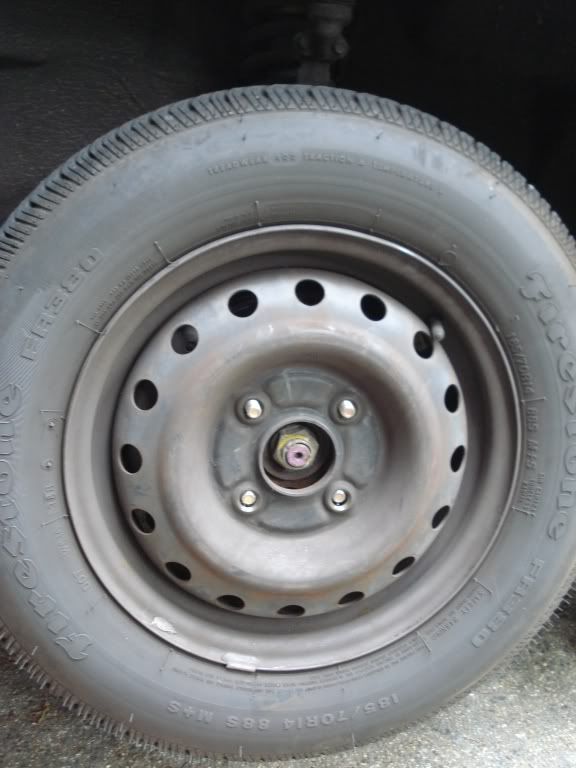
Get that wheel off. You should probably loosen the axle nut first, but i didn't and had no problems doing it up in the air :shrug:. If you're using a breaker bar, you might need the car on the ground.
*Tool & Budget tip
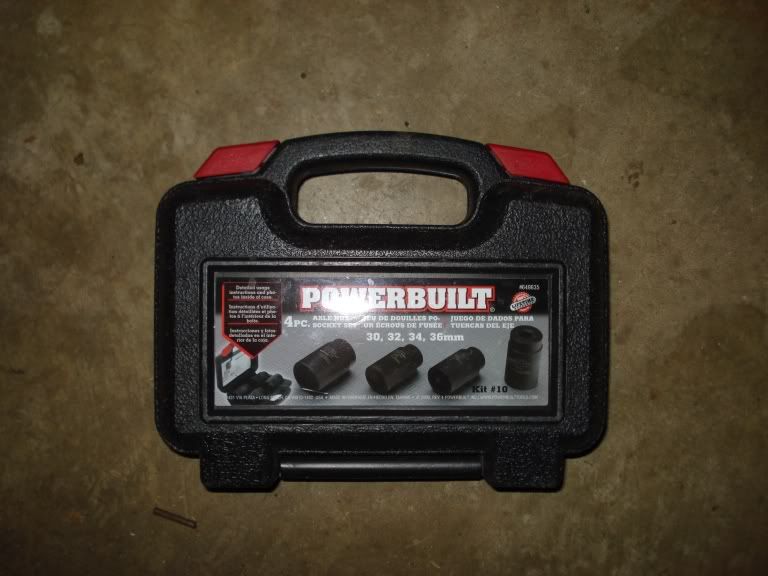
You can borrow an axle sized impact socket set from your local store. I got mine from Advance auto.
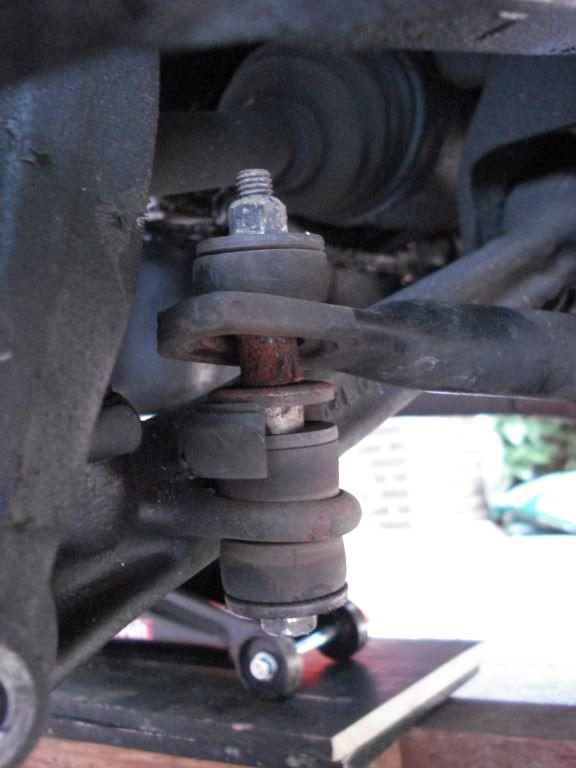
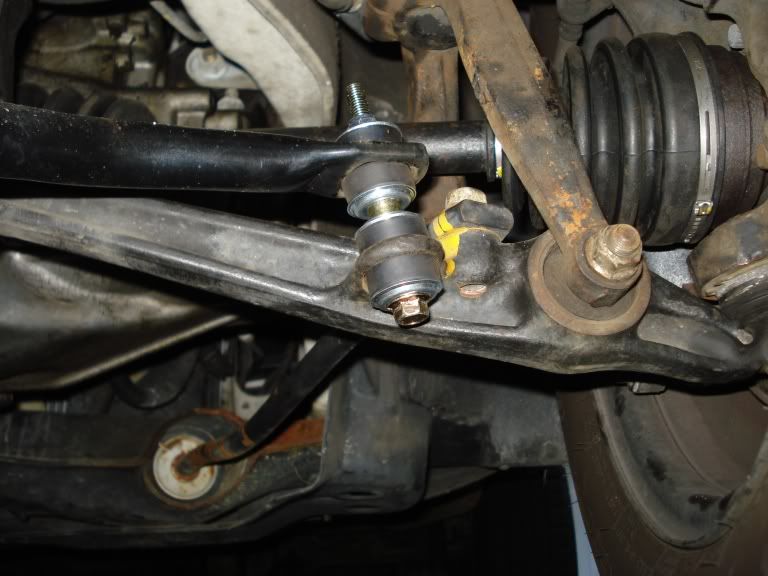
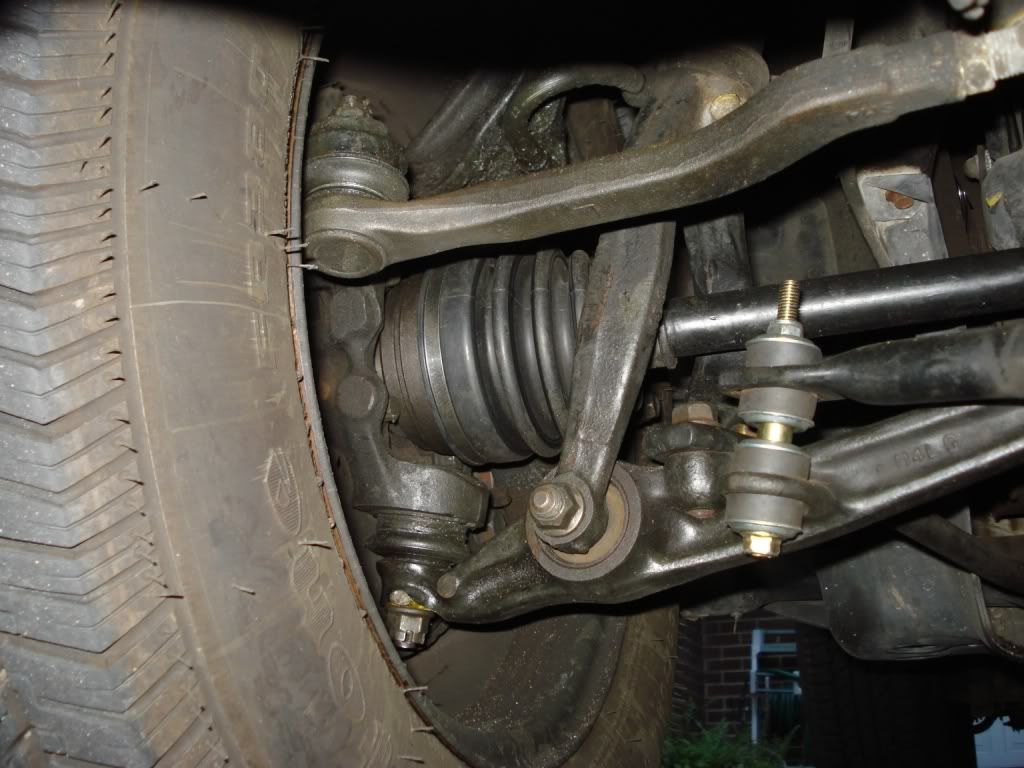
Take a moment to check out how things look. I already knew my stabilizer bar bushings were shot, so I picked those up at NAPA too (ripoff at $15?). These were ugly. I needed a 12 mm on these with a adjustable wrench on one end.
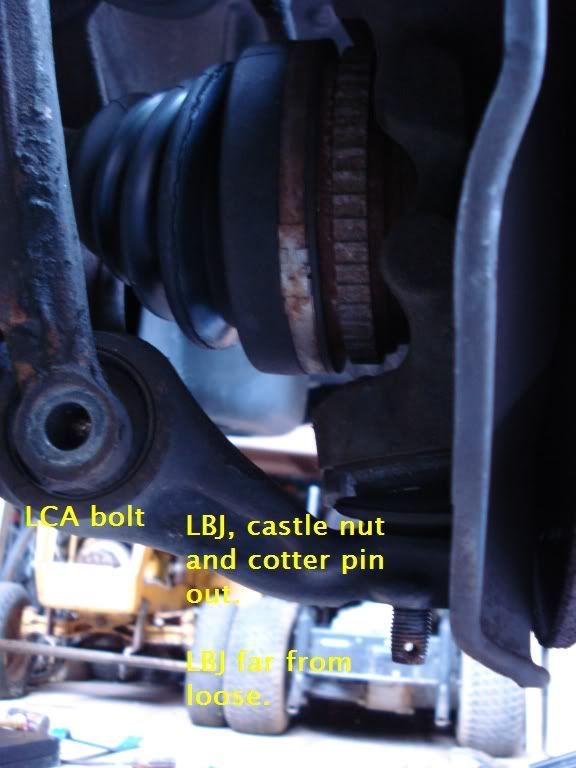
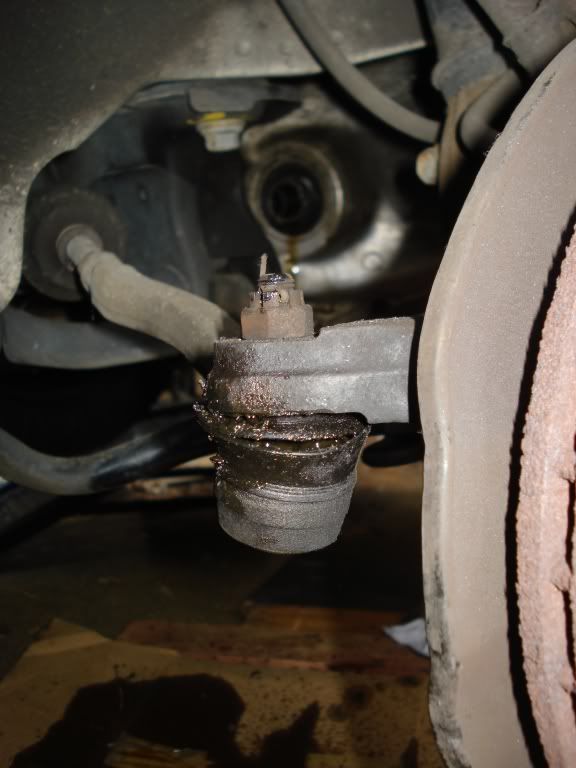
Remove the lower control arm bolt, adjustable wrench on one side. Take the cotter pin out of the lower ball joint nut and take that off. 17mm on both. You might want to remove some other bits, do so at your discretion.
______________________________________________
Disconnecting from the LBJ:
Try to just lift the whole disc/hub straight up off the LBJ. Came off? You're lucky. Otherwise, stick that LCA bolt right back in (tightening not entirely necessary), tighten that castle nut on a few threads for the heck of it, get your jack and a BFH.
How I did it:
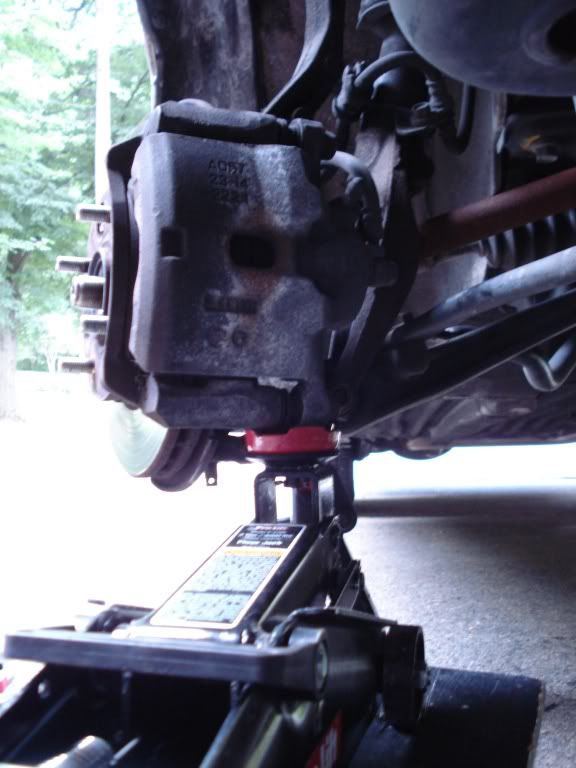
Turn the wheel so you can swing from the front toward the back and get at the LBJ. Place jack under hub, somewhere where it looks beefy. Start jacking. This will compress the spring.
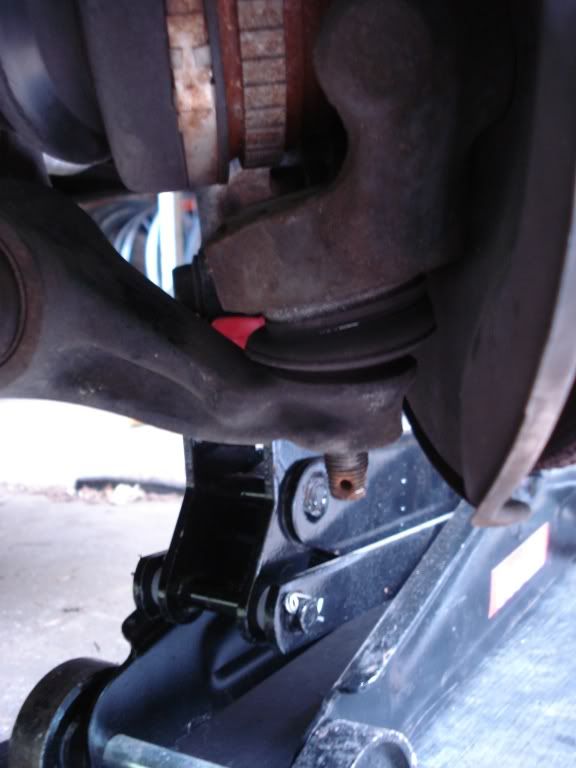
(Pic above sans castle nut, I put in on after.) I swung at the LCA, below the LBJ. Don't hit the LBJ.
HINT: Tapping on it won't do a damn thing. Here's where your martial arts zen powers comes in handy.
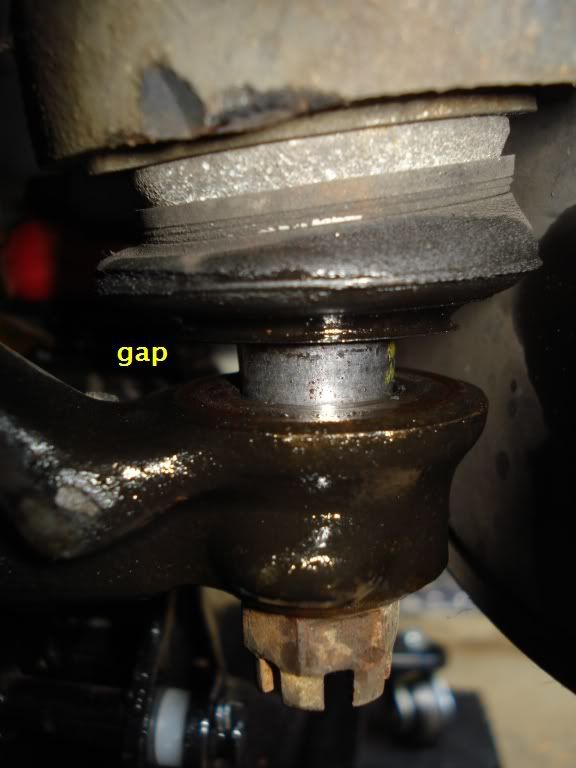
Aim through the the LCA and give it a hard pound. Not a tap, not a hit, not a plop, not a strike, a pound. Again. Check your aim. Once more.
That one sounded different! Look:
Lower jack and take off/out castle nut/LCA bolt. Keep things supported.
____________________________
Ok, work on getting those axle splines out of the hub. For me, they just slid out, you might need a punch. Lift the hub off the LCA, turn it to the side, don't overextend/bend brake lines. It shouldn't be a problem. Keep the axle supported horizontal with wire, a spare hand, or your knee.
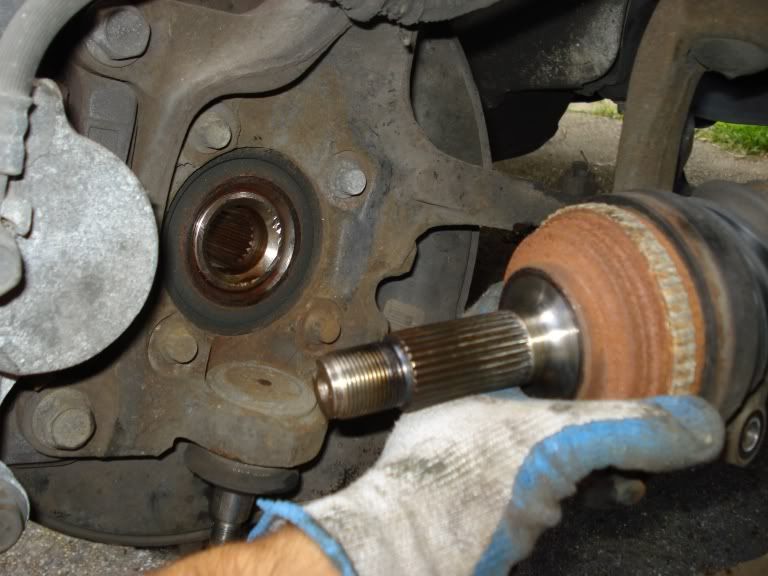
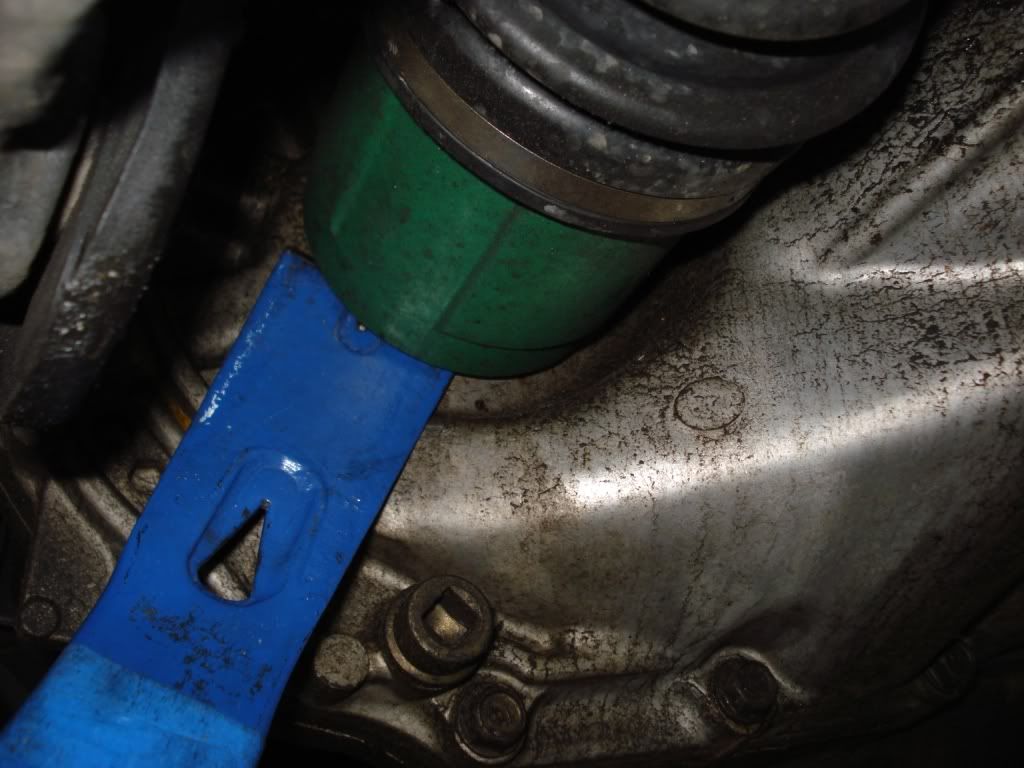
Get a prybar and pry the axle off the intermediate shaft (driver side) or trans (passenger). If doing passenger side, expect some oil to spill out. Put down cardboard/catch can.
This shouldn't be too difficult.
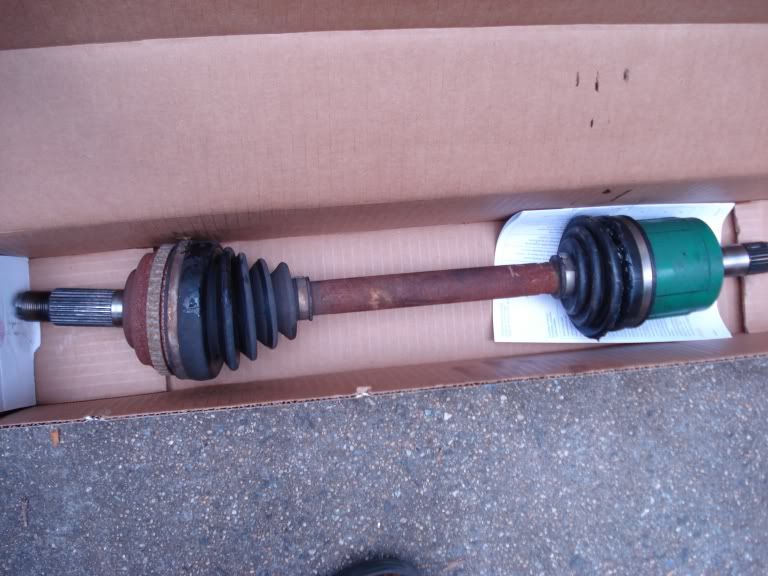
Pull that ugly SOB out and bring it back to NAPA for some cash/store credit.
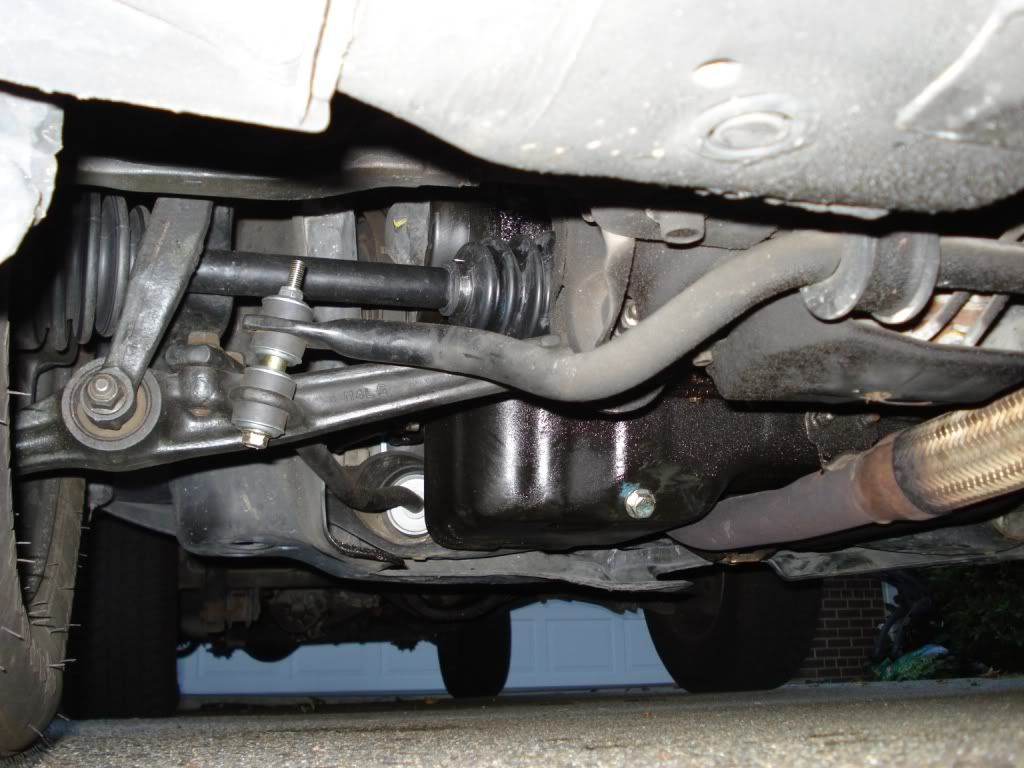
Look around again. I found this joint was bad. Note the trans in the back...
________________________
Putting it back:
Stick the new axle in to the trans/intermediate shaft. Greasing the end is a good idea. I found intermediate to be easier and can be done with two hands. You might need to tap the passenger axle into the trans. Gentler here. It'll slide in all of a sudden and be pressed up to the trans. You should hear a the spring clip (new one supplied on new axle) click into place. Try and pull it out - you shouldn't be able to. Keep axle supported on the loose end.
Grease the other end and get it into the hub.
Check all your connections.
You might want to spray the brake disc with cleaner - check if you got it greasy.
Reverse of the above pretty much.
Use a new cotter pin on the LBJ.
Done.
My cv joints were bad and I needed to pass inspection. I figure I'll save a little time and worry and just replace the whole drive axle assemblies. My first car. I'm on a budget, and save $ where I can.
I'm more mechanically inclined than most, but really, this isn't a hard job if you have the right tools.
Specifically, get air tools. I found a POS air compressor (old sears paint sprayer) in the back of my dad's warehouse and bought an impact wrench, ratchet (3/8) and sockets for $85, and spent a few more on a new hose/connectors off craigslist. Got my jack and jack stands there too. Similar finds on ebay.
If you plan on wrenching on stuff in the future, it's worth it. Or you can just sell the stuff right back on CL. Really though, it pays for itself in one or two jobs.
Whatever, once you get an air ratchet in your hands and hear that sweet sound you'll know what to do.
For educational use only blah blah blah.
_________________________________
Tool & Budget tip
You can get refurbished axles on the cheap. I got mine at NAPA for around $45 each, after I got the core charge back for bringing in the old part.
They have a warranty which makes it an even better deal - this is part of the reason why I replaced the whole axle assembly instead of just fixing the CV boots. Cleaning out those CV joints will take time, effort, and parts that exceed $45 in my mind.
________________________________
Business:
My car is a 1991 Accord lx. Pretty sure these instructions apply to all 90-93's, let me know if I'm wrong. I did both axles, so the side I'm working on in the pic might switch around. Get in there and get dirty, it'll make sense once it's in front of you.
Get that wheel off. You should probably loosen the axle nut first, but i didn't and had no problems doing it up in the air :shrug:. If you're using a breaker bar, you might need the car on the ground.
*Tool & Budget tip
You can borrow an axle sized impact socket set from your local store. I got mine from Advance auto.
Take a moment to check out how things look. I already knew my stabilizer bar bushings were shot, so I picked those up at NAPA too (ripoff at $15?). These were ugly. I needed a 12 mm on these with a adjustable wrench on one end.
Remove the lower control arm bolt, adjustable wrench on one side. Take the cotter pin out of the lower ball joint nut and take that off. 17mm on both. You might want to remove some other bits, do so at your discretion.
______________________________________________
Disconnecting from the LBJ:
Try to just lift the whole disc/hub straight up off the LBJ. Came off? You're lucky. Otherwise, stick that LCA bolt right back in (tightening not entirely necessary), tighten that castle nut on a few threads for the heck of it, get your jack and a BFH.
How I did it:
Turn the wheel so you can swing from the front toward the back and get at the LBJ. Place jack under hub, somewhere where it looks beefy. Start jacking. This will compress the spring.
(Pic above sans castle nut, I put in on after.) I swung at the LCA, below the LBJ. Don't hit the LBJ.
HINT: Tapping on it won't do a damn thing. Here's where your martial arts zen powers comes in handy.
Aim through the the LCA and give it a hard pound. Not a tap, not a hit, not a plop, not a strike, a pound. Again. Check your aim. Once more.
That one sounded different! Look:
Lower jack and take off/out castle nut/LCA bolt. Keep things supported.
____________________________
Ok, work on getting those axle splines out of the hub. For me, they just slid out, you might need a punch. Lift the hub off the LCA, turn it to the side, don't overextend/bend brake lines. It shouldn't be a problem. Keep the axle supported horizontal with wire, a spare hand, or your knee.
Get a prybar and pry the axle off the intermediate shaft (driver side) or trans (passenger). If doing passenger side, expect some oil to spill out. Put down cardboard/catch can.
This shouldn't be too difficult.
Pull that ugly SOB out and bring it back to NAPA for some cash/store credit.
Look around again. I found this joint was bad. Note the trans in the back...
________________________
Putting it back:
Stick the new axle in to the trans/intermediate shaft. Greasing the end is a good idea. I found intermediate to be easier and can be done with two hands. You might need to tap the passenger axle into the trans. Gentler here. It'll slide in all of a sudden and be pressed up to the trans. You should hear a the spring clip (new one supplied on new axle) click into place. Try and pull it out - you shouldn't be able to. Keep axle supported on the loose end.
Grease the other end and get it into the hub.
Check all your connections.
You might want to spray the brake disc with cleaner - check if you got it greasy.
Reverse of the above pretty much.
Use a new cotter pin on the LBJ.
Done.
Last edited by Aluminum; 07-09-2009 at 05:20 PM.
 08-15-2009, 06:50 PM
#2
Living and Learning FTW
Join Date: Aug 2009
Location: La Crosse, WI
Posts: 33
Likes: 0
Received 0 Likes
on
0 Posts
dont forget to take a screwdriver and punch the edge down around the notch in the axle nut. 
EDIT I advise not to attempt to pull on the axle to test if its in place. that small action may hurt the joint. instead take a screwdriver and apply a small amount of force to pry it out. just enough to feel if there is any resistance to coming out.
EDIT I advise not to attempt to pull on the axle to test if its in place. that small action may hurt the joint. instead take a screwdriver and apply a small amount of force to pry it out. just enough to feel if there is any resistance to coming out.
Last edited by mattliston; 08-15-2009 at 06:54 PM.

