anyone know how to take headlights apart?
 06-08-2006, 04:16 PM
#1
Member
Thread Starter

Join Date: Mar 2006
Posts: 49
Likes: 0
Received 0 Likes
on
0 Posts
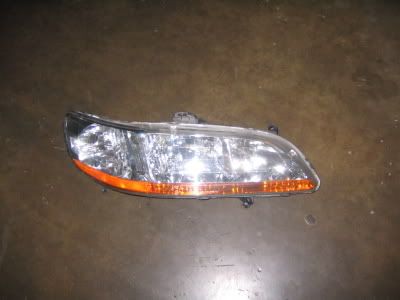
Hello guys. i was just wondering that i want to take headlights apart and open them. 1st) is it possible? 2) what are my chances of headlight not working after i've opened it. I want to do a retrofit and try it myself but just before i start the job i have few questions which i would like to ask and have different opinions on it
 06-08-2006, 04:49 PM
#2
Jizz Maste12
Join Date: Jun 2002
Location: DISNEYLAND!
Posts: 702
Likes: 0
Received 0 Likes
on
0 Posts
You'll need a screw driver, a knife, and some silicon to glue it back together.
YOu got your head light
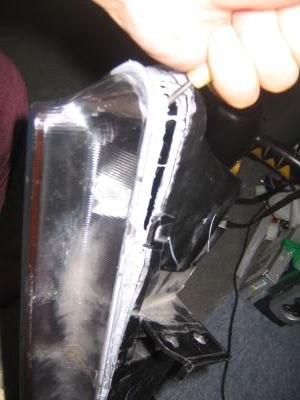
Take your screw driver and pry the hosing off by removing the glue

Once your able to pry it a little take your knife and cut the glue (silicon) with your screw driver continue to pry and cut the excess glue.
You get the idea.
YOu got your head light
Take your screw driver and pry the hosing off by removing the glue
Once your able to pry it a little take your knife and cut the glue (silicon) with your screw driver continue to pry and cut the excess glue.
You get the idea.
06-09-2006, 09:43 PM
#4
In the depths of my mind
Join Date: Mar 2002
Location: Right behind you
Posts: 948
Likes: 0
Received 0 Likes
on
0 Posts
Before trying to pry the housing apart, make sure you get ALL the screws in the housing and I do mean ALL OF THEM. There was one that I didn't see the first time, and now one of my lights is off by a little bit.
To reseal them, just head to your local hardware store and buy some silicone sealant.
To reseal them, just head to your local hardware store and buy some silicone sealant.
06-10-2006, 02:38 PM
#6
Older Honda Fanatic
Join Date: Jul 2002
Location: Adirondacks of NY
Posts: 3,154
Likes: 0
Received 0 Likes
on
0 Posts
check www.hidplanet.com, they have a ton of write-ups to help you out... search around before asking any questions, as most basic topics have been covered a few times... they're not always the friendliest group over there, but know what they're talkin about when it comes to headlights.
06-10-2006, 03:03 PM
#7

the easy was to do it is to take off the clips ,screws,bulbs then set your oven rack up so the lights fit preheat the oven to 250 when it gets there turn off oven stick the lights in there wait 10 mins pull them out and use a a flat head screwdriver or 2 and it should pull appart easy ...then after the retrofit do the same to put them back together . did that for my 94 with S2k projectors and worked like a charm.
06-11-2006, 08:28 AM
#8
Senior Member

Join Date: Apr 2003
Location: North Kingstown, RI
Posts: 152
Likes: 0
Received 0 Likes
on
0 Posts
I just did this with my 6th gen tail lights a couple days ago, to blackhouse the blinker and remove the orange. Definitely use the oven trick, however, be careful.
I did mine at 260 at first, and left it in for about 15 minutes. This turned out to be a little too long, because it ended up warping it a little bit. It wasn't too bad, so luckily I was able to put it back together without it looking awful.
But anyway, just be careful. I reccomend doing 225 degrees for about 8 minutes, then trying it, then putting it back in for 2-3 minutes at a time, until you can get it apart easily. It doesn't take much to melt that glue.
Also, an easy way to get the watertight seal back together is to heat it BACK up, before you close it together again, then just squeeze the hell out of it to make sure it's sealed. You may want to put some silicon glue in there if you see any areas without much glue left.
Hope that helps