Omnipower front camber kit install
 03-07-2005, 12:12 PM
#1
Still here... sorta...
Thread Starter
Hello all. 
This DIY was completed on a '95 Civic, but is virtually the same for all Integras & Civics (and maybe more). This DIY will also provide information to replace the OEM upper control arms (UCA) and the OEM bushings. The kicker to this is that I already have the Ingalls kit installed so it will look a little differently for those of you with the OEM bushings still in place. Not to worry, they look and uninstall the same.
This DIY will likely work for the Skunk2 camber kit as well considering the design is almost identical.
Here we go:
Tools List:
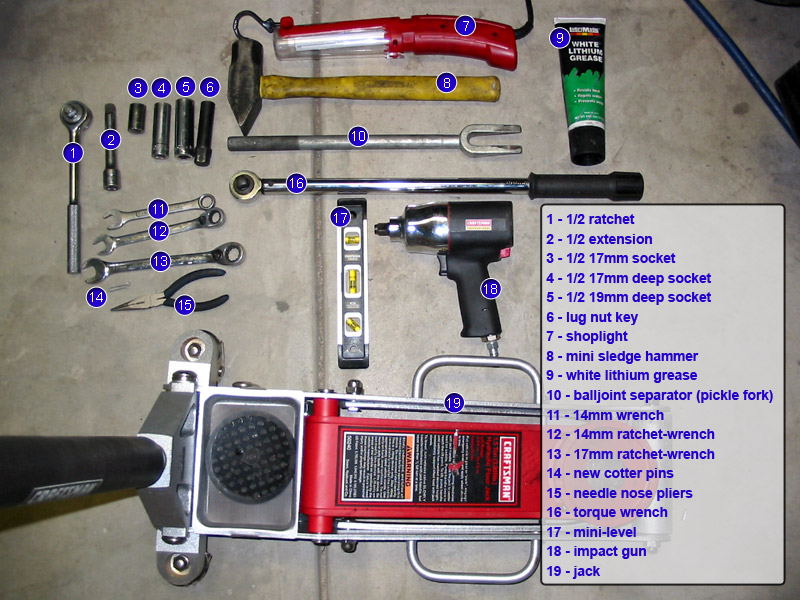
(not shown: 7mm allen wrench for camber adjustment)
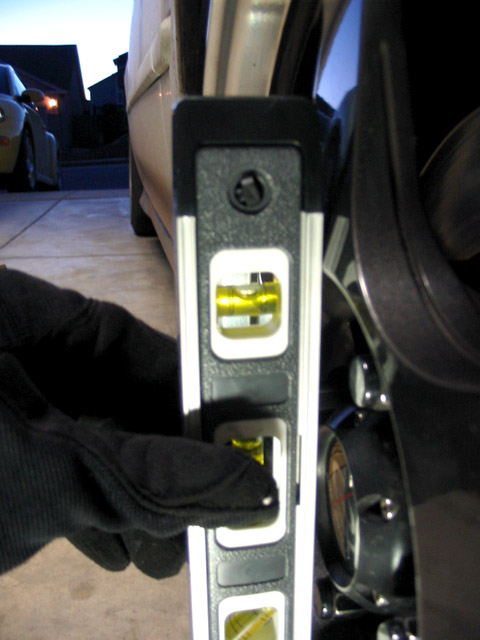
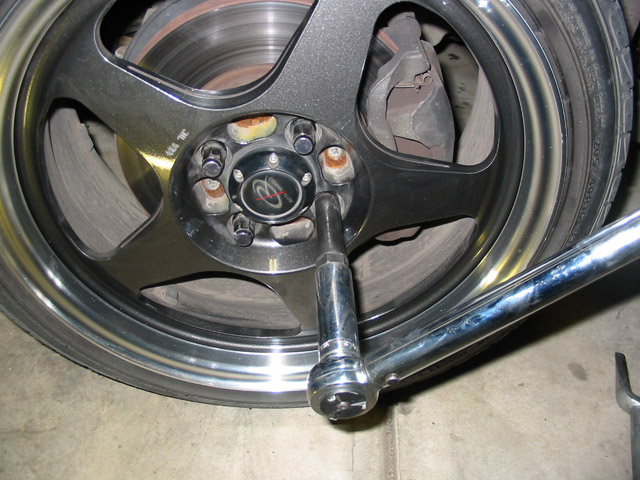
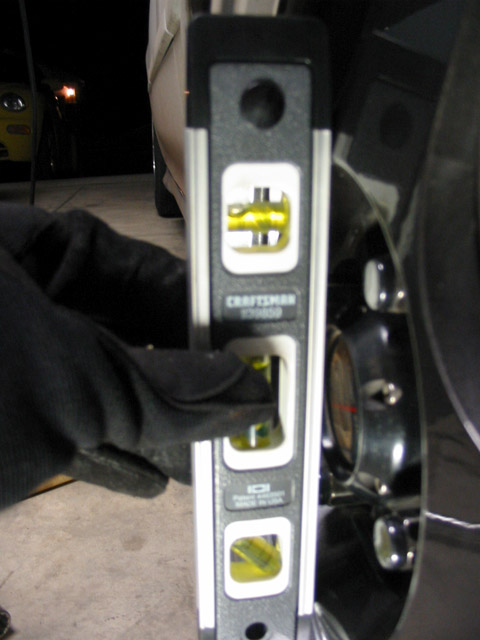
1) I began by using the level against the wheel to see where my camber was (before jacking up the car). Theoretically, your wheel/tire should be perpendicular to the ground; thus, the wheel should be level.
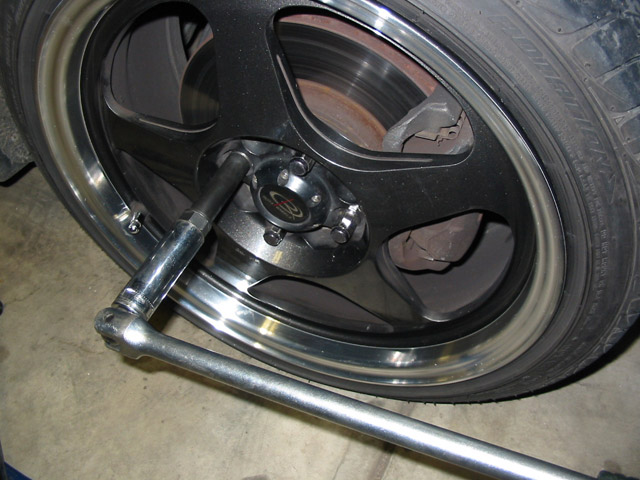
2a) If you are using a breaker bar, break the lugs loose before jacking up the car.
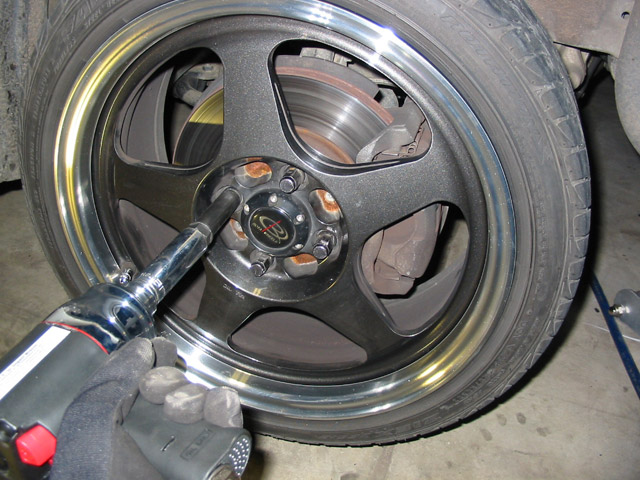
2b) If you are using an impact gun, you can jack the car up first and then remove the wheel.
3) Use the needle nose pliers to remove the cotter pin in the castle nut on the upper balljoint.
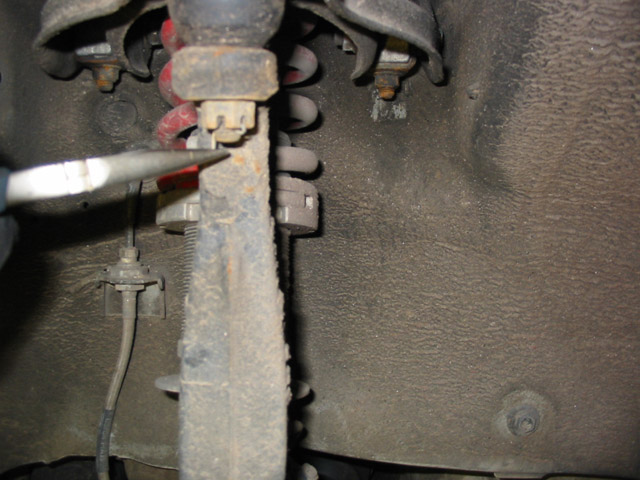
4) Use the 17mm wrench to loosen the upper balljoint castle nut.
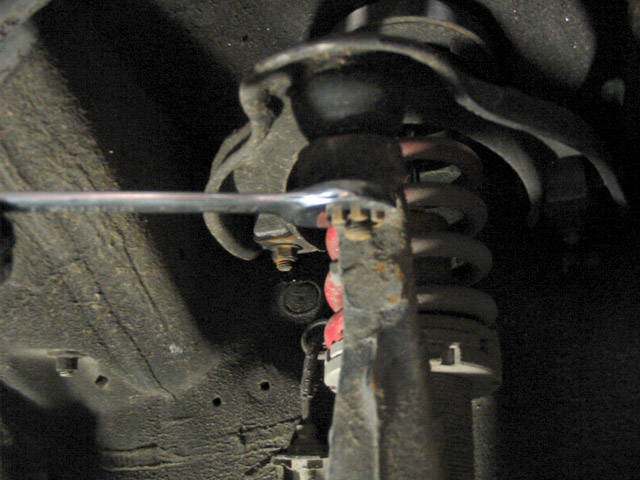
5) Use the pickle fork and mini-sledge hammer to separate the UCA from the rest of the suspension. For those of you that use other tools for this, good for you. In the words of Napoleon Dynamite: "I'll do what I want.. GOSH!"
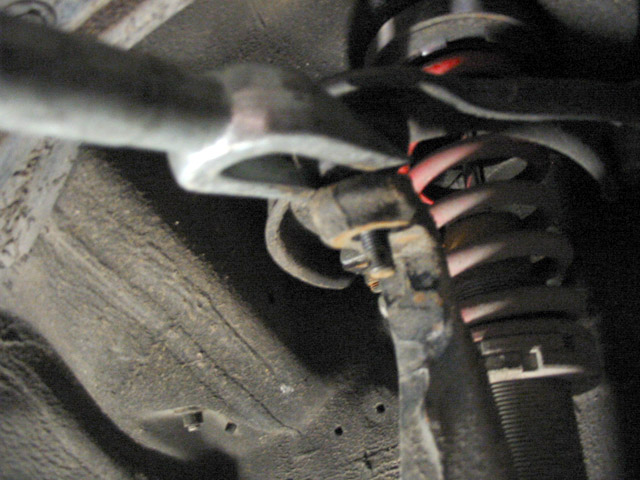
6) With the UCA separated, move the lower suspension assembly out of the way.
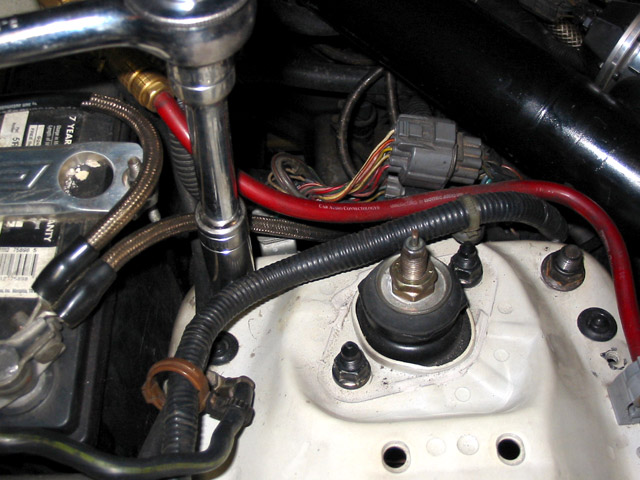
7) Remove the nuts holding the UCA bushing assembly from within the engine bay. I believe the OEM nuts are 17mm.
8) Pull the UCA assembly out of the holes. If you still have the OEM assembly on the car then this will be a bit different. There is a connecting bar that will not allow you to pull the entire assembly away from the car. You will simply use the two 14mm wrenches to remove the bolts so you can separate the bushing assembly from the UCA. I will continue on with the way mine was.
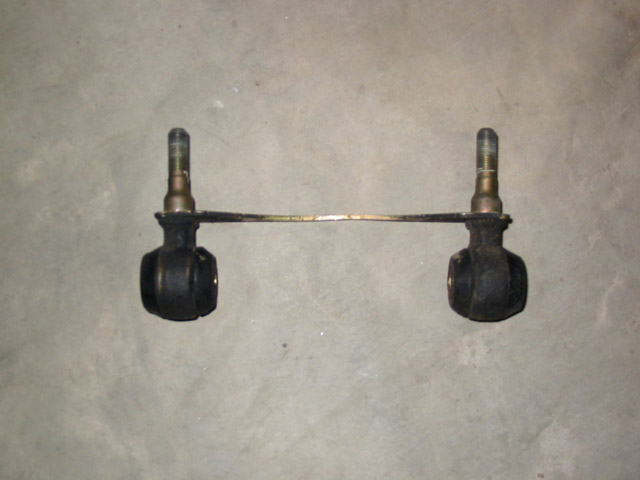
The OEM bushings look like this:
Removing the assembly:
9) Use the two 14mm wrenches to remove the bushings (Ingalls kit in my case) from the UCA.
10) If you did not have the OEM assembly on the car then you will need to slide the bushing assembly back up behind the strut assembly. If you have the OEM assembly on the car then you will already have the bushing assembly close to this position.

11) Lube up the nonthread portion of the bolts with a bit of the Lithium Grease.
12) Be sure you have the correct camber adjustable UCA for the side you are working on (specific marking is that of the Omnipower UCA, Skunk2 may be different).
13) Install the new UCA onto the bushing assembly and insert the bolts so that they push toward the strut assembly.
14) Using the 14mm wrenches, tighten the new UCA onto the bushing assembly.
15) Install the full assembly by inserting the bushing assembly studs back into the holes.
16) While holding the UCA assembly with one had so that it will not fall back through the holes, use the other hand to reinstall a nut onto the bushing assembly stud.
17) You can then let go of the UCA assembly and put the other nut on the bushing assembly stud. Complete this portion by torquing the nuts to 47 ft/lbs.
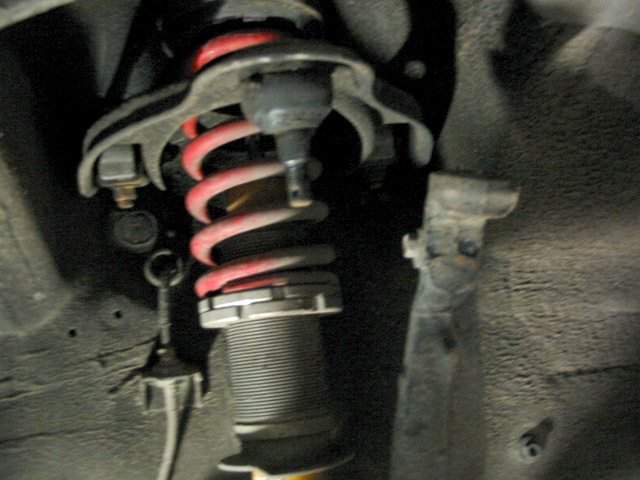
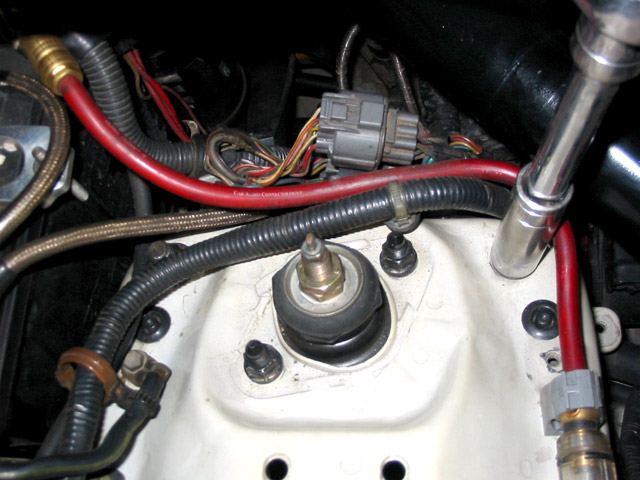
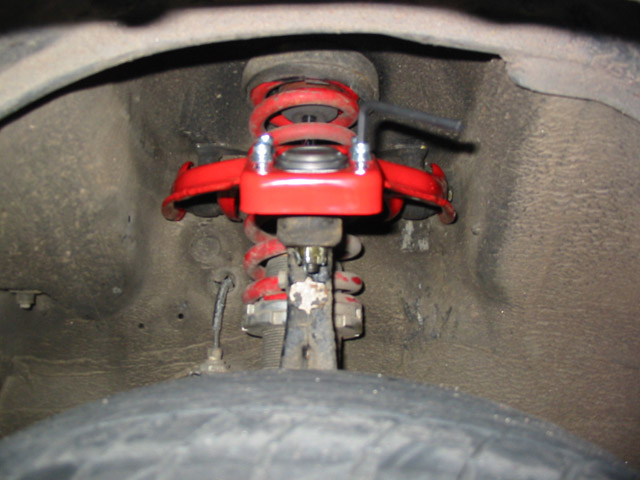
18) This is what the installed assembly should look like.
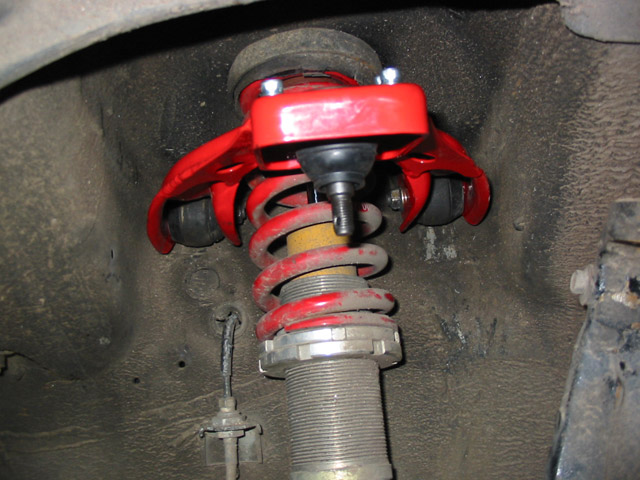
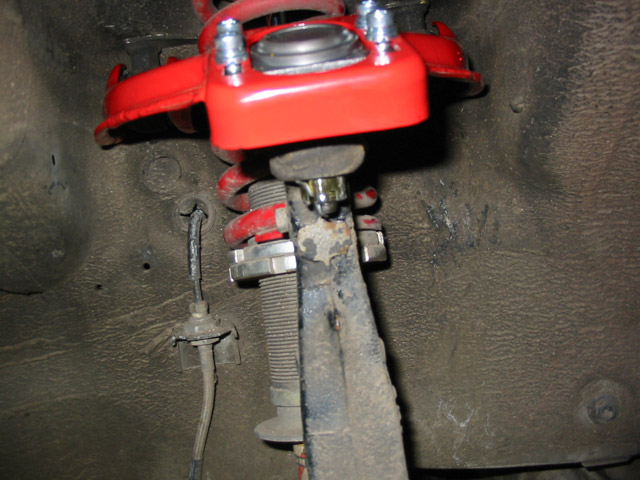
19) Connect the lower suspension assembly to the new UCA balljoint.
20) Place the new castle nut on the balljoint stud and torque the nut to 32 ft/lbs.
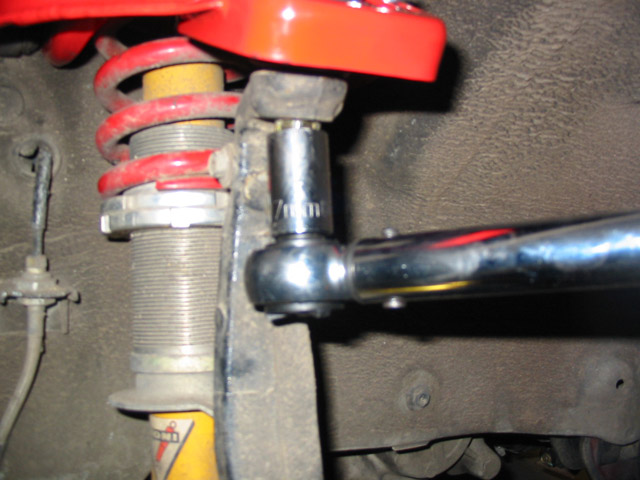
21) Install the new cotter pin onto the castle nut.
22) Place the wheel back on the car and hand-tighten the lugs onto the wheel. Lower the car and torque the lugs to 80 ft/lbs.
23) Check the level again to see where the camber is.
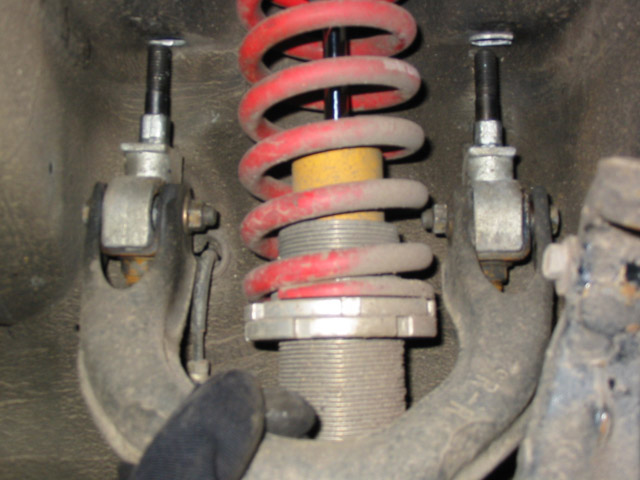
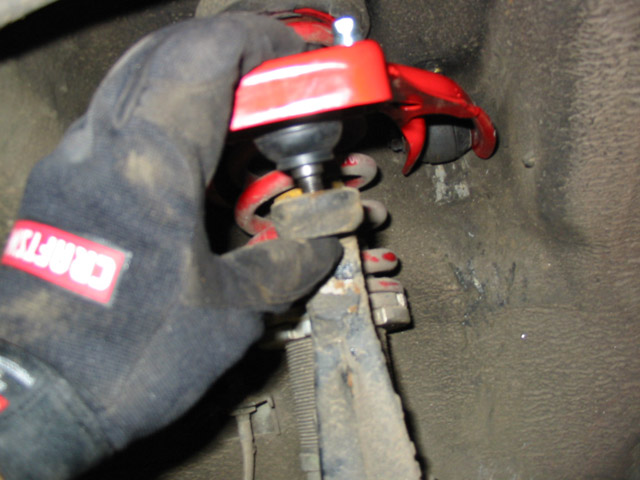
24) The camber is obviously worse than it was so I will adjust it by raising the car back up and pulling the top of the wheel out using the new adjustable UCA. This requires the use of a 7mm allen wrench (not shown in the tools list above).
25) Make minor adjustments lowering the car between the adjustments until you have the camber adjusted to a reasonable setting. I recommend putting the nonperminant (blue) loctite on the adjuster bolts to be sure that they don't move. Do not overtighten these bolts either, that has been proven to be another reason that they can come loose.
That's it, simple enough.
Glad to help out.
This DIY was completed on a '95 Civic, but is virtually the same for all Integras & Civics (and maybe more). This DIY will also provide information to replace the OEM upper control arms (UCA) and the OEM bushings. The kicker to this is that I already have the Ingalls kit installed so it will look a little differently for those of you with the OEM bushings still in place. Not to worry, they look and uninstall the same.
This DIY will likely work for the Skunk2 camber kit as well considering the design is almost identical.
Here we go:
Tools List:
(not shown: 7mm allen wrench for camber adjustment)
1) I began by using the level against the wheel to see where my camber was (before jacking up the car). Theoretically, your wheel/tire should be perpendicular to the ground; thus, the wheel should be level.
2a) If you are using a breaker bar, break the lugs loose before jacking up the car.
2b) If you are using an impact gun, you can jack the car up first and then remove the wheel.
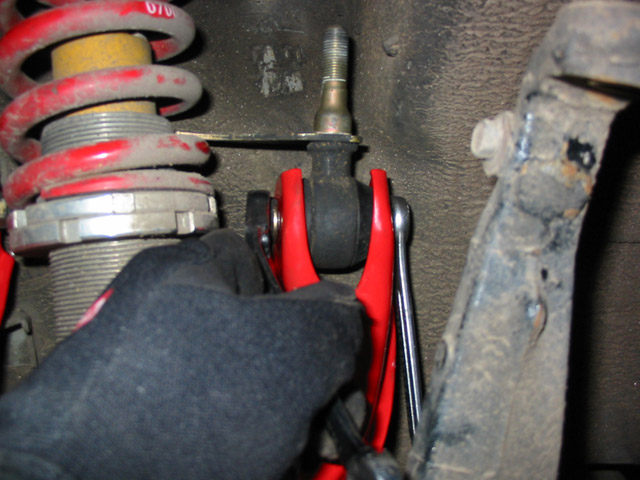
3) Use the needle nose pliers to remove the cotter pin in the castle nut on the upper balljoint.
4) Use the 17mm wrench to loosen the upper balljoint castle nut.
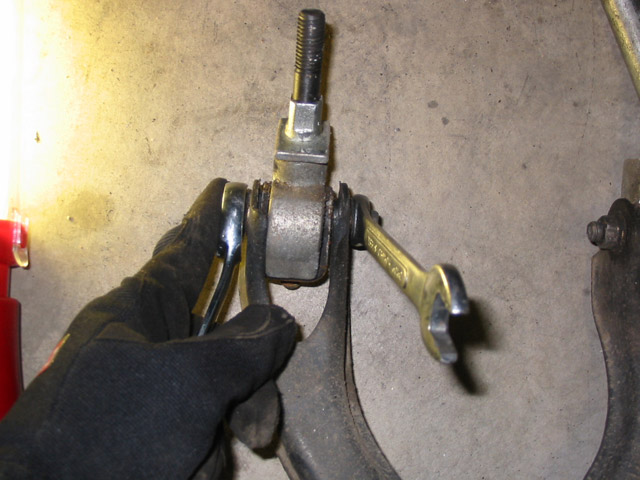
5) Use the pickle fork and mini-sledge hammer to separate the UCA from the rest of the suspension. For those of you that use other tools for this, good for you. In the words of Napoleon Dynamite: "I'll do what I want.. GOSH!"
6) With the UCA separated, move the lower suspension assembly out of the way.
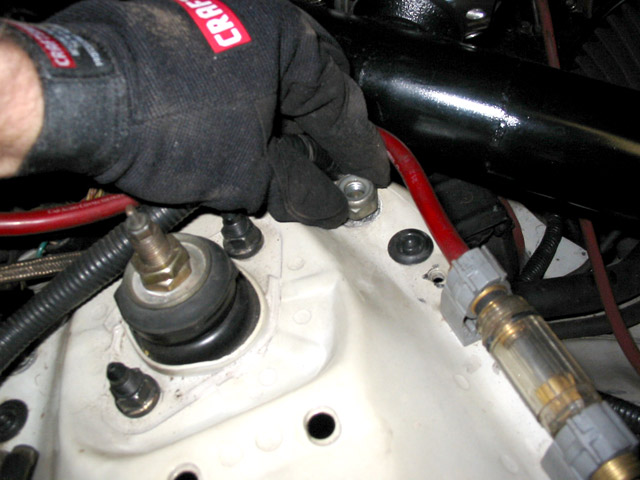
7) Remove the nuts holding the UCA bushing assembly from within the engine bay. I believe the OEM nuts are 17mm.
8) Pull the UCA assembly out of the holes. If you still have the OEM assembly on the car then this will be a bit different. There is a connecting bar that will not allow you to pull the entire assembly away from the car. You will simply use the two 14mm wrenches to remove the bolts so you can separate the bushing assembly from the UCA. I will continue on with the way mine was.
The OEM bushings look like this:
Removing the assembly:
9) Use the two 14mm wrenches to remove the bushings (Ingalls kit in my case) from the UCA.
10) If you did not have the OEM assembly on the car then you will need to slide the bushing assembly back up behind the strut assembly. If you have the OEM assembly on the car then you will already have the bushing assembly close to this position.
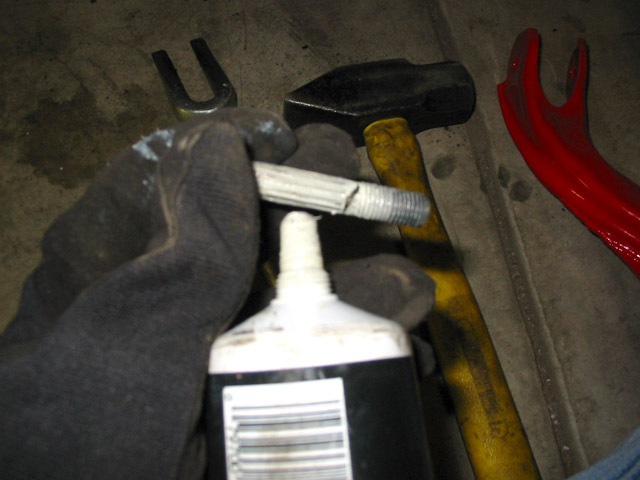
11) Lube up the nonthread portion of the bolts with a bit of the Lithium Grease.
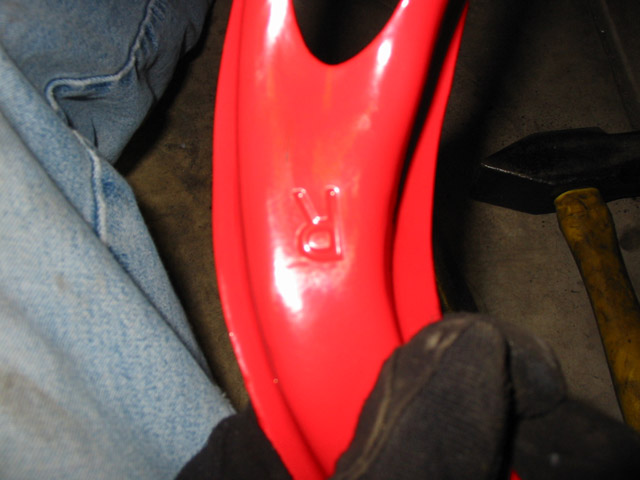
12) Be sure you have the correct camber adjustable UCA for the side you are working on (specific marking is that of the Omnipower UCA, Skunk2 may be different).
13) Install the new UCA onto the bushing assembly and insert the bolts so that they push toward the strut assembly.
14) Using the 14mm wrenches, tighten the new UCA onto the bushing assembly.
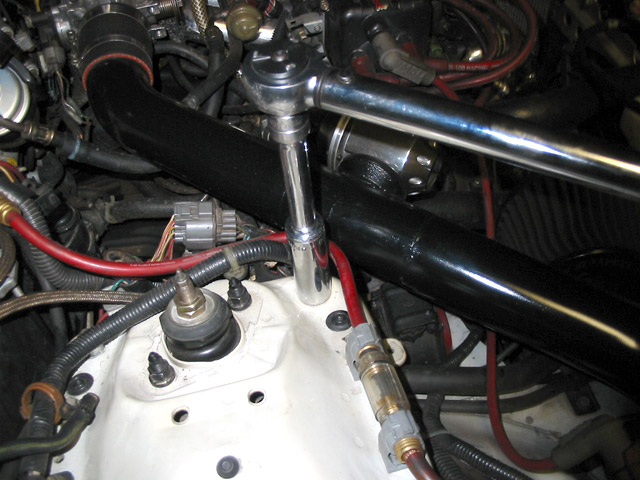
15) Install the full assembly by inserting the bushing assembly studs back into the holes.
16) While holding the UCA assembly with one had so that it will not fall back through the holes, use the other hand to reinstall a nut onto the bushing assembly stud.
17) You can then let go of the UCA assembly and put the other nut on the bushing assembly stud. Complete this portion by torquing the nuts to 47 ft/lbs.
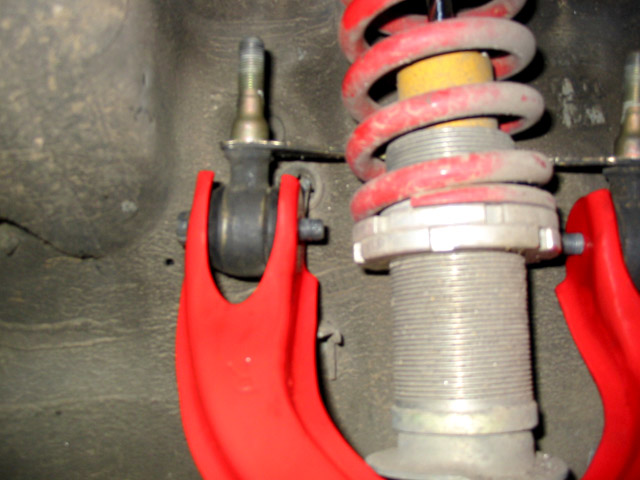
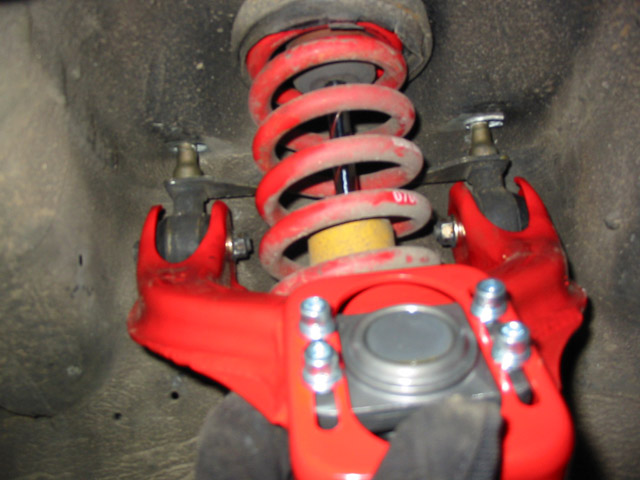
18) This is what the installed assembly should look like.
19) Connect the lower suspension assembly to the new UCA balljoint.
20) Place the new castle nut on the balljoint stud and torque the nut to 32 ft/lbs.
21) Install the new cotter pin onto the castle nut.
22) Place the wheel back on the car and hand-tighten the lugs onto the wheel. Lower the car and torque the lugs to 80 ft/lbs.
23) Check the level again to see where the camber is.
24) The camber is obviously worse than it was so I will adjust it by raising the car back up and pulling the top of the wheel out using the new adjustable UCA. This requires the use of a 7mm allen wrench (not shown in the tools list above).
25) Make minor adjustments lowering the car between the adjustments until you have the camber adjusted to a reasonable setting. I recommend putting the nonperminant (blue) loctite on the adjuster bolts to be sure that they don't move. Do not overtighten these bolts either, that has been proven to be another reason that they can come loose.
That's it, simple enough.
Glad to help out.
Last edited by westcoaststyle; 03-07-2005 at 01:12 PM.
 03-07-2005, 01:32 PM
#4
HAN Approved Vendor
Join Date: Mar 2004
Posts: 357
Likes: 0
Received 0 Likes
on
0 Posts
The torque specs on the allen heads used for adjustment are 7 ft/lbs.
Overtightening is one of the big reasons for failure. Basically people tighten the allenheads so much the UCA slots deform, metal has horrible elastic properties so the material ends up being thinner than when you first received them, therefor it leaves nothing for the allenheads to grip onto.
Great work WC!
Last edited by FunctionMotoring; 03-07-2005 at 01:35 PM.
03-08-2005, 06:45 AM
#6
Still here... sorta...
Thread Starter
Originally Posted by lkailburn
ugh what a crappy walk through geez.
haha jk
wcs you make the BEST writeup's evAr
haha jk
wcs you make the BEST writeup's evAr

Thanks man, I like being thorough.
03-08-2005, 05:28 PM
#8
Still here... sorta...
Thread Starter
Originally Posted by lkailburn
i've got your clutch/fly one bookmarked waiting for the springtime :yes:

I'll have a Bseries intake manifold replacement, head gasket replacement, timing belt and all that goes with that fairly soon.