Honda Civic 96-00: DIY CTR Headlights Guide(with Pictures)
 03-16-2003, 03:06 PM
#1
Still here... sorta...
Thread Starter
Ok, we FINALLY did this thing the right way and took some pics to help eveyone out. Here's the DIY, enjoy! :thumbup:
Tools/Supplies
- Dupi-Color Gunmetal spray paint
- Alchohol and clean rag
- Heat gun/blowdryer (prefer the heat gun)
- Old kitchen knife that you can destroy
- Oven big enough to fit the headlight on a tray in
- PATIENCE
The Process
First things first:
Remove the headlights from the car by taking off the front bumper (center plastic clips, 2 lower 10mm bolts, 2 screws under the bumper, 2 screws at each fender)
Then, remove the headlights by taking off the 4 10mm bolts from each headlight. Don't forget to disconnect the headlight connector and the corner bulb (once the headlight is free).
Ok, the headlights are now off the car and ready to be disected. :naughty:
- Start by removing the light bulb from the housing.
- Preheat the oven to 325 deg.
- When the oven is ready, place the headlight housing onto a baking sheet and put it in the oven for appx. 2 min (you may need to repeat this step until the silicon is plyable enough to work with)
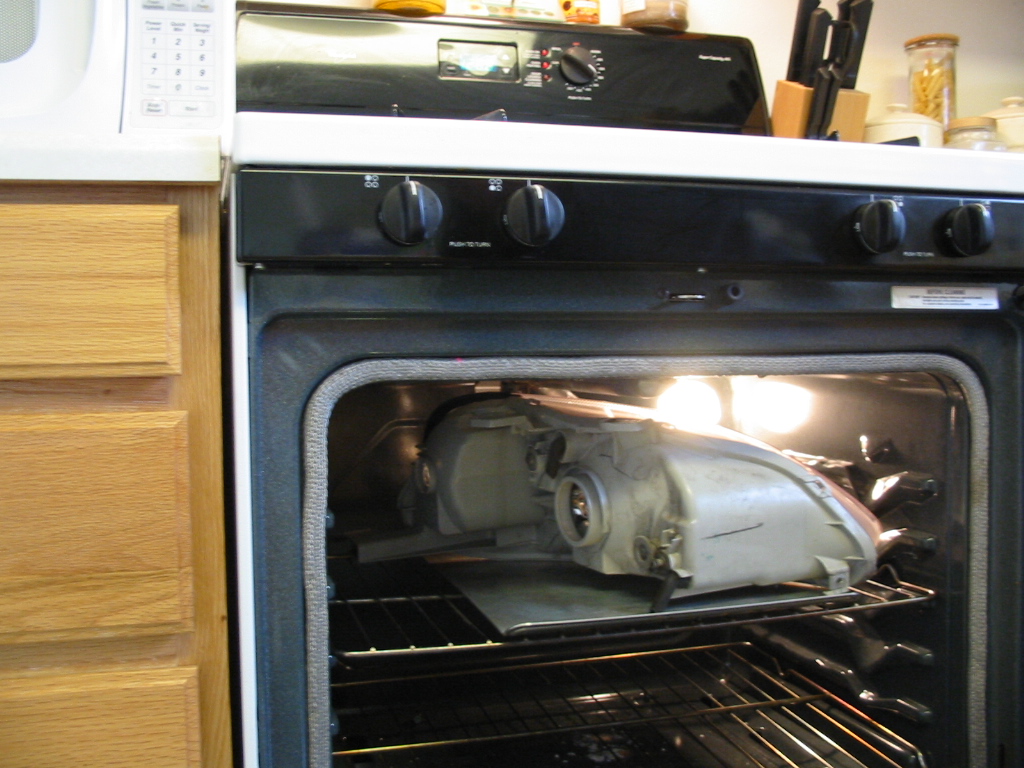
- Remove the housing from the oven (with the pan it's on)
- Place the housing on the counter or whatever surface you choose (we used a towel) and put the baking sheet in another spot as you will be using it again
- Use the blunt side of the knife to pry the outer plastic piece away from the housing. You will need to use the heat gun/blowdryer at this point to help you get it apart. Also, be aware of the little clips and be sure to unclip them without breaking or melting them

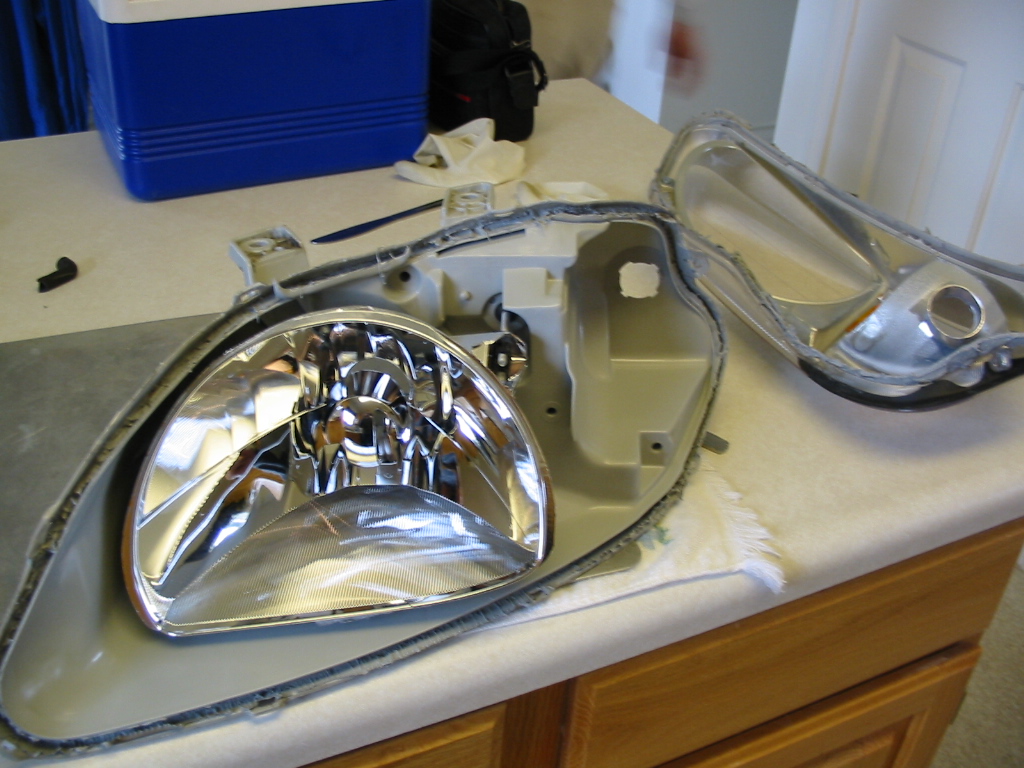
- With the clear housing now off, remove the 2 phillips-head screws holding the reflective piece to the clear lense and pull the chrome housing from the clear lense, but be careful to not get the silicon on the chrome piece

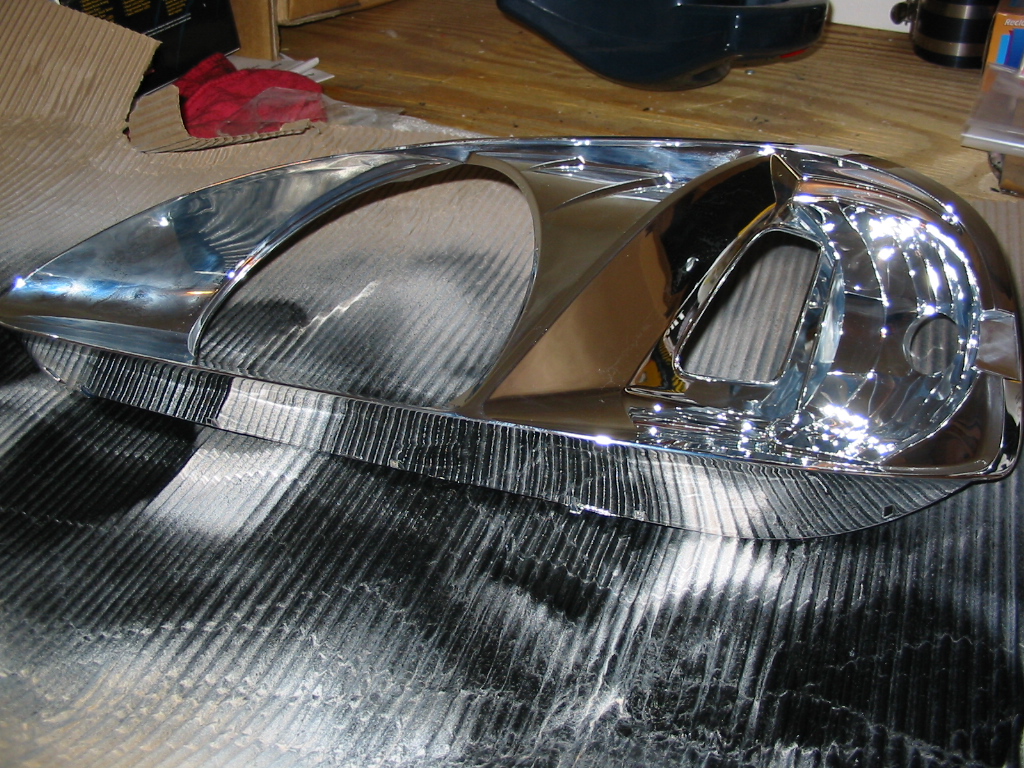
- Prepping the housing is easy, but requires patience: use the alchohol and rag and wipe all over the chrome piece. I rubbed enough to where the chrome was actually rubbing off. You will be painting over this part so that does not matter. BE SURE! to wipe into the crevaces very well or the paint will not stick.
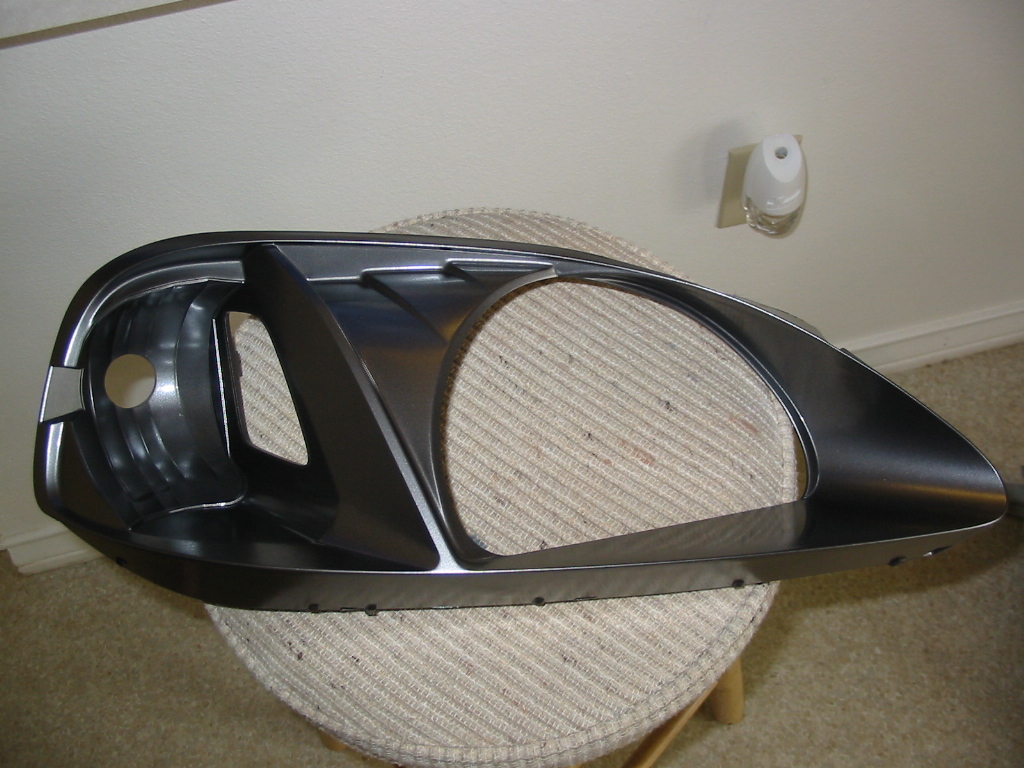
- Let the alchohol dry COMPLETELY! and begin painting the housing by spraying very lightly. Do not spray a thick coat on yet, apply a VERY light coat and give it a couple of minutes to dry.

- When the first coat has set for a few minutes, apply a second, thicker coat, but be careful not to overwhelm one area as the paint will run and ruin your project. After this coat is applied, you may want to go work on your other headlight to give this housing enough time to dry.
- Keep applying coats until you are satisfied with the result
EXTRA DIY!!
This part is a little extra that we decided to do on the fly:
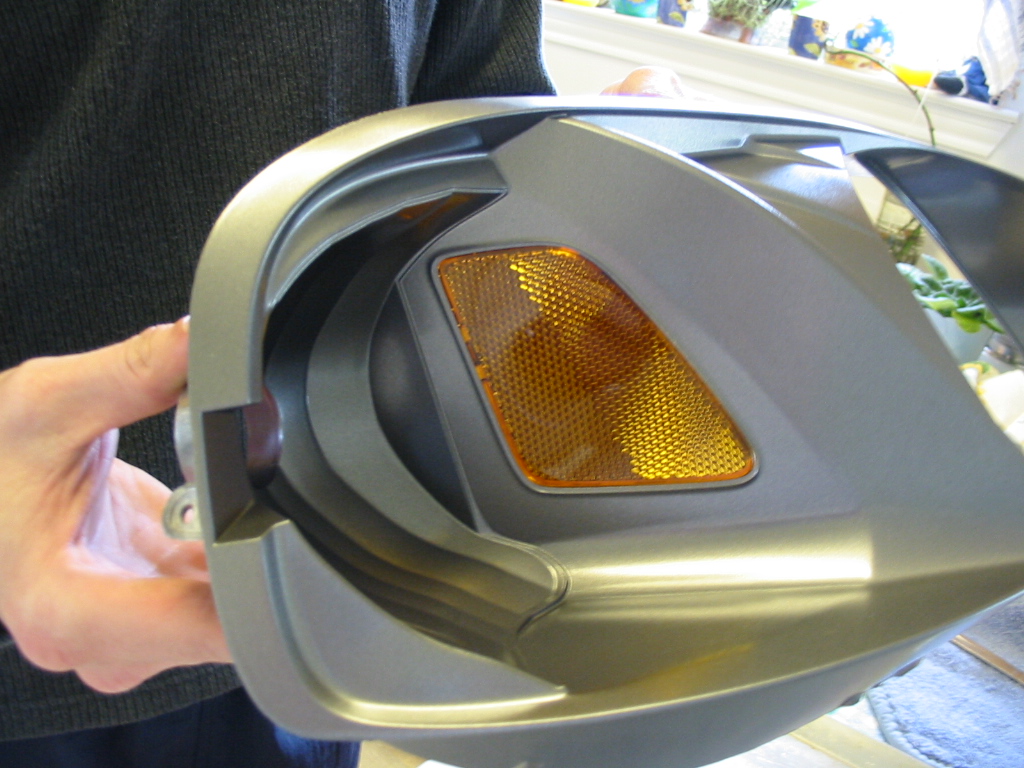
I happen to have some spare Black Transparent Window Tinting model paint left from a model I did and the amber reflectors were just a little too bright for our liking. So, we sprayed the rough side of the amber reflector with a couple of quick coats of the paint. The result was AWESOME!!!!

back on track...
- Reinstall the painted piece into the clear housing and screw it down
- be careful not to get silicon on the painted piece as it will show through and make you very mad
- use the heat gun/blowdryer on the main housing edges to heat the silicon back up -- do this on the clear housing as well
- with both edges sticky, reinstall the clear housing back onto the main housing.
- use the heat gun/blowdryer to help you get the snaps back on
- with the housing as far on as you can get, place the headlight back onto the baking sheet and into the oven for another couple of minutes
- when you remove it, immediately place the headlight into clamps or have something to hold it together (we used an old towel, wrapped the headlight in the towel and duct taped around the towel as tighly as we could for about 10 minutes)
END RESULT
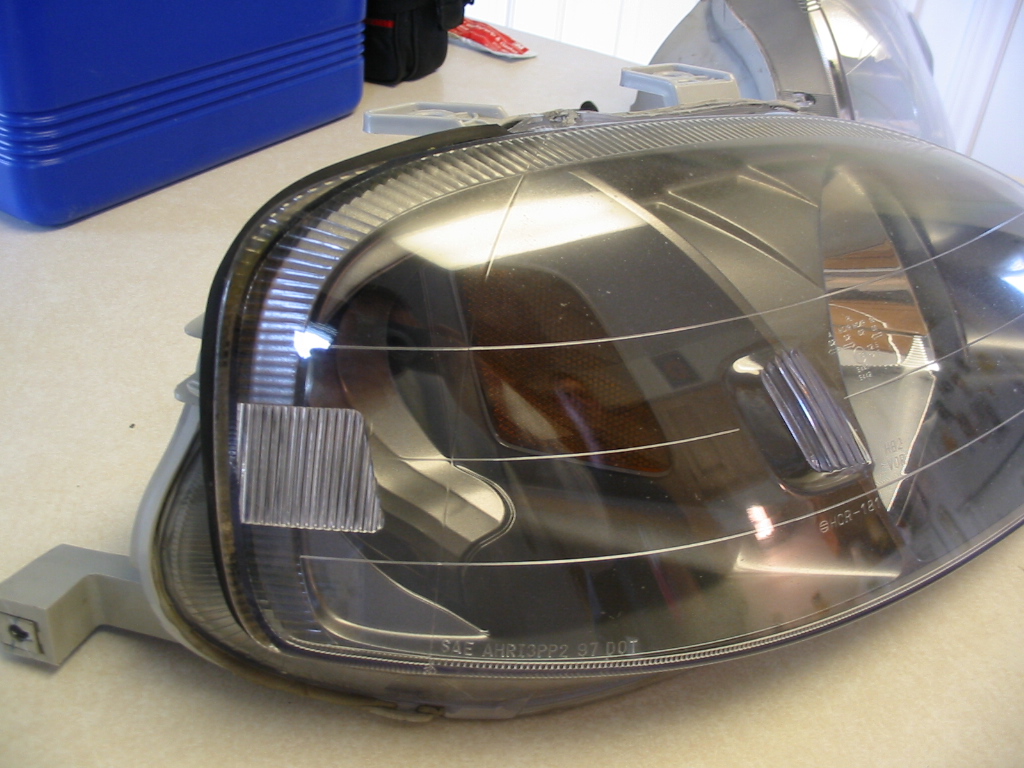
Here's how they turned out.

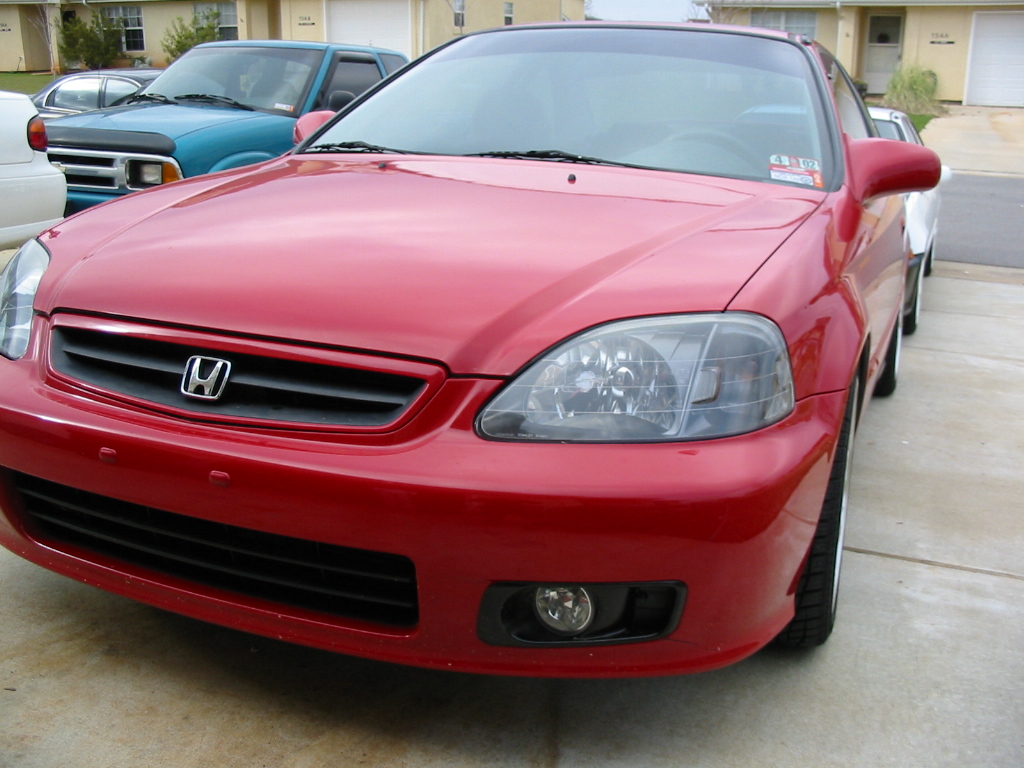
And, on the car. h: :drool:
LESSONS LEARNED
1. DO NOT leave the baking sheet in the oven while you work on one headlight and just go set the headlight onto the sheet - THE HEADLIGHT WILL MELT!!! Always remove the sheet with the headlight and set it aside.
2. Patience is the best tool to have here. The paint runs very easily on the chrome surface so spray a bunch of thin coats
3. Don't force anything, if it's not working, step away from the project and come back to it. It's not worth breaking something when you're trying to upgrade.
4. You may have to place the housing in the oven for longer or shorter time spans to get it right. We used the heat gun more than anything, but be careful not to heat one spot for too long or it will melt.
That's it, I hope it helps eveyone. This was a SWEEEEET!! mod and his car looks uber cooler now.
Thanks!
ADDITION - 27 APR 03
Learned today that you can get the headlight apart much easier and faster by putting the headlight in the oven for 325 deg. for 2 min 45 sec. MUCH EASIER! FYI.
Tools/Supplies
- Dupi-Color Gunmetal spray paint
- Alchohol and clean rag
- Heat gun/blowdryer (prefer the heat gun)
- Old kitchen knife that you can destroy
- Oven big enough to fit the headlight on a tray in
- PATIENCE
The Process
First things first:
Remove the headlights from the car by taking off the front bumper (center plastic clips, 2 lower 10mm bolts, 2 screws under the bumper, 2 screws at each fender)
Then, remove the headlights by taking off the 4 10mm bolts from each headlight. Don't forget to disconnect the headlight connector and the corner bulb (once the headlight is free).
Ok, the headlights are now off the car and ready to be disected. :naughty:
- Start by removing the light bulb from the housing.
- Preheat the oven to 325 deg.
- When the oven is ready, place the headlight housing onto a baking sheet and put it in the oven for appx. 2 min (you may need to repeat this step until the silicon is plyable enough to work with)
- Remove the housing from the oven (with the pan it's on)
- Place the housing on the counter or whatever surface you choose (we used a towel) and put the baking sheet in another spot as you will be using it again
- Use the blunt side of the knife to pry the outer plastic piece away from the housing. You will need to use the heat gun/blowdryer at this point to help you get it apart. Also, be aware of the little clips and be sure to unclip them without breaking or melting them
- With the clear housing now off, remove the 2 phillips-head screws holding the reflective piece to the clear lense and pull the chrome housing from the clear lense, but be careful to not get the silicon on the chrome piece
- Prepping the housing is easy, but requires patience: use the alchohol and rag and wipe all over the chrome piece. I rubbed enough to where the chrome was actually rubbing off. You will be painting over this part so that does not matter. BE SURE! to wipe into the crevaces very well or the paint will not stick.
- Let the alchohol dry COMPLETELY! and begin painting the housing by spraying very lightly. Do not spray a thick coat on yet, apply a VERY light coat and give it a couple of minutes to dry.
- When the first coat has set for a few minutes, apply a second, thicker coat, but be careful not to overwhelm one area as the paint will run and ruin your project. After this coat is applied, you may want to go work on your other headlight to give this housing enough time to dry.
- Keep applying coats until you are satisfied with the result
EXTRA DIY!!
This part is a little extra that we decided to do on the fly:
I happen to have some spare Black Transparent Window Tinting model paint left from a model I did and the amber reflectors were just a little too bright for our liking. So, we sprayed the rough side of the amber reflector with a couple of quick coats of the paint. The result was AWESOME!!!!
back on track...
- Reinstall the painted piece into the clear housing and screw it down
- be careful not to get silicon on the painted piece as it will show through and make you very mad
- use the heat gun/blowdryer on the main housing edges to heat the silicon back up -- do this on the clear housing as well
- with both edges sticky, reinstall the clear housing back onto the main housing.
- use the heat gun/blowdryer to help you get the snaps back on
- with the housing as far on as you can get, place the headlight back onto the baking sheet and into the oven for another couple of minutes
- when you remove it, immediately place the headlight into clamps or have something to hold it together (we used an old towel, wrapped the headlight in the towel and duct taped around the towel as tighly as we could for about 10 minutes)
END RESULT
Here's how they turned out.
And, on the car.
h: :drool:LESSONS LEARNED
1. DO NOT leave the baking sheet in the oven while you work on one headlight and just go set the headlight onto the sheet - THE HEADLIGHT WILL MELT!!! Always remove the sheet with the headlight and set it aside.
2. Patience is the best tool to have here. The paint runs very easily on the chrome surface so spray a bunch of thin coats
3. Don't force anything, if it's not working, step away from the project and come back to it. It's not worth breaking something when you're trying to upgrade.
4. You may have to place the housing in the oven for longer or shorter time spans to get it right. We used the heat gun more than anything, but be careful not to heat one spot for too long or it will melt.
That's it, I hope it helps eveyone. This was a SWEEEEET!! mod and his car looks uber cooler now.
Thanks!
ADDITION - 27 APR 03
Learned today that you can get the headlight apart much easier and faster by putting the headlight in the oven for 325 deg. for 2 min 45 sec. MUCH EASIER! FYI.
Last edited by westcoaststyle; 11-15-2004 at 04:48 PM.
 03-16-2003, 03:15 PM
#2
Join Date: Dec 2002
Location: Lumberport, WV
Posts: 5,747
Likes: 0
Received 0 Likes
on
0 Posts
Huge Props, to westcoast on this one, he was the main person in all of this. You guys don't even know how much it changed the look of the car!! This is my second favorite mod so far, only outdone by the Koni Yellows, wrapped by Skunk2 coilovers. When I get the car cleaned, I will get some pics of it. Like he said, patience is greatly rewarded in this one. Thanks, mang!!
 03-16-2003, 04:01 PM
#6
Still here... sorta...
Thread Starter
Originally posted by swaggs21
Huge Props, to westcoast on this one, he was the main person in all of this. You guys don't even know how much it changed the look of the car!! This is my second favorite mod so far, only outdone by the Koni Yellows, wrapped by Skunk2 coilovers. When I get the car cleaned, I will get some pics of it. Like he said, patience is greatly rewarded in this one. Thanks, mang!!
Huge Props, to westcoast on this one, he was the main person in all of this. You guys don't even know how much it changed the look of the car!! This is my second favorite mod so far, only outdone by the Koni Yellows, wrapped by Skunk2 coilovers. When I get the car cleaned, I will get some pics of it. Like he said, patience is greatly rewarded in this one. Thanks, mang!!
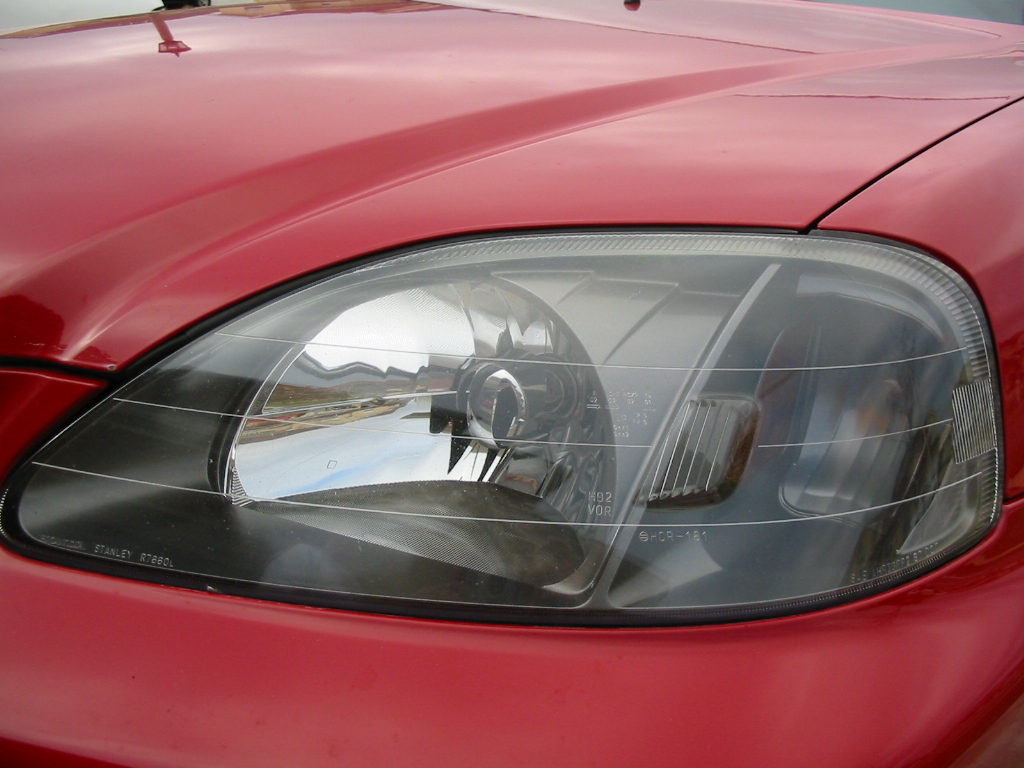
The smoked reflectors are my favorite part.
03-16-2003, 04:18 PM
#7
Join Date: Dec 2002
Location: Lumberport, WV
Posts: 5,747
Likes: 0
Received 0 Likes
on
0 Posts
You should see them at night! They are not bright like before, but they still give off alot of light. You can't really tell that they are orange either, they look much more subdued. And now the housings aren't all lit up, they look really mellow.....
03-18-2003, 07:24 PM
#9
Civic GSR Driver
Join Date: Mar 2002
Location: Frederick, MD
Posts: 256
Likes: 0
Received 0 Likes
on
0 Posts
what kinda paint did you use? Also, did you spray lighter around the turn signal area? It kinda looks like it but it could just be the picture playing tricks on me.
03-18-2003, 07:56 PM
#10
VTEC-Gen4Lude

Join Date: Jan 2003
Location: San Diego
Posts: 34
Likes: 0
Received 0 Likes
on
0 Posts
when I did my 4th gen prelude lights.
I placed the glass face of Headlight down on the oven rack
Thereby, avoiding the need for a cookie sheet and decreasing the risk of melting the plastic housing.
should apply to most HONDA products.
Great DIY post.:thumbup:
I placed the glass face of Headlight down on the oven rack
Thereby, avoiding the need for a cookie sheet and decreasing the risk of melting the plastic housing.
should apply to most HONDA products.
Great DIY post.:thumbup: